Biscoff Millionaires Shortbread: The Ultimate Indulgent Treat That Will Transform Your Dessert Game
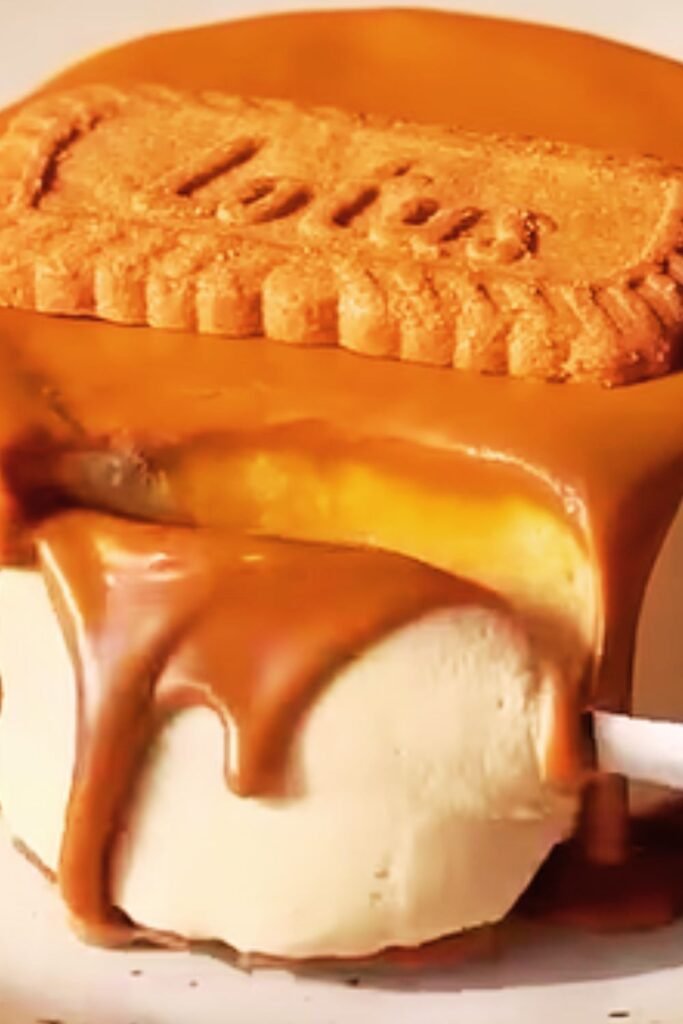
When I first discovered Biscoff spread, I knew my baking world would never be the same. That distinctive caramelized cookie flavor paired with the rich, buttery texture opened up endless possibilities in my kitchen. Today, I’m sharing one of my absolute favorite creations that combines the beloved millionaire’s shortbread with the irresistible taste of Biscoff cookies.
This Biscoff Millionaires Shortbread takes the classic three-layer treat to extraordinary heights. I’ve spent countless hours perfecting this recipe, experimenting with different ratios and techniques until I achieved what I consider the perfect balance of textures and flavors. The result is a dessert that’s become the star of every gathering I bring it to.
What Makes This Recipe Special
My version of Biscoff Millionaires Shortbread isn’t just a simple substitution recipe. I’ve carefully crafted each layer to complement the others, creating a harmonious blend that showcases the unique characteristics of Biscoff while maintaining the structural integrity that makes millionaire’s shortbread so appealing.
The beauty of this dessert lies in its sophisticated simplicity. While the combination of three distinct layers might seem intimidating, I’ve broken down the process into manageable steps that even novice bakers can master. The key is patience and attention to detail, which I’ll guide you through every step of the way.
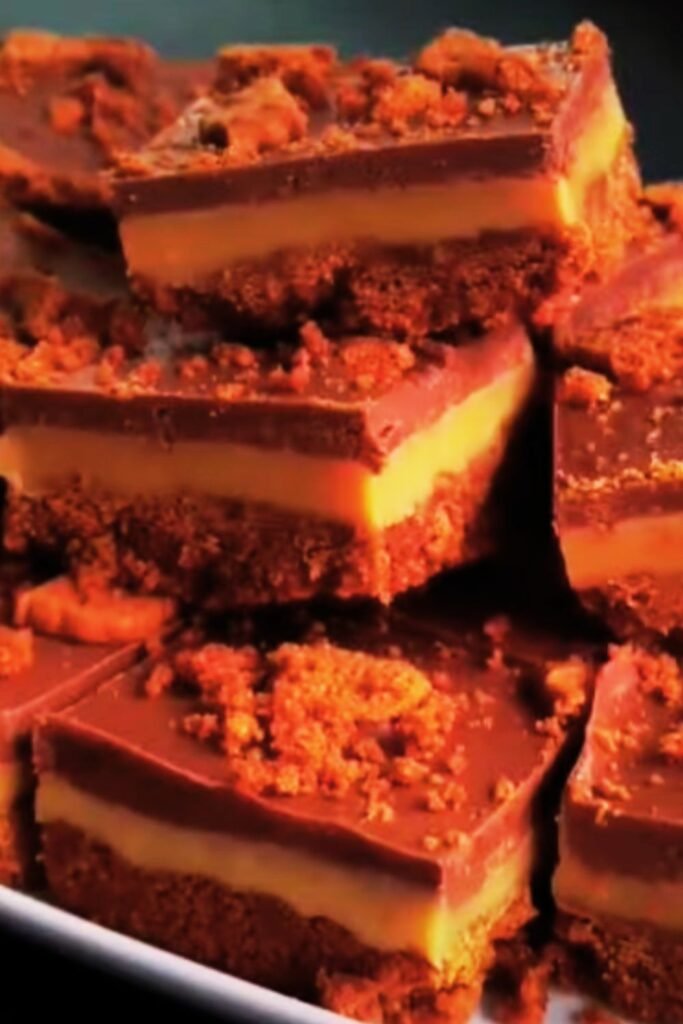
Understanding the Three Layers
The Shortbread Base
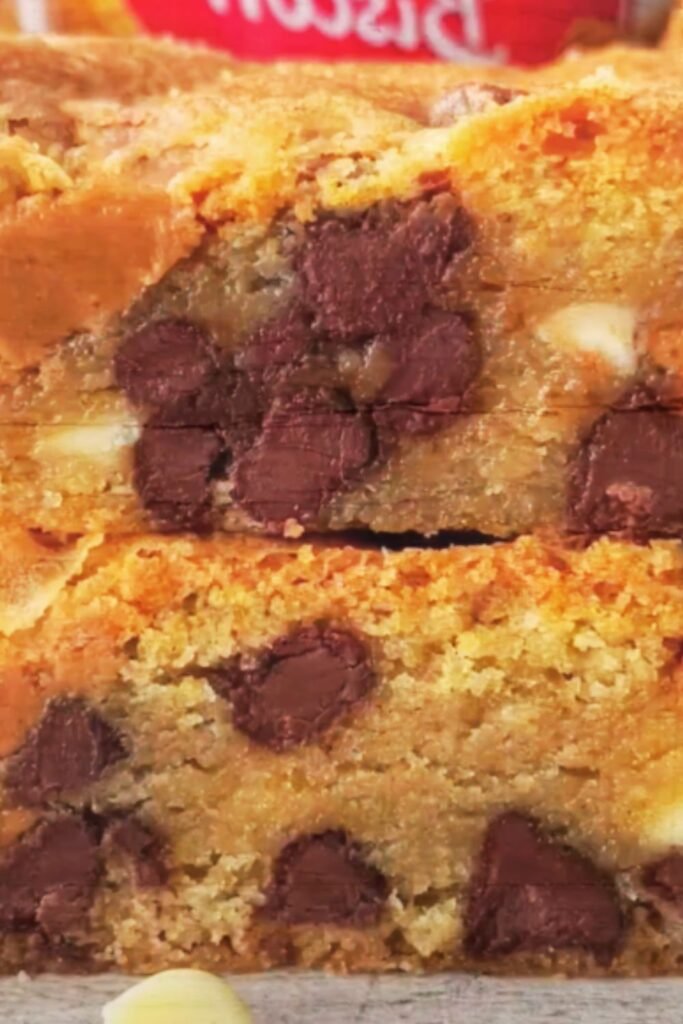
The foundation of our Biscoff Millionaires Shortbread starts with a buttery shortbread base that I’ve enhanced with crushed Biscoff cookies. This isn’t just for flavor – the cookie crumbs add a delightful texture that creates tiny pockets of concentrated Biscoff taste throughout the base.
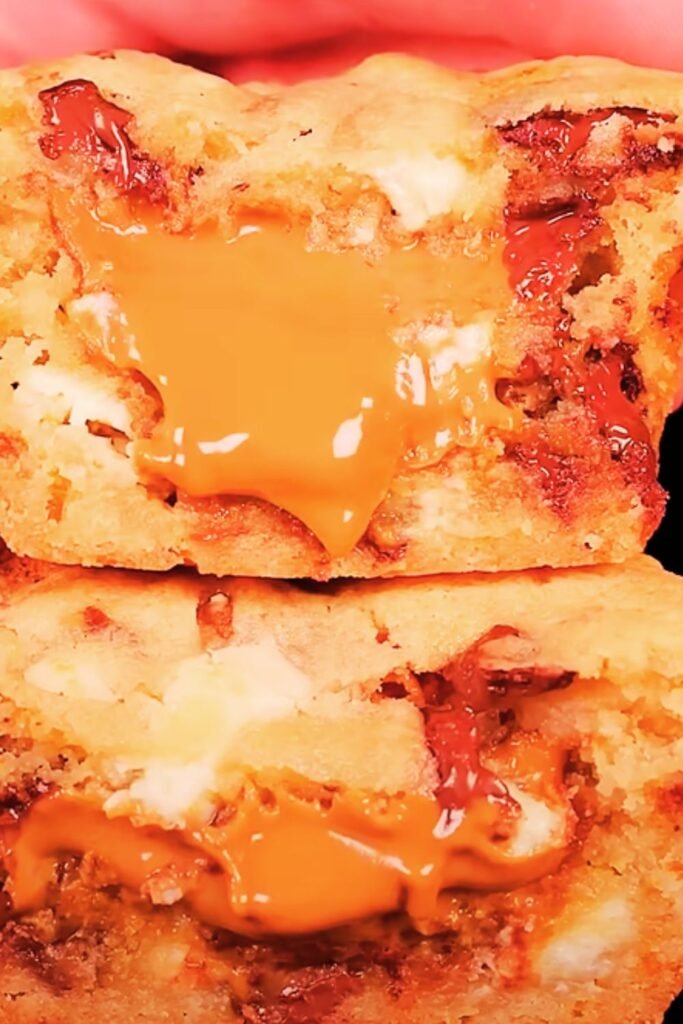
The Biscoff Caramel Layer
Here’s where my recipe truly shines. Instead of traditional caramel, I create a luscious Biscoff caramel that combines the classic sweetness of caramel with the distinctive spiced cookie flavor of Biscoff. This layer requires careful temperature control, but the results are absolutely worth the effort.
The Chocolate Topping
The final layer is a glossy chocolate ganache that I often enhance with a drizzle of melted Biscoff spread. This creates beautiful marbled patterns and adds an extra layer of flavor complexity that makes each bite a delightful surprise.
Essential Ingredients Breakdown
| Ingredient | Purpose | Quality Tips | Substitution Notes |
|---|---|---|---|
| Biscoff Cookies | Base texture and flavor | Use original, not chocolate variant | Graham crackers work but flavor differs |
| Biscoff Spread | Caramel enhancement | Smooth version preferred | Natural peanut butter as last resort |
| Butter | Shortbread richness | European-style high-fat content | Margarine reduces quality significantly |
| Heavy Cream | Caramel consistency | 35% fat minimum | Half-and-half makes thinner caramel |
| Dark Chocolate | Top layer complexity | 60-70% cocoa content | Milk chocolate works but less sophisticated |
| Golden Syrup | Caramel texture | Lyle’s brand preferred | Corn syrup acceptable alternative |
| Vanilla Extract | Flavor enhancement | Pure extract only | Vanilla paste adds visual appeal |
| Sea Salt | Flavor balance | Flaky finishing salt | Table salt works but use less |
Step-by-Step Recipe Instructions
Preparing the Shortbread Base
I always start with the base because it needs time to cool completely before adding the caramel layer. Here’s my tried-and-tested method:
First, I preheat my oven to 325°F (160°C) and line an 8×8 inch pan with parchment paper, leaving overhang for easy removal. This preparation step is crucial – don’t skip the parchment paper or you’ll struggle to remove the finished bars cleanly.
For the shortbread mixture, I combine 1½ cups of all-purpose flour with ½ cup of powdered sugar and a pinch of salt in a large bowl. I then add ½ cup of cold, cubed butter and work it into the flour mixture using my fingertips until it resembles coarse breadcrumbs. The key here is not to overwork the mixture – I want to maintain that tender, crumbly texture that makes shortbread so special.
Next, I crush about 8-10 Biscoff cookies into small pieces (not powder, but chunks) and fold them into the mixture. I press this mixture firmly into my prepared pan, making sure the surface is level and compact. A flat-bottomed measuring cup works perfectly for this step.
I bake the base for 20-25 minutes until it’s lightly golden around the edges. The center should still look slightly underbaked – it will continue cooking with residual heat. I let it cool completely in the pan while I prepare the caramel layer.
Creating the Perfect Biscoff Caramel
This is where my recipe truly sets itself apart from others. My Biscoff caramel combines traditional caramel-making techniques with the unique flavor profile of Biscoff spread.
I start by placing ½ cup of caster sugar in a heavy-bottomed saucepan over medium heat. I don’t stir the sugar at this stage – instead, I swirl the pan occasionally to ensure even melting. The sugar will clump at first, but patience is key. It will eventually melt into a smooth, amber-colored caramel.
Once my caramel reaches a deep amber color (this usually takes 8-10 minutes), I quickly whisk in 3 tablespoons of butter, one piece at a time. The mixture will bubble vigorously, which is normal. I then slowly pour in ¼ cup of heavy cream while whisking continuously. The caramel will seize up initially, but continued whisking over low heat will smooth it out.
Here’s my secret ingredient: I whisk in 3 tablespoons of smooth Biscoff spread while the caramel is still hot. This creates an incredibly smooth, flavorful caramel that tastes like liquid Biscoff cookies. I add a pinch of sea salt and a teaspoon of vanilla extract to enhance the overall flavor profile.
I pour this caramel over my cooled shortbread base and refrigerate for at least 2 hours until it’s completely set. The caramel should be firm to the touch but not rock-hard.
Mastering the Chocolate Layer
The final layer requires a bit of finesse to achieve that perfect glossy finish. I use a simple ganache technique that creates a smooth, professional-looking top.
I chop 4 ounces of good-quality dark chocolate (I prefer 60-70% cocoa content) and place it in a heatproof bowl. I heat ½ cup of heavy cream until it just begins to simmer, then pour it over the chocolate. I let it sit for 2 minutes without stirring, then whisk from the center outward until I have a smooth, glossy ganache.
For an extra touch of Biscoff flavor, I warm 2 tablespoons of Biscoff spread in the microwave for 20-30 seconds until it’s pourable. I drizzle this over the chocolate ganache and use a toothpick to create beautiful swirl patterns.
Temperature and Timing Guide
| Layer | Temperature | Timing | Key Indicators |
|---|---|---|---|
| Shortbread Base | 325°F (160°C) | 20-25 minutes | Lightly golden edges |
| Caramel Cooking | Medium heat | 8-10 minutes | Deep amber color |
| Caramel Setting | Refrigerated | 2+ hours | Firm to touch |
| Chocolate Ganache | Room temp | 5 minutes | Smooth, glossy |
| Final Setting | Refrigerated | 4+ hours | Clean cut possible |
Troubleshooting Common Issues
Through my years of making this recipe, I’ve encountered and solved numerous challenges that home bakers face. Here are the most common issues and my solutions:
Grainy Caramel: This usually happens when the sugar crystallizes during melting. I prevent this by ensuring my pan is completely clean and avoiding stirring until the sugar is fully melted. If crystallization occurs, I add a tablespoon of water and continue cooking until smooth.
Soft Caramel Layer: Under-cooked caramel won’t set properly. The key is reaching the right temperature – I look for a deep amber color and test by dropping a small amount into cold water. It should form a soft ball that holds its shape.
Chocolate Bloom: White spots on the chocolate layer indicate temperature shock. I always let my ganache cool slightly before pouring and ensure the caramel layer is completely chilled.
Crumbly Shortbread: This indicates too much flour or not enough butter. I measure my flour by spooning it into the cup and leveling off – never pack it down.
Storage and Serving Recommendations
Proper storage is crucial for maintaining the perfect texture of each layer. I store my finished Biscoff Millionaires Shortbread in an airtight container in the refrigerator for up to one week. The layers actually improve after a day or two as the flavors meld together.
For serving, I remove the bars from the refrigerator about 15 minutes before cutting. This slight softening makes cutting much easier and prevents the chocolate from cracking. I use a sharp knife warmed in hot water and wiped clean between cuts for the cleanest edges.
Each bar is quite rich, so I cut them into small squares – typically 16 pieces from an 8×8 pan. They’re perfect for afternoon tea, dinner party desserts, or special occasion treats.
Nutritional Information and Serving Size
| Nutrient | Per Serving (1 square) | % Daily Value |
|---|---|---|
| Calories | 285 | 14% |
| Total Fat | 18g | 23% |
| Saturated Fat | 11g | 55% |
| Cholesterol | 45mg | 15% |
| Sodium | 125mg | 5% |
| Total Carbohydrates | 32g | 12% |
| Dietary Fiber | 2g | 7% |
| Sugars | 26g | – |
| Protein | 3g | 6% |
Based on 16 servings per recipe
Creative Variations and Flavor Enhancements
My basic recipe is delicious on its own, but I love experimenting with variations that showcase different flavor profiles while maintaining the Biscoff theme.
Salted Caramel Version: I increase the sea salt in the caramel layer and sprinkle flaky sea salt on top of the chocolate layer. This creates a sophisticated sweet-salty balance that’s absolutely irresistible.
White Chocolate Drizzle: Instead of swirling Biscoff spread into the chocolate layer, I drizzle melted white chocolate over the dark chocolate ganache. The contrast is visually stunning and adds a creamy sweetness.
Espresso Enhancement: I add a teaspoon of instant espresso powder to the chocolate ganache. The coffee flavor complements the spiced cookie notes of the Biscoff beautifully.
Nutty Texture: I sprinkle chopped toasted hazelnuts or almonds over the caramel layer before adding the chocolate. This adds a delightful crunch and nutty flavor that pairs wonderfully with Biscoff.
Advanced Techniques for Perfect Results
After making this recipe countless times, I’ve developed several advanced techniques that ensure consistent, professional results every time.
Temperature Control: I use a candy thermometer when making caramel to ensure accuracy. The ideal temperature for my Biscoff caramel is 240°F (115°C) – this creates the perfect consistency that sets firmly but remains chewy.
Layering Technique: I’ve learned that slightly warming the caramel layer (just until it’s barely warm to the touch) before adding the chocolate creates better adhesion between layers and prevents the chocolate from seizing.
Cutting Method: I score the chocolate layer lightly with a knife while it’s still slightly soft, then complete the cuts once everything is fully set. This prevents the chocolate from cracking and creates clean, professional-looking edges.
Seasonal Adaptations and Holiday Variations
Throughout the year, I adapt this recipe to reflect seasonal flavors and holiday themes. These variations have become family traditions that I look forward to making each year.
Winter Spice Version: During the holiday season, I add a pinch of cinnamon and nutmeg to the shortbread base and sprinkle the finished bars with a light dusting of powdered sugar to mimic snow.
Summer Berry Twist: I sometimes add a thin layer of raspberry jam between the shortbread and caramel layers. The tartness of the berries balances the rich sweetness beautifully.
Autumn Pumpkin Spice: I replace some of the Biscoff spread in the caramel with pumpkin butter and add a touch of pumpkin pie spice. This creates a seasonal treat that’s perfect for fall gatherings.
The Science Behind Perfect Millionaire’s Shortbread
Understanding the science behind each layer helps me achieve consistent results and troubleshoot when things go wrong. The shortbread base relies on the careful balance of fat and flour to create that characteristic crumbly texture. Too much flour creates a dry, crumbly base, while too much butter makes it greasy and difficult to handle.
The caramel layer is all about temperature and timing. Sugar undergoes complex chemical changes as it heats, progressing from crystalline to liquid to caramelized. The addition of cream and butter creates an emulsion that gives the caramel its smooth, creamy texture.
The chocolate ganache is an emulsion of chocolate and cream that creates a smooth, glossy finish when properly executed. The key is maintaining the right temperature ratio – hot cream melts the chocolate without overheating it, which would cause it to seize.
Questions and Answers
Q: Can I make this recipe ahead of time for a party? I absolutely recommend making this recipe 1-2 days ahead of serving. The flavors actually improve as they meld together, and the texture becomes perfect for clean cutting. I store the finished bars covered in the refrigerator and remove them about 15 minutes before serving to soften slightly.
Q: What’s the best way to cut clean squares without the layers separating? The key is using a sharp knife warmed in hot water and wiped clean between each cut. I also make sure the bars are chilled but not frozen-hard. If the chocolate layer cracks, it’s usually too cold – let it sit at room temperature for a few more minutes.
Q: Can I use crunchy Biscoff spread instead of smooth? While you can use crunchy Biscoff spread, I prefer smooth for the caramel layer as it creates a more uniform texture. If you want extra crunch, I recommend using smooth spread in the caramel and adding crushed Biscoff cookies to the shortbread base or sprinkling them on top of the chocolate layer.
Q: My caramel turned out too hard. What went wrong? Hard caramel usually means it was cooked too long or at too high a temperature. The sugar should reach a deep amber color but not become dark brown. If your caramel is too hard, you can try gently reheating it with a tablespoon of cream to soften it slightly.
Q: How do I prevent the chocolate layer from developing white spots? White spots (chocolate bloom) occur when chocolate is exposed to temperature changes or moisture. Make sure your caramel layer is completely cool and dry before adding the ganache, and store the finished bars in a consistent temperature environment.
Q: Can I freeze these bars for longer storage? Yes, these bars freeze beautifully for up to 3 months. I wrap them individually in plastic wrap and store them in an airtight container. I thaw them in the refrigerator overnight before serving – they taste just as good as fresh!
Q: What’s the secret to getting the caramel layer perfectly smooth? The key is adding the cream slowly while whisking constantly, and making sure your caramel isn’t too hot when you add the Biscoff spread. If the mixture seizes up, keep whisking over low heat until it smooths out. Patience is crucial here.
Q: Can I make a larger batch in a 9×13 pan? Absolutely! I double the recipe for a 9×13 pan, but I increase the baking time for the shortbread base to 25-30 minutes. The layers will be slightly thinner, but the flavor and texture remain perfect.
This Biscoff Millionaires Shortbread has become one of my signature desserts, and I’m confident it will become a favorite in your kitchen too. The combination of buttery shortbread, rich Biscoff caramel, and smooth chocolate creates a treat that’s impossible to resist. Take your time with each layer, trust the process, and you’ll be rewarded with a dessert that rivals anything from a high-end bakery.
Leave a Reply