The Ultimate Hibachi Dinner Recipe: Bringing Japanese Steakhouse Magic to Your Home Kitchen

When I first experienced the theatrical flair of a hibachi restaurant, I was mesmerized by the sizzling sounds, aromatic flavors, and entertaining chef performance. The combination of perfectly seasoned proteins, crisp vegetables, and that unforgettable fried rice left me craving more. After years of experimenting in my own kitchen, I’ve mastered the art of recreating that authentic hibachi experience at home, and I’m excited to share these secrets with you.
Creating a hibachi dinner isn’t just about cooking—it’s about crafting an experience that brings family and friends together around bold flavors and interactive cooking. Whether you’re planning a special date night, celebrating with loved ones, or simply wanting to elevate your weeknight dinner routine, this comprehensive guide will transform your kitchen into your very own Japanese steakhouse.
Understanding Hibachi Cooking: More Than Just a Meal
Hibachi refers to a traditional Japanese heating device, but in Western culture, it’s evolved to describe the style of cooking performed on flat iron griddles at Japanese steakhouses. The key elements that define authentic hibachi cooking include high-heat searing, minimal seasoning that enhances natural flavors, and the interactive presentation that makes dining an entertainment experience.
Teppanyaki is the actual cooking style most people associate with hibachi restaurants, where food is prepared on an iron hotplate. Understanding this distinction helps you appreciate the technique behind the spectacle.
Mise en place becomes crucial in hibachi cooking since everything happens quickly once you start. Having all ingredients prepped, measured, and within reach ensures smooth execution.
Essential Equipment for Home Hibachi Success
Creating restaurant-quality hibachi at home requires the right tools. While you don’t need a professional teppanyaki grill, certain equipment will significantly improve your results.
Primary Cooking Surfaces
| Equipment Type | Best Options | Why It Works | Price Range |
|---|---|---|---|
| Cast Iron Griddle | Lodge or Blackstone | Even heat distribution, retains temperature | $30-80 |
| Large Skillet | 12-14 inch stainless steel | High sides contain splatter | $40-120 |
| Electric Griddle | Presto or Black+Decker | Consistent temperature control | $50-150 |
| Outdoor Flat Top | Blackstone or Camp Chef | Authentic experience, high BTU | $200-500 |
Essential Tools and Accessories
My hibachi cooking arsenal includes several specialized tools that make the process smoother and more authentic. Two wide spatulas are absolutely essential—I use them for flipping, chopping, and the signature hibachi techniques. A squeeze bottle for oils and sauces allows for precise application and those dramatic flame effects. Small prep bowls keep seasonings organized and within easy reach.
Temperature control becomes critical since hibachi cooking relies on high heat. I keep a infrared thermometer handy to ensure my cooking surface reaches optimal temperatures. For proteins, an instant-read thermometer guarantees perfect doneness every time.
The Foundation: Perfect Hibachi Fried Rice
Hibachi fried rice serves as the cornerstone of any authentic hibachi dinner. The secret lies in using day-old rice, which has the perfect texture and moisture content for achieving that characteristic separate-grain consistency.
Ingredients for Hibachi Fried Rice (Serves 4-6)
Rice Base:
- 4 cups cooked white rice (preferably day-old)
- 3 large eggs, beaten
- 3 tablespoons vegetable oil
- 2 tablespoons butter
Vegetables:
- 1 medium onion, diced
- 2 carrots, finely diced
- 1 cup frozen peas
- 3 green onions, chopped
Seasonings:
- 3 tablespoons soy sauce
- 1 tablespoon sesame oil
- 1 teaspoon garlic powder
- 1/2 teaspoon white pepper
- Salt to taste
Step-by-Step Hibachi Fried Rice Method
I start by heating my griddle or large skillet over high heat until it’s smoking hot. This intense heat is crucial for achieving that signature hibachi flavor and texture. First, I scramble the eggs quickly, breaking them into small pieces as they cook, then remove them and set aside.
Next comes the rice preparation. I add oil to the hot surface and immediately add the cold rice, spreading it evenly. The key technique here is to press the rice down with my spatulas, allowing it to get crispy on the bottom before stirring. This creates those delicious crispy bits that elevate the dish.
The vegetables go in next—onions first since they need the most cooking time, followed by carrots. I keep everything moving constantly, using the classic hibachi chopping and flipping motions. The peas go in last since they only need to be heated through.
Seasoning happens gradually. I create a well in the center of the rice and add the soy sauce, letting it sizzle before incorporating it throughout. The sesame oil goes on at the very end to preserve its delicate flavor.
Hibachi Protein Perfection: Steak, Chicken, and Shrimp
The proteins are where hibachi cooking truly shines. Each requires slightly different techniques, but all benefit from high heat and minimal handling.
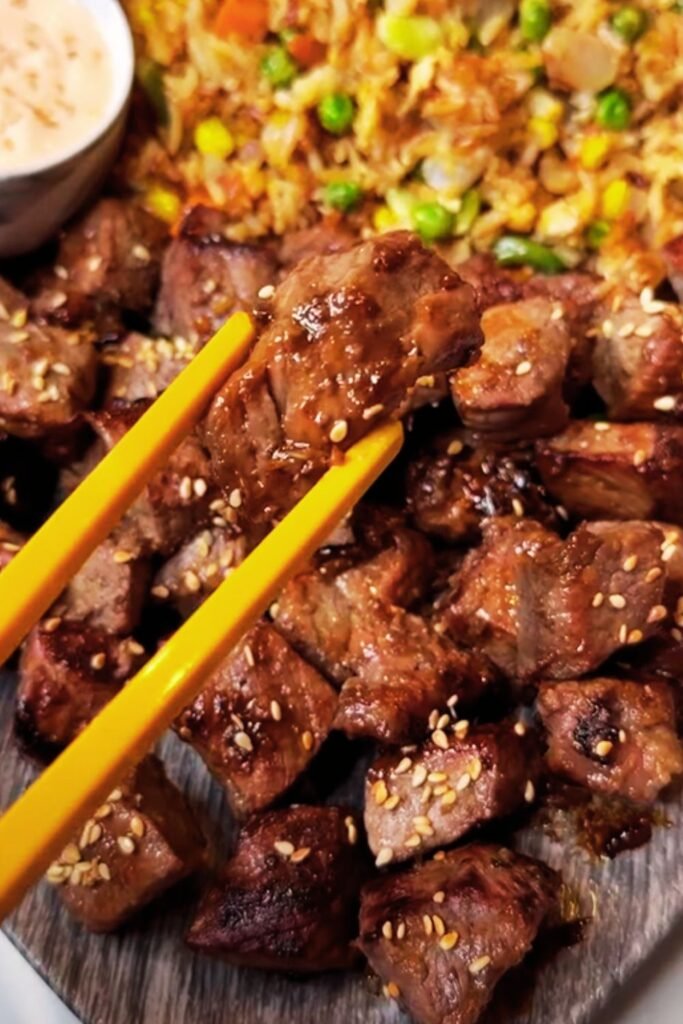
Hibachi Steak Preparation
| Cut | Thickness | Cooking Time | Internal Temp |
|---|---|---|---|
| Filet Mignon | 1.5 inches | 3-4 min per side | 130°F (medium-rare) |
| New York Strip | 1 inch | 2-3 min per side | 135°F (medium-rare) |
| Ribeye | 1.25 inches | 3-4 min per side | 140°F (medium) |
| Sirloin | 1 inch | 2-3 min per side | 135°F (medium-rare) |
For steak, I season simply with salt, pepper, and garlic powder about 30 minutes before cooking. The key is getting an incredible sear on the outside while maintaining a perfectly pink center. I achieve this by cooking on screaming hot metal and only flipping once.
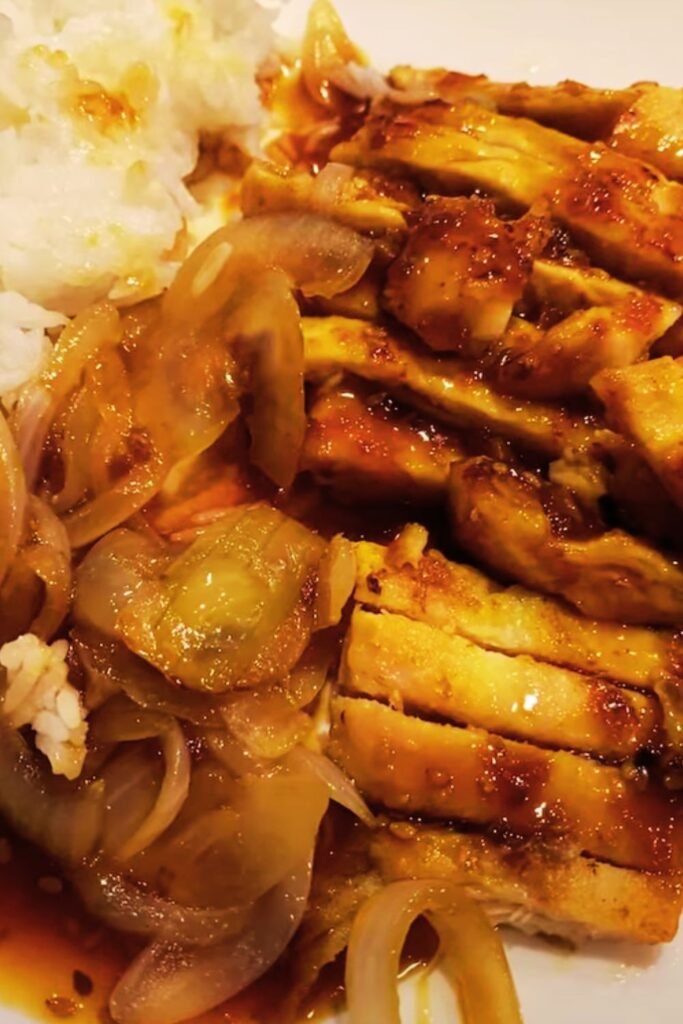
Hibachi Chicken Technique
Chicken breast works best when butterflied to ensure even cooking. I pound it to uniform thickness, season with salt, pepper, and a touch of garlic powder. The cooking process involves searing one side completely before flipping, which prevents the meat from sticking and ensures beautiful grill marks.
Hibachi Shrimp Mastery
Shrimp cook incredibly fast on the hibachi griddle—usually just 1-2 minutes per side. I use large shrimp (16-20 count) and season them with salt, pepper, and a hint of garlic. The moment they turn pink and curl, they’re done. Overcooking results in rubbery texture that no amount of sauce can save.
Signature Hibachi Sauces and Seasonings
The magic of hibachi dining extends beyond the cooking technique to the incredible sauces that accompany each dish. I’ve perfected several signature sauces that capture the authentic flavors of Japanese steakhouses.
Classic Yum Yum Sauce
This creamy, tangy sauce is what most people crave when they think of hibachi dining.
Ingredients:
- 1 cup mayonnaise
- 2 tablespoons tomato paste
- 1 tablespoon rice vinegar
- 1 teaspoon garlic powder
- 1 teaspoon onion powder
- 1/2 teaspoon paprika
- 1/4 teaspoon cayenne pepper
- 1 tablespoon sugar
I whisk all ingredients together and let the sauce chill for at least 30 minutes before serving. The flavors meld beautifully, creating that distinctive sweet-tangy profile that complements both proteins and vegetables.
Ginger Sauce
This lighter alternative provides a fresh, zesty kick that pairs wonderfully with seafood and vegetables.
Ingredients:
- 1/4 cup fresh ginger, minced
- 1/4 cup soy sauce
- 2 tablespoons rice vinegar
- 1 tablespoon mirin
- 1 teaspoon sesame oil
- 1 green onion, finely chopped
Hibachi Mustard Sauce
The sharp, horseradish-like bite of this sauce creates an excellent contrast to rich proteins.
Ingredients:
- 1/4 cup dry mustard powder
- 2 tablespoons hot water
- 2 tablespoons soy sauce
- 1 tablespoon rice vinegar
- 1 teaspoon sugar
Vegetable Sides That Steal the Show
Hibachi vegetables are far from afterthoughts—they’re integral components that provide color, nutrition, and complementary flavors to the meal.
Classic Hibachi Vegetables
Zucchini and Yellow Squash: I slice these into half-moons about 1/4 inch thick. They cook quickly and provide a mild flavor that absorbs the hibachi seasonings beautifully. The key is not overcooking them—they should retain a slight bite.
Mushrooms: Button or cremini mushrooms work best, sliced thick so they don’t disappear on the griddle. I season them with salt, pepper, and a touch of soy sauce as they cook.
Onions: Yellow onions, cut into thick rings or chunks, become sweet and caramelized on the hot griddle. They’re often the first vegetables I start since they take the longest to develop proper color and flavor.
Vegetable Cooking Sequence and Timing
| Vegetable | Prep Method | Cooking Time | Key Tips |
|---|---|---|---|
| Onions | Thick rings | 8-10 minutes | Start first, allow caramelization |
| Mushrooms | 1/4 inch slices | 5-6 minutes | Don’t crowd the pan |
| Zucchini | Half-moon cuts | 3-4 minutes | High heat, quick cooking |
| Bell Peppers | Strip cuts | 4-5 minutes | Maintain slight crunch |
| Broccoli | Small florets | 4-5 minutes | Steam briefly first |
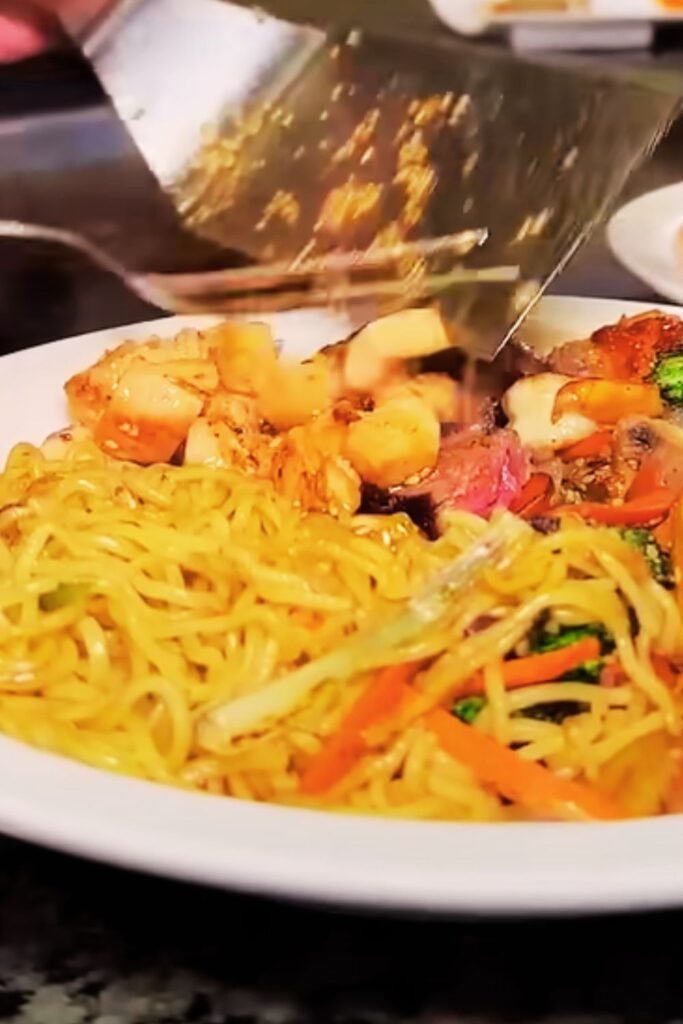
Creating the Complete Hibachi Experience
The beauty of hibachi dining lies in its interactive nature and the way all components come together harmoniously. When I prepare a hibachi dinner at home, I focus on timing and presentation to recreate that restaurant magic.
Timing Your Hibachi Dinner
Successful hibachi cooking is all about orchestration. I start with the fried rice since it can hold its heat while I prepare the proteins. The vegetables go on next, followed by the proteins, which need to be served immediately for optimal taste and texture.
Here’s my preferred cooking sequence:
- Prepare and cook fried rice (can be kept warm)
- Start longer-cooking vegetables (onions, mushrooms)
- Add remaining vegetables
- Cook proteins (steak, chicken, shrimp)
- Plate everything together while hot
Plating and Presentation
I serve hibachi dinners on warmed plates to maintain temperature. Each plate gets a portion of fried rice, a selection of vegetables, and the chosen protein. I arrange everything so the colors complement each other—the golden rice, vibrant vegetables, and perfectly seared proteins create a visually stunning presentation.
Small bowls of the various sauces accompany each plate, allowing diners to customize their flavor experience. I typically provide yum yum sauce, ginger sauce, and hibachi mustard sauce, along with extra soy sauce and hot sauce for those who want additional heat.
Advanced Hibachi Techniques and Tips
After years of perfecting my hibachi skills, I’ve discovered several techniques that elevate the cooking experience and improve results significantly.
Temperature Management
Maintaining proper heat levels is crucial for authentic hibachi cooking. I preheat my cooking surface for at least 10 minutes before adding any ingredients. For proteins, I want the surface hot enough that water droplets dance and evaporate immediately. For vegetables, I sometimes reduce the heat slightly to prevent burning while ensuring proper cooking.
Oil and Fat Usage
The choice of cooking fats impacts both flavor and cooking performance. I use vegetable oil for its high smoke point and neutral flavor, but I add butter at strategic moments for richness and flavor development. The technique of adding cold butter to hot oil creates that signature sizzle and helps develop beautiful browning.
Seasoning Strategies
Unlike Western cooking, hibachi seasoning happens throughout the cooking process rather than just at the beginning. I season proteins before cooking, add salt to vegetables as they cook, and finish everything with a light touch of soy sauce and sesame oil.
Nutritional Benefits and Dietary Adaptations
Hibachi cooking offers numerous nutritional advantages, particularly when prepared at home where you control the ingredients and cooking methods.
Nutritional Profile of Hibachi Meals
| Component | Calories (per serving) | Protein | Carbs | Fat | Key Nutrients |
|---|---|---|---|---|---|
| Hibachi Fried Rice | 320 | 8g | 45g | 12g | B vitamins, Iron |
| Grilled Chicken (6oz) | 280 | 52g | 0g | 6g | Complete protein |
| Hibachi Vegetables | 80 | 3g | 12g | 3g | Vitamins A, C, Fiber |
| Yum Yum Sauce (2 tbsp) | 120 | 0g | 2g | 13g | Minimal nutrients |
Dietary Modifications
The beauty of hibachi cooking lies in its adaptability to various dietary needs. For those following low-carb diets, I substitute cauliflower rice for traditional rice, achieving similar textures and flavors. The high-heat cooking method works perfectly with cauliflower, creating those desired crispy bits.
Vegetarian and vegan adaptations work wonderfully with hibachi techniques. Firm tofu, tempeh, or even thick-cut vegetables like portobello mushrooms provide satisfying protein alternatives. I use the same seasoning and cooking methods, adjusting timing based on the specific ingredients.
For gluten-free diners, I substitute tamari for soy sauce and ensure all other seasonings are certified gluten-free. The cooking techniques remain unchanged, making this an easy adaptation.
Troubleshooting Common Hibachi Cooking Challenges
Even experienced home cooks encounter challenges when attempting hibachi cooking. I’ve identified the most common issues and developed reliable solutions.
Problem: Mushy Fried Rice
This usually results from using freshly cooked rice or insufficient heat. Day-old rice that’s been refrigerated develops the proper texture for frying. If you must use fresh rice, spread it on a sheet pan and let it cool completely before using.
Problem: Proteins Sticking to the Cooking Surface
Inadequate preheating or insufficient oil causes sticking. I ensure my cooking surface is properly seasoned (for cast iron) or well-oiled (for stainless steel) before adding proteins. The surface should be hot enough that the protein sears immediately upon contact.
Problem: Vegetables Becoming Mushy
Overcrowding the cooking surface or excessive cooking time leads to mushy vegetables. I cook vegetables in batches if necessary and remove them from heat while they still retain some bite.
Problem: Uneven Cooking
This typically occurs when ingredients are cut to different sizes or the cooking surface has hot spots. Consistent sizing and learning your equipment’s heating patterns solve this issue.
Seasonal Variations and Creative Adaptations
One aspect I love about hibachi cooking is its adaptability to seasonal ingredients and personal preferences. Throughout the year, I modify my hibachi dinners to incorporate the best available produce and accommodate changing tastes.
Spring Hibachi Variations
Spring brings tender asparagus, fresh peas, and early summer squash. I incorporate these into my vegetable medleys, adjusting cooking times for their delicate textures. Fresh herbs like cilantro and green onions add bright flavors that complement the season’s lighter eating preferences.
Summer Hibachi Adaptations
Summer’s abundance of zucchini, yellow squash, and bell peppers creates colorful, flavorful vegetable combinations. I sometimes add fresh corn kernels to the fried rice for sweetness and texture. The outdoor grilling season also allows me to use actual hibachi grills or flat-top griddles for authentic experiences.
Fall and Winter Modifications
Cooler months call for heartier vegetables like butternut squash, Brussels sprouts, and root vegetables. These require longer cooking times but develop incredible caramelized flavors on the hot griddle. I sometimes add warming spices like ginger and garlic to complement the season’s comfort food cravings.
Storage, Reheating, and Meal Prep Strategies
Hibachi components store and reheat differently, requiring specific strategies to maintain quality and safety.
Proper Storage Methods
| Component | Storage Method | Refrigerator Life | Freezer Life | Reheating Instructions |
|---|---|---|---|---|
| Fried Rice | Airtight container | 3-4 days | 1 month | Skillet over medium heat |
| Cooked Proteins | Wrapped tightly | 3-4 days | 2-3 months | Gentle reheating, add moisture |
| Cooked Vegetables | Airtight container | 2-3 days | Not recommended | Quick sauté |
| Sauces | Sealed containers | 1 week | 3 months | Room temperature |
Meal Prep Advantages
Hibachi components work excellently for meal preparation. I often prepare large batches of fried rice and portion them for the week. Proteins can be pre-seasoned and stored, ready for quick cooking. The sauces improve with time as flavors meld, making them perfect make-ahead components.
When meal prepping, I partially cook vegetables so they only need quick reheating. This preserves their texture and nutritional value while saving significant time during busy weeknight preparations.
Q&A Section
Q: Can I make hibachi without a large griddle or flat-top grill? Absolutely! I’ve successfully made hibachi dinners using large skillets, cast iron pans, and even electric griddles. The key is having enough cooking surface area and maintaining high heat. You might need to cook in batches, but the results are equally delicious.
Q: What’s the secret to getting that signature hibachi flavor? The combination of high heat, minimal seasonings, and proper technique creates authentic hibachi flavor. Using day-old rice, maintaining screaming hot cooking surfaces, and seasoning throughout the cooking process rather than just at the end makes all the difference.
Q: How far in advance can I prepare hibachi components? Rice can be cooked and refrigerated up to two days ahead—it actually improves the final texture. Sauces benefit from being made hours or even a day ahead. Proteins should be seasoned no more than a few hours before cooking, and vegetables are best prepared fresh.
Q: Why does my fried rice turn out clumpy instead of with separate grains? Clumpy fried rice usually results from using freshly cooked rice or insufficient heat. Day-old, refrigerated rice has the proper moisture content and texture. Additionally, pressing the rice against the hot surface and allowing it to crisp before stirring helps separate the grains.
Q: Can I use brown rice instead of white rice for fried rice? Yes, but the texture and cooking time will be different. Brown rice has a chewier texture and takes longer to achieve the desired crispiness. I recommend using day-old brown rice and allowing extra cooking time for proper texture development.
Q: What’s the best way to achieve those dramatic flames I see at restaurants? While entertaining, the flames are primarily for show and don’t significantly impact flavor. They’re created by adding alcohol or oil to extremely hot surfaces. For safety reasons, I focus on achieving great flavors through proper technique rather than attempting flame effects at home.
Q: How do I prevent my steak from overcooking on the high heat? Proper thickness and timing are crucial. I use steaks at least 1 inch thick and only flip them once. An instant-read thermometer helps ensure perfect doneness. Remember that carryover cooking continues after removing from heat, so I remove steaks about 5 degrees before the target temperature.
Q: Can I prepare hibachi for large groups? Definitely! I scale up recipes proportionally and cook in batches when necessary. Having all ingredients prepped and organized becomes even more critical with larger quantities. Consider recruiting helpers for the prep work to make the cooking process smoother.
Q: What vegetables work best for hibachi cooking? Vegetables that hold their shape and cook quickly work best. My favorites include zucchini, yellow squash, onions, mushrooms, bell peppers, and broccoli. I avoid delicate vegetables like leafy greens or tomatoes that break down quickly under high heat.
Q: How can I make my hibachi dinner healthier? Use less oil during cooking, substitute cauliflower rice for traditional fried rice, load up on vegetables, and choose lean proteins like chicken breast or shrimp. The sauces contain the most calories, so use them sparingly or create lighter versions using Greek yogurt bases.
This comprehensive guide provides everything needed to create authentic, delicious hibachi dinners at home. The combination of proper techniques, quality ingredients, and attention to timing transforms ordinary ingredients into extraordinary dining experiences that rival the best Japanese steakhouses.
Leave a Reply