Easy Tamarind Sauce Recipe: Your Gateway to Bold, Tangy Flavors
I’ve been experimenting with different sauces for years, and I can confidently say that tamarind sauce holds a special place in my kitchen. This incredibly versatile condiment brings together sweet, sour, and umami flavors in perfect harmony. Whether you’re looking to elevate your stir-fries, add depth to your marinades, or create an authentic dipping sauce, this easy tamarind sauce recipe will become your go-to flavor enhancer.
The beauty of homemade tamarind sauce lies in its simplicity and the incredible depth of flavor it delivers. Unlike store-bought versions that often contain preservatives and artificial flavors, my recipe uses fresh, wholesome ingredients that you can pronounce and trust. I’ve refined this recipe through countless kitchen experiments, and I’m excited to share the secrets that make this sauce absolutely irresistible.
Understanding Tamarind: The Star Ingredient
Tamarind paste: The concentrated pulp extracted from tamarind pods, providing the characteristic tangy-sweet flavor profile that forms the foundation of this sauce.
Tamarind pods: The brown, curved seed pods of the tamarind tree, containing sticky pulp around seeds that creates the distinctive taste when processed.
Umami depth: The savory, complex flavor dimension that tamarind naturally provides, enhancing other ingredients and creating a more satisfying taste experience.
Tamarind has been treasured in cuisines across Asia, Africa, and Latin America for centuries. I love how this single ingredient can transform ordinary dishes into extraordinary culinary experiences. The natural tartness combined with subtle sweetness creates a flavor profile that’s both familiar and exotic.
Essential Ingredients and Their Roles
Creating the perfect tamarind sauce requires understanding how each ingredient contributes to the final flavor profile. I’ve tested numerous combinations, and this blend delivers consistent, restaurant-quality results every time.
| Ingredient | Quantity | Purpose | Substitution Options |
|---|---|---|---|
| Tamarind paste | 3 tablespoons | Primary flavor base, provides tang and complexity | Tamarind concentrate (use 2 tbsp) |
| Brown sugar | 2 tablespoons | Balances acidity, adds caramel notes | Palm sugar, coconut sugar, or white sugar |
| Soy sauce | 1 tablespoon | Adds umami depth and saltiness | Tamari or coconut aminos |
| Rice vinegar | 1 tablespoon | Enhances acidity, brightens flavors | Apple cider vinegar or white vinegar |
| Garlic | 2 cloves, minced | Provides aromatic foundation | Garlic powder (1/2 tsp) |
| Fresh ginger | 1 teaspoon, grated | Adds warmth and complexity | Ground ginger (1/4 tsp) |
| Red pepper flakes | 1/4 teaspoon | Introduces heat and color | Cayenne pepper or fresh chilies |
| Water | 1/4 cup | Adjusts consistency | Vegetable or chicken broth |
Grab the Saving up to 50% from Target Deal Days (Mar 25 to 27, 2026)
The magic happens when these ingredients meld together during cooking. I’ve found that the quality of your tamarind paste significantly impacts the final result, so I always recommend investing in a good brand or making your own from fresh pods.
Step-by-Step Preparation Method
My foolproof method ensures consistent results every time. I’ve streamlined this process to minimize active cooking time while maximizing flavor development.
Preparation Phase
First, I gather all ingredients and prepare them for cooking. This mise en place approach prevents any rushed moments during the cooking process. I mince the garlic finely to ensure it distributes evenly throughout the sauce. The ginger gets grated fresh because dried simply doesn’t provide the same aromatic punch.
Cooking Process
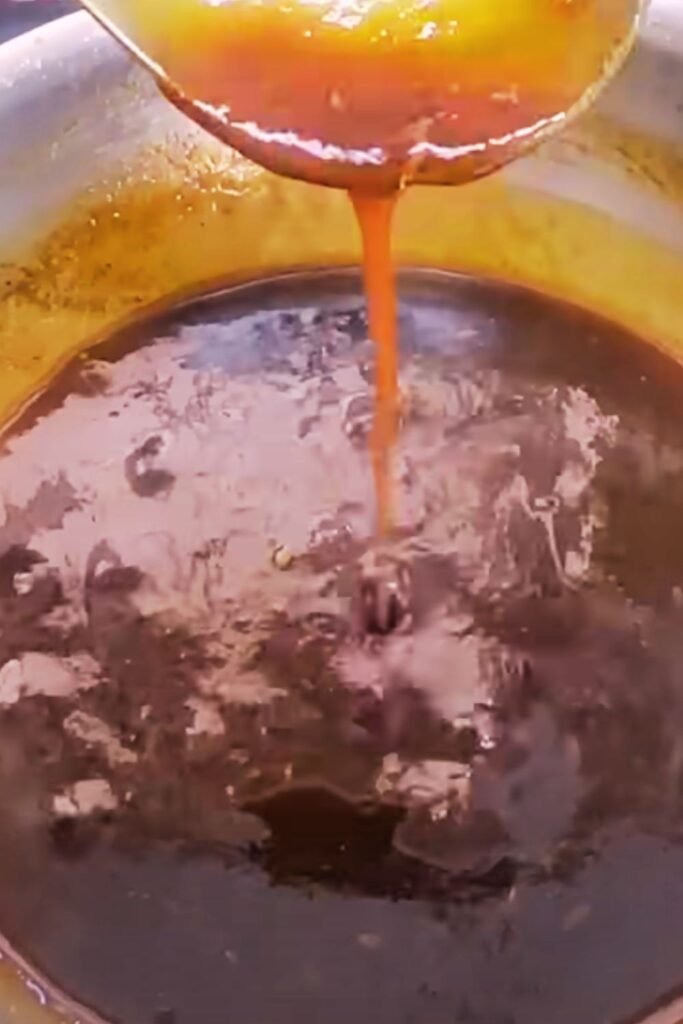
I start by heating a small saucepan over medium heat. No oil is needed since we’re building a sauce base. I add the minced garlic first, stirring constantly for about 30 seconds until fragrant. The key is warming the garlic without browning it, which would introduce bitter notes.
Next, I incorporate the tamarind paste, stirring it into the warm garlic. This step activates the tamarind’s complex flavors and begins the melding process. I then add the brown sugar, watching as it dissolves and begins to caramelize slightly around the edges.
The soy sauce goes in next, followed by the rice vinegar. I can hear the mixture sizzle as the vinegar hits the hot pan, releasing aromatic steam that tells me the flavors are combining beautifully. The grated ginger and red pepper flakes follow, creating a fragrant base that makes my mouth water every time.
Finally, I add the water gradually, whisking constantly to prevent lumps from forming. The sauce will bubble and thicken as it cooks, usually taking about 5-7 minutes to reach the perfect consistency.
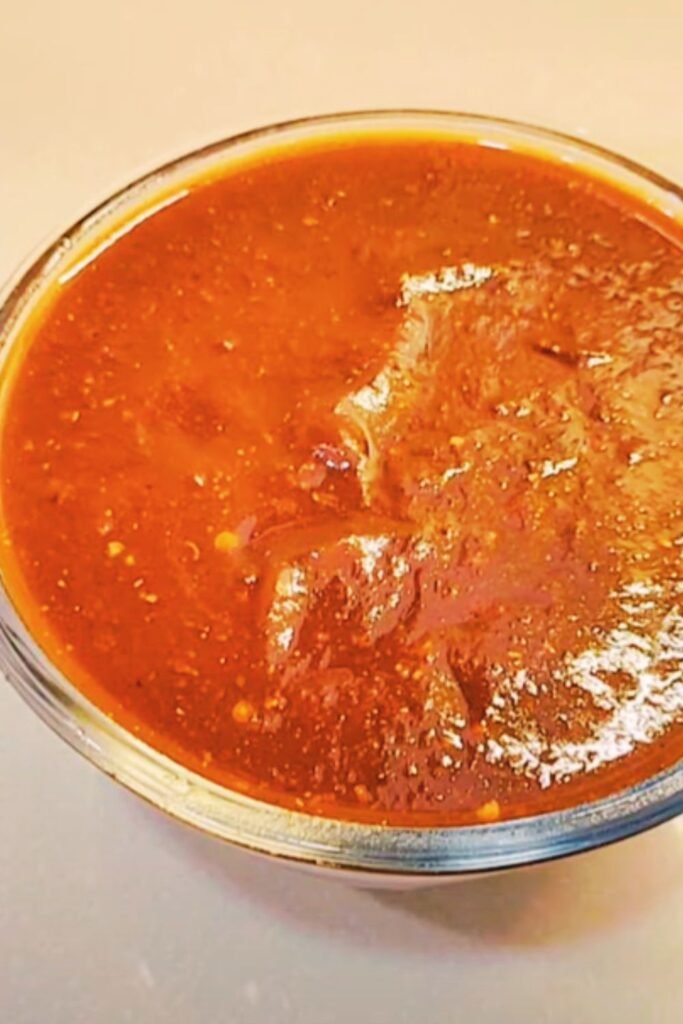
Texture and Consistency Testing
I test the sauce by dragging a spoon across the bottom of the pan. If the sauce coats the spoon and flows back slowly, it’s ready. The ideal consistency should be pourable but not thin, similar to a good barbecue sauce or teriyaki glaze.
Flavor Variations and Customizations
One of the aspects I love most about this recipe is its adaptability. Over the years, I’ve developed several variations that cater to different taste preferences and dietary needs.
Spicy Tamarind Sauce
For heat lovers, I increase the red pepper flakes to 1/2 teaspoon and add a finely minced fresh jalapeño. Sometimes I’ll include a dash of sriracha for additional complexity. This version pairs beautifully with grilled meats and robust vegetables.
Sweet and Mild Version
When serving children or those sensitive to spice, I omit the red pepper flakes entirely and increase the brown sugar to 3 tablespoons. I might also add a tablespoon of honey for extra sweetness and glossy finish.
Garlic-Forward Variation
Some dishes benefit from a more pronounced garlic presence. For these occasions, I double the garlic to 4 cloves and add 1/2 teaspoon of garlic powder for an extra punch. This version works wonderfully with seafood dishes.
Low-Sodium Alternative
For those watching their sodium intake, I reduce the soy sauce to 1/2 tablespoon and add an extra tablespoon of rice vinegar along with a pinch of salt. The flavor remains balanced while significantly reducing sodium content.
Grab the Saving up to 50% from Target Deal Days (Mar 25 to 27, 2026)
Perfect Pairings and Serving Suggestions

I’ve discovered that tamarind sauce enhances numerous dishes across different cuisines. Its versatility continues to surprise me, and I’m always finding new applications in my cooking.
Asian-Inspired Dishes
Tamarind sauce transforms simple stir-fries into restaurant-quality meals. I love tossing it with pad thai noodles, where it provides the authentic tangy-sweet flavor that makes this dish so beloved. It also works beautifully as a glaze for grilled chicken or fish, caramelizing beautifully under high heat.
Western Applications
I’ve found that tamarind sauce makes an excellent barbecue sauce alternative. Its complex flavor profile elevates grilled pork tenderloin and adds sophistication to simple roasted vegetables. I’ve even used it as a salad dressing base, thinning it slightly with additional rice vinegar and a touch of sesame oil.
Vegetarian and Vegan Options
This sauce breathes life into plant-based proteins. I frequently use it to marinate tofu before grilling or baking, and it creates an incredible glaze for roasted cauliflower. Mixed with coconut milk, it becomes a fantastic curry base for vegetables and legumes.
Creative Serving Ideas
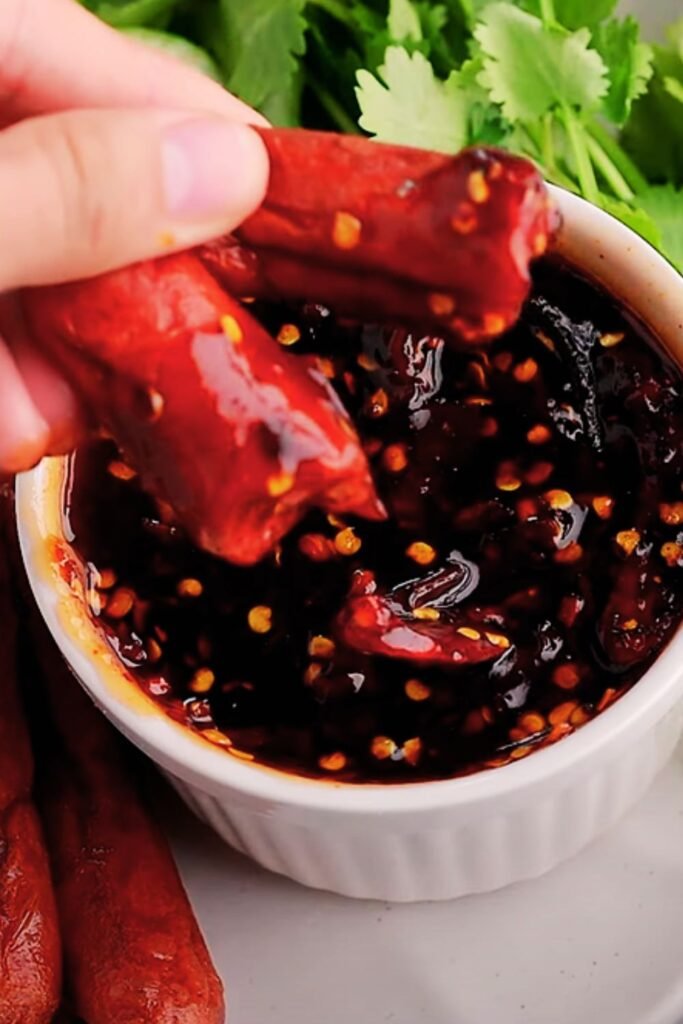
Beyond traditional applications, I’ve discovered some unexpected uses that have become family favorites. As a dipping sauce for spring rolls or dumplings, it provides the perfect balance of flavors. I’ve also used it as a sandwich spread, particularly with grilled vegetables and fresh herbs.
Storage and Shelf Life Guidelines
Proper storage ensures your homemade tamarind sauce maintains its quality and safety. I’ve learned through experience that following these guidelines prevents spoilage and preserves the sauce’s vibrant flavors.
| Storage Method | Container Type | Temperature | Shelf Life | Notes |
|---|---|---|---|---|
| Refrigerator | Glass jar with tight lid | 35-40°F | 2-3 weeks | Allow to cool completely before storing |
| Freezer | Freezer-safe containers | 0°F | 3-4 months | Freeze in small portions for convenience |
| Room temperature | Not recommended | N/A | 2-3 hours | Only safe for immediate serving |
Grab the Saving up to 50% from Target Deal Days (Mar 25 to 27, 2026)
I always label my containers with the preparation date to track freshness. The sauce may thicken slightly when cold, but it returns to the proper consistency when brought to room temperature or gently warmed.
Freezing Tips
When freezing, I portion the sauce into ice cube trays first, then transfer the frozen cubes to freezer bags. This method allows me to thaw only what I need without compromising the remaining sauce. Each cube equals approximately 2 tablespoons, perfect for single-serving applications.
Nutritional Information and Health Benefits
Understanding the nutritional profile of homemade tamarind sauce helps me make informed decisions about incorporating it into my meal planning.
| Nutrient | Per 2 Tablespoons | Daily Value % | Health Benefits |
|---|---|---|---|
| Calories | 35 | 2% | Low-calorie flavor enhancer |
| Carbohydrates | 8g | 3% | Quick energy source from natural sugars |
| Fiber | 0.5g | 2% | Supports digestive health |
| Vitamin C | 3mg | 3% | Antioxidant properties |
| Potassium | 85mg | 2% | Supports heart health |
| Iron | 0.3mg | 2% | Essential for blood health |
| Sodium | 290mg | 13% | Moderate sodium content |
Tamarind naturally contains antioxidants and has been used in traditional medicine for centuries. I appreciate that this homemade version allows me to control the sodium and sugar content compared to commercial alternatives.
Troubleshooting Common Issues
Through years of making this sauce, I’ve encountered and solved various challenges that home cooks might face. These solutions ensure consistent success every time.
Sauce Too Thin
If my sauce doesn’t thicken properly, I continue cooking it over low heat, stirring frequently until it reaches the desired consistency. Sometimes I’ll add a slurry made from 1 teaspoon cornstarch mixed with 1 tablespoon cold water.
Overpowering Tartness
When the sauce tastes too acidic, I balance it by adding more brown sugar, one teaspoon at a time, until the flavors harmonize. Alternatively, a small amount of honey can provide smoothness without overpowering sweetness.
Lack of Depth
If the flavor seems flat, I usually add a pinch of salt or an extra splash of soy sauce. Sometimes a few drops of sesame oil can provide the missing complexity.
Lumpy Texture
To prevent lumps, I always whisk the tamarind paste thoroughly before adding other ingredients. If lumps do form, I strain the finished sauce through a fine-mesh sieve.
Advanced Techniques and Professional Tips
After perfecting this basic recipe, I’ve developed some advanced techniques that elevate the sauce to restaurant quality.
Blooming Spices
Sometimes I bloom whole spices like cumin seeds or coriander in the dry pan before adding other ingredients. This technique releases essential oils and adds incredible depth to the final sauce.
Caramelizing Sugars
For special occasions, I caramelize the brown sugar slightly before adding the tamarind paste. This creates a deeper, more complex sweetness that pairs beautifully with grilled meats.
Balancing Acidity
I’ve learned to taste continuously throughout the cooking process, adjusting the balance of sweet, sour, and salty elements. Professional chefs call this “seasoning to taste,” and it’s crucial for achieving perfect flavor harmony.
Grab the Saving up to 50% from Target Deal Days (Mar 25 to 27, 2026)
Frequently Asked Questions
Q: Can I make this sauce without tamarind paste? While tamarind paste is essential for authentic flavor, you could substitute it with a mixture of brown sugar, lemon juice, and Worcestershire sauce, though the result will be quite different from traditional tamarind sauce.
Q: How do I know if my tamarind paste is still good? Fresh tamarind paste should have a dark brown color and slightly sticky consistency. If it’s developed mold, has an off smell, or has become completely hard, it’s time to replace it.
Q: Can I double or triple this recipe? Absolutely! I often make larger batches for meal prep. Just maintain the same proportions and increase cooking time slightly to allow all ingredients to meld properly.
Q: Is this sauce gluten-free? If you use tamari instead of regular soy sauce, this recipe becomes completely gluten-free. Always check your soy sauce label to be sure.
Q: Why does my sauce separate after cooling? Separation can occur due to temperature changes or ingredient ratios. Simply whisk the sauce before using, or warm it gently while stirring to re-emulsify.
Q: Can I use fresh tamarind pods instead of paste? Yes, but you’ll need to extract the pulp first. Soak 6-8 pods in warm water for 30 minutes, then mash and strain to remove seeds and fibers. Use about 1/4 cup of this pulp in place of the paste.
Q: How spicy is this sauce? With 1/4 teaspoon of red pepper flakes, the sauce has a mild heat that most people find pleasant. You can adjust the spice level to your preference.
Q: Can I use this sauce as a marinade? Definitely! It makes an excellent marinade for chicken, pork, or tofu. Marinate proteins for at least 30 minutes, or up to 24 hours for deeper flavor penetration.
This easy tamarind sauce recipe has become one of my most treasured kitchen secrets. Its ability to transform simple ingredients into something extraordinary never fails to impress my family and friends. The combination of sweet, sour, and umami flavors creates a complexity that enhances virtually any dish you pair it with.
I encourage you to start with this basic recipe and then experiment with your own variations. Cooking is about discovery and personal taste, and this sauce provides an excellent foundation for culinary creativity. Whether you’re preparing a quick weeknight dinner or planning an elaborate feast, having a jar of homemade tamarind sauce in your refrigerator opens up endless possibilities for delicious meals.
Remember that the best recipes are those that bring joy to both the cook and those who share the meal. I hope this tamarind sauce brings as much happiness to your kitchen as it has to mine.
Leave a Reply