Greek Pita: The Perfect Mediterranean Flatbread for Every Meal

There’s something magical about biting into a warm, freshly-baked Greek pita. That perfect pocket of pillowy softness with just the right amount of chew has been a staple of Mediterranean cuisine for centuries, and for good reason. As someone who’s spent years perfecting my pita technique and exploring its rich history, I’m excited to share everything I know about this versatile flatbread that has become a global sensation.
Greek pita isn’t just any bread – it’s the foundation of countless delicious meals, from classic gyros to simple dips. Whether you’re a novice baker or seasoned chef, understanding the art of Greek pita opens up a world of culinary possibilities.
The Rich History of Greek Pita
The humble pita has deep roots that stretch back thousands of years across the Mediterranean and Middle East. Archaeological evidence suggests flatbreads similar to pita have been made since at least 14,500 BCE. The word “pita” itself comes from the Greek word “πίτα” (pronounced “peeta”), which simply means “bread” or “cake.”
In Greece specifically, pita has been integral to the cuisine for millennia. Ancient Greeks were known to make flatbreads called “plakous” that were often topped with herbs, onions, and garlic – perhaps the earliest ancestors to modern pizza. But the pocket-style pita we know today likely evolved during the centuries of Ottoman influence in the region.
What makes Greek pita distinct from other Mediterranean and Middle Eastern variations is its slightly thicker texture and consistent pocket formation. Traditional Greek bakeries have been crafting these delicious flatbreads using techniques passed down through generations, often baking them in wood-fired ovens that create that characteristic slight char and delicious aroma.
Types of Greek Pita
As I’ve discovered through my culinary adventures, not all Greek pitas are created equal. Here are the main varieties you’ll encounter:
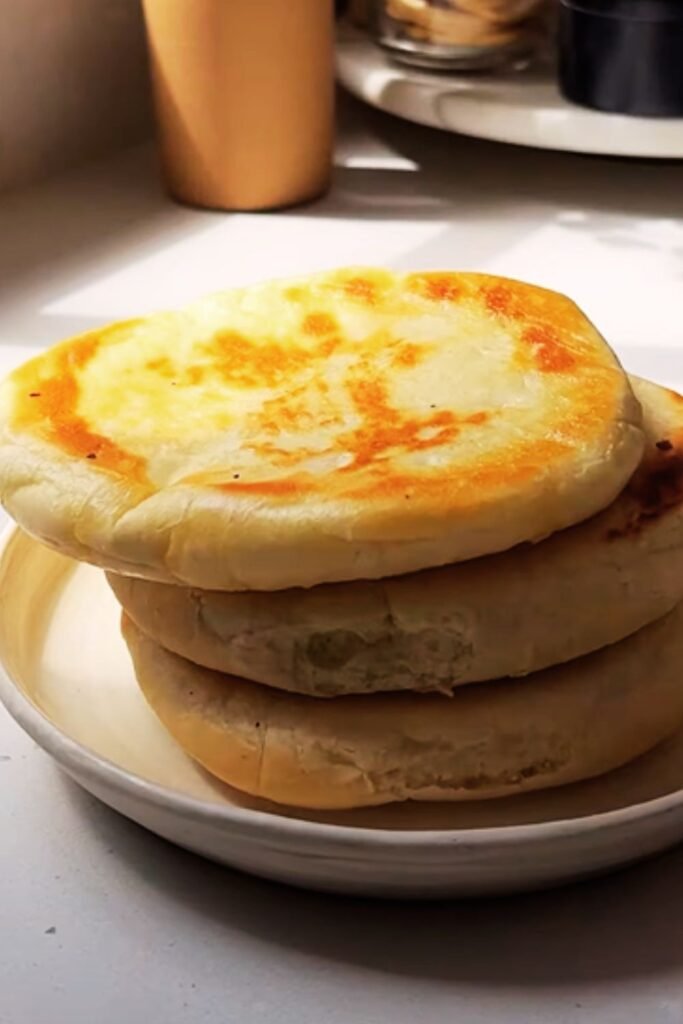
Pocket Pita (Pita Bread) : The most internationally recognized style, featuring a hollow pocket perfect for fillings. This is what most people picture when thinking of Greek pita.
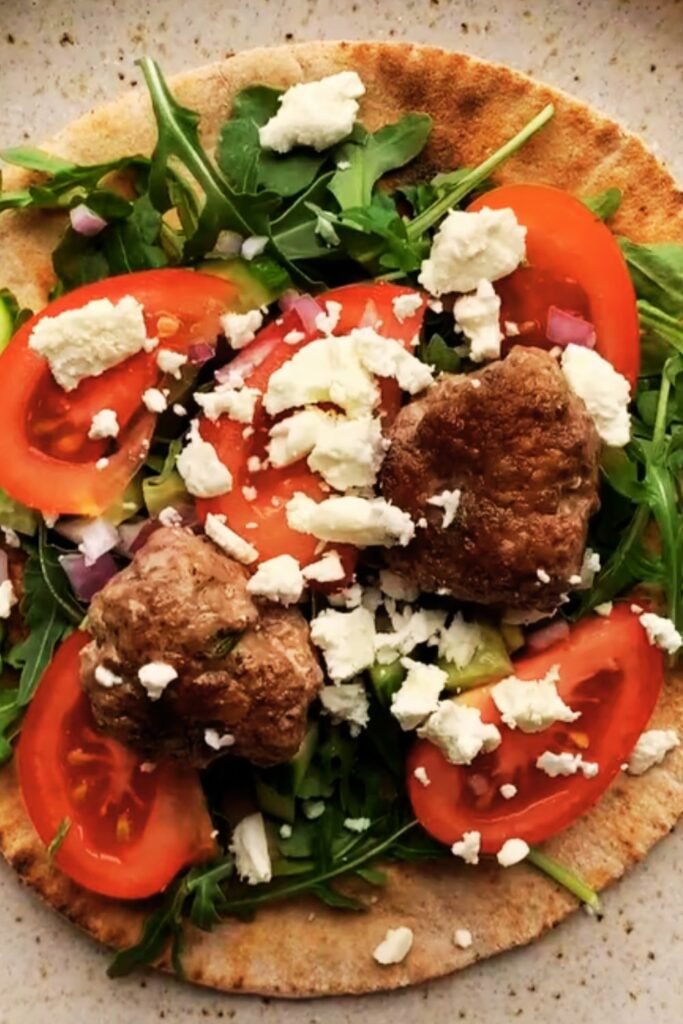
Greek Pita Gyro : Slightly thicker and often without a pocket, designed specifically for wrapping around gyro meat and toppings. This style is more like a flatbread than a pocket bread.
Horiatiki Pita (Country Pita) : A rustic, hand-stretched variation that’s typically larger and thinner, perfect for sharing.
Tiganopsomo : A fried version of pita that’s crispy on the outside and fluffy inside, often served with honey or cheese.
Pita Souvlaki : Similar to gyro pita but often slightly smaller and thinner, specifically designed for souvlaki wraps.
The regional variations across Greece are fascinating as well. In northern regions, pitas tend to be slightly thicker and heartier, while island variations might incorporate local herbs or olive varieties in the dough.
The Science Behind Perfect Pita
Creating that perfect pocket isn’t just culinary magic—there’s real science at work. When pita dough is placed in a hot oven, the moisture in the dough rapidly turns to steam. This steam expansion causes the dough to puff dramatically, creating that signature pocket. As it cools, the top and bottom layers remain separated, forming the perfect vessel for fillings.
The key factors in successful pocket formation include:
- Proper gluten development through adequate kneading
- Correct hydration level of the dough
- Extremely hot oven temperature (preferably 450°F/230°C or higher)
- Quick cooking time (usually 2-3 minutes)
I’ve learned through countless batches that it’s this specific combination of factors that creates the perfect pita. Too little gluten development or insufficient heat will result in flat, pocket-less pitas.
Essential Ingredients for Authentic Greek Pita
The beauty of Greek pita lies in its simplicity. The traditional recipe requires just a few basic ingredients, but each plays a crucial role:
| Ingredient | Purpose | Traditional Option | Modern Alternative |
|---|---|---|---|
| Flour | Forms the structure | Stone-ground wheat flour | All-purpose or bread flour |
| Water | Creates hydration and steam | Spring water | Filtered tap water |
| Yeast | Leavening agent | Fresh baker’s yeast | Active dry or instant yeast |
| Salt | Flavor enhancer & dough strengthener | Sea salt | Kosher salt |
| Olive Oil | Adds tenderness and flavor | Extra virgin Greek olive oil | Any quality olive oil |
| Sugar (optional) | Feeds yeast | Honey | Granulated sugar |
The quality of ingredients matters significantly. I’ve found that using authentic Greek extra virgin olive oil makes a noticeable difference in both flavor and texture. If you can find it, Greek “alef” flour, which has a protein content between all-purpose and bread flour, is ideal for pita making.
My Foolproof Greek Pita Recipe
After years of experimenting with different techniques, I’ve perfected what I believe to be the most reliable Greek pita recipe. This makes 8 medium-sized pitas:
Ingredients:
- 3 cups (375g) bread flour
- 1 cup (240ml) warm water (around 110°F/43°C)
- 2 tsp active dry yeast
- 2 tbsp extra virgin olive oil
- 1 tsp sugar or honey
- 1½ tsp salt
Equipment Needed:
- Large mixing bowl
- Measuring cups and spoons
- Kitchen scale (for precision)
- Clean work surface for kneading
- Rolling pin
- Baking stone or heavy baking sheet
- Clean kitchen towels
Step-by-Step Instructions:
- Activate the yeast: Combine warm water with sugar or honey in a small bowl. Sprinkle the yeast over the top and let it sit for 5-10 minutes until foamy.
- Mix the dry ingredients: In a large bowl, whisk together the flour and salt.
- Form the dough: Create a well in the center of the flour mixture. Pour in the yeast mixture and olive oil. Mix with a wooden spoon until a shaggy dough forms.
- Knead thoroughly: Turn the dough onto a floured surface and knead for 8-10 minutes until smooth and elastic. The dough should pass the “windowpane test” – when a small piece is stretched, it should form a thin, translucent membrane without tearing.
- First rise: Place the dough in an oiled bowl, cover with a damp cloth, and let rise in a warm place for 1-2 hours, or until doubled in size.
- Divide and shape: Punch down the dough and divide it into 8 equal pieces. Shape each piece into a ball and let rest, covered, for 15 minutes to relax the gluten.
- Roll out: On a lightly floured surface, roll each ball into a circle about 6-7 inches (15-18cm) in diameter and ¼ inch (6mm) thick.
- Second rise: Place the rolled pitas on parchment paper or a floured surface, cover with a clean towel, and let rest for 30 minutes.
- Preheat: While the pitas rest, place a baking stone or heavy baking sheet in the oven and preheat to 500°F (260°C) for at least 30 minutes.
- Bake: Working with 1-2 pitas at a time (depending on your baking surface size), carefully transfer them onto the hot stone or baking sheet. Bake for 2-3 minutes until fully puffed and lightly golden.
- Cool properly: Remove pitas from the oven and immediately wrap them in a clean kitchen towel to keep them soft and pliable as they cool.
For the best results, I recommend baking these just before serving. There’s nothing quite like freshly baked pita straight from the oven!
Common Pitfalls and How to Avoid Them
Even experienced bakers sometimes struggle with pita. Here are solutions to the most common issues I’ve encountered:
Problem: Pitas don’t puff up Solution: Ensure your oven is hot enough (minimum 450°F/230°C) and properly preheated with a baking stone. Also check that your dough has adequate gluten development and correct hydration.
Problem: Tough or dry pitas Solution: Avoid over-kneading or using too much flour during rolling. Also, make sure to store them properly in a towel or bag immediately after baking.
Problem: Pitas deflate when removing from oven Solution: This is normal! The key is to wrap them in a kitchen towel immediately to retain moisture and keep them pliable.
Problem: Uneven puffing Solution: Roll the dough to an even thickness throughout, and ensure your oven temperature is consistent.
Problem: Pitas stick to the baking surface Solution: Make sure your baking stone or sheet is properly preheated, and consider using a light dusting of cornmeal or semolina as a release agent.
Beyond Basic: Creative Pita Variations
While the traditional recipe is perfect, I love experimenting with variations that add interesting flavors and textures:
Whole Wheat Pita : Replace half the bread flour with whole wheat flour for a nuttier flavor and additional fiber.
Herbed Pita : Add 1-2 tablespoons of fresh herbs like oregano, thyme, or rosemary to the dough.
Garlic Pita : Incorporate 2-3 cloves of finely minced garlic into the dough.
Multigrain Pita : Add 2 tablespoons of mixed seeds (sesame, flax, sunflower) to the dough.
Spiced Pita : Include 1 teaspoon of spices like za’atar, sumac, or black pepper for a flavor boost.
Regardless of which variation you try, the basic technique remains the same. These adaptations simply add another dimension to an already wonderful bread.
Traditional Greek Fillings and Accompaniments
The true beauty of Greek pita is how perfectly it pairs with so many Greek specialties. Here are some classic combinations:
Gyro
The quintessential Greek street food featuring:
- Thinly sliced gyro meat (traditionally pork or chicken in Greece)
- Tzatziki sauce
- Tomatoes and onions
- Sometimes french fries tucked inside!
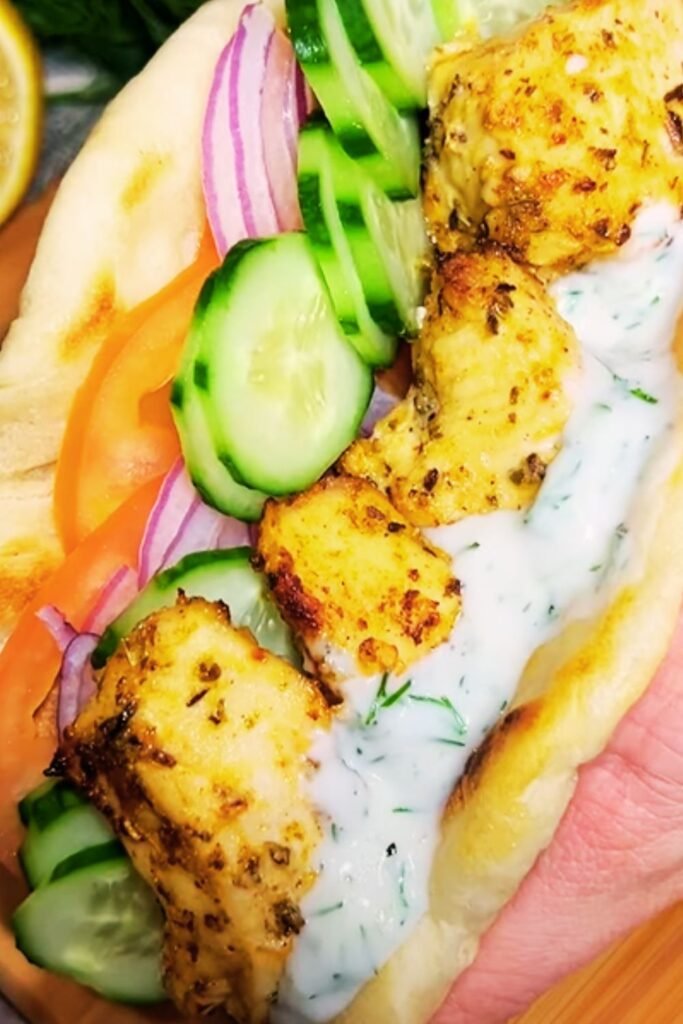
Souvlaki
Another beloved Greek specialty:
- Grilled meat skewers (often pork, chicken, or lamb)
- Tzatziki
- Tomatoes, onions, and sometimes lettuce
- A sprinkle of oregano and a squeeze of lemon
Vegetarian Options
Greeks know how to make incredible plant-based fillings too:
- Falafel with tahini sauce
- Grilled halloumi cheese with vegetables
- Gigantes plaki (giant beans in tomato sauce)
- Briam (Greek ratatouille) with feta cheese
Dips and Spreads
Pita is the perfect vehicle for Greece’s amazing dips:
- Tzatziki (yogurt, cucumber, and garlic)
- Melitzanosalata (roasted eggplant dip)
- Tirokafteri (spicy feta dip)
- Hummus (though technically not Greek, it’s widely enjoyed)
- Skordalia (garlic and potato dip)
Storing and Reviving Greek Pita
The shelf life of fresh pita is relatively short, but proper storage can help:
| Storage Method | Shelf Life | Best For |
|---|---|---|
| Room temperature (in plastic bag) | 2 days | Immediate use |
| Refrigerator (in sealed bag) | 4-5 days | Short-term storage |
| Freezer (double wrapped) | Up to 3 months | Long-term storage |
When it comes to reviving day-old pita, I’ve found several effective methods:
- Light sprinkling and microwave: Sprinkle the pita with a few drops of water and microwave for 10-15 seconds.
- Stovetop reheating: Warm a dry skillet over medium heat and heat the pita for 30 seconds on each side.
- Oven refreshing: Wrap pitas in aluminum foil and heat in a 350°F (175°C) oven for 5-7 minutes.
- Toasting: For a different texture, lightly toast pitas until just crisp on the outside but still soft inside.
The key is to add a small amount of moisture before reheating, which helps restore that fresh-baked texture.
Creative Serving Suggestions
While traditional uses are delicious, Greek pita is incredibly versatile. Here are some creative ways I love to use it:
Greek-Style Pizza Base : Brush with olive oil, top with feta, olives, tomatoes, and oregano, then bake until crisp.
Mediterranean Breakfast Pockets : Fill with scrambled eggs, spinach, and feta for a Greek-inspired breakfast.
Pita Chips : Cut into triangles, brush with olive oil, sprinkle with herbs, and bake until crisp for a healthy snack.
Greek Nachos : Top crispy pita triangles with gyro meat, tzatziki, feta, tomatoes, and olives.
Sweet Treats : Brush with butter, sprinkle with cinnamon sugar, and bake briefly for a simple dessert.
Greek Pita Bowl : Use a whole pita as the base of a bowl, filled with Greek salad and protein of choice.
Stuffed Pita Burgers : Use pita pockets instead of traditional buns for a Mediterranean twist on burgers.
Greek Panzanella : Tear pita into pieces and use in place of bread in a Greek-style panzanella salad with tomatoes, cucumbers, olives, and feta.
Greek Pita in Modern Cuisine
While deeply rooted in tradition, Greek pita has found its way into contemporary cuisine in exciting ways. Fusion restaurants often use pita as a versatile base for creative dishes that blend Greek flavors with other culinary traditions. I’ve seen everything from Greek-Mexican fusion tacos using pita instead of tortillas to Greek-Asian fusion wraps combining traditional Greek ingredients with East Asian flavors.
Health-conscious diners appreciate that pita can be made with whole grains and provides a more nutritious alternative to many other breads. The pocket style naturally creates portion control for fillings, making it popular in modern healthy eating plans.
Even plant-based diets have embraced Greek pita as an essential component. Vegan Greek restaurants typically offer pita stuffed with plant-based proteins and vegetables, maintaining the essence of Greek cuisine while adapting to contemporary dietary preferences.
Greek Pita Around the World
Having traveled extensively, I’ve been fascinated by how Greek pita has been adopted and adapted globally:
United States: Often used for gyro sandwiches but also popularized as “pita pockets” for healthier sandwich alternatives.
United Kingdom: A staple of late-night food culture, particularly in kebab shops serving souvlaki and gyros.
Australia: Embraced in Mediterranean restaurants but also commonly used in fusion cuisine.
Middle East: Exists alongside local flatbreads with subtle regional differences in thickness and texture.
Germany: Particularly popular in the form of “Döner Kebab” sandwiches, a Turkish-German adaptation using pita bread.
Canada: Found in Greek restaurants but also widely available in supermarkets for home use.
What amazes me is how each culture subtly adapts the basic pita recipe to local tastes and ingredients while maintaining its essential character.
Q&A Section
Is Greek pita the same as Middle Eastern pita bread? While similar, Greek pita tends to be slightly thicker than many Middle Eastern varieties. Greek pita for gyros often doesn’t have a pocket, while the pocket is standard in most Middle Eastern pitas. The ingredients are similar, but preparation techniques can differ.
Can I make Greek pita without yeast? Yes, though it won’t be traditional. You can make a quick version using baking powder (about 1 tablespoon per 2 cups of flour) instead of yeast. The texture will be slightly different, but in a pinch, it works for a quick alternative.
Why doesn’t my pita form a pocket? The pocket forms when steam builds up inside the dough during baking. If your pita isn’t forming pockets, your oven likely isn’t hot enough, or the dough might be too dry or too wet. Make sure your oven is fully preheated to at least 450°F (230°C) with a baking stone or heavy sheet inside.
Is Greek pita healthy? Basic Greek pita is relatively healthy compared to many breads. It’s low in fat and can be made with whole wheat flour for added fiber. The simple ingredients make it a relatively clean choice. What makes it unhealthy or healthy often depends more on the fillings you choose.
How can I make gluten-free Greek pita? While not traditional, you can make gluten-free pita using a blend of gluten-free flours like rice flour, tapioca starch, and psyllium husk for structure. The pocket is harder to achieve, but the flavor can be quite good. Commercial gluten-free pita mixes are also available.
Can pita dough be made ahead of time? Absolutely! You can refrigerate the dough after the first rise for up to 24 hours. This actually improves flavor through slow fermentation. Just bring it to room temperature before shaping and baking.
What’s the difference between pita and naan? While both are flatbreads, naan originates from India and typically contains yogurt in the dough. Naan is usually cooked in a tandoor oven on the sides of the oven, while pita is baked on a flat surface. Naan doesn’t typically form a pocket like pita does.
Can I freeze unbaked pita dough? Yes! You can freeze the dough after dividing it into individual portions. Thaw in the refrigerator overnight, then bring to room temperature, roll out, and bake as usual.
Embracing the Art of Greek Pita
As I’ve discovered over years of baking and enjoying Greek pita, this seemingly simple bread represents so much more than just a vehicle for fillings. It connects us to thousands of years of Mediterranean culinary tradition, provides a canvas for countless delicious meals, and offers the satisfaction that comes from mastering a fundamental cooking technique.
Whether you’re rolling out your first batch of pita dough or experimenting with creative variations, remember that like all great foods, making perfect Greek pita takes practice. Each batch teaches you something new about the interplay of flour, water, yeast, and heat.
I encourage you to embrace the process, learn from each attempt, and enjoy the journey toward pita perfection. There’s something deeply satisfying about pulling a perfectly puffed pita from a hot oven, watching it balloon with steam, and knowing you’ve participated in a culinary tradition that stretches back millennia.
So heat up that oven, dust your countertop with flour, and get ready to experience the simple joy of authentic Greek pita made with your own hands. Your taste buds—and anyone lucky enough to share your table—will thank you.
Leave a Reply