Decadent Chocolate Strawberry Hi-Hat Cupcakes: A Showstopping Dessert
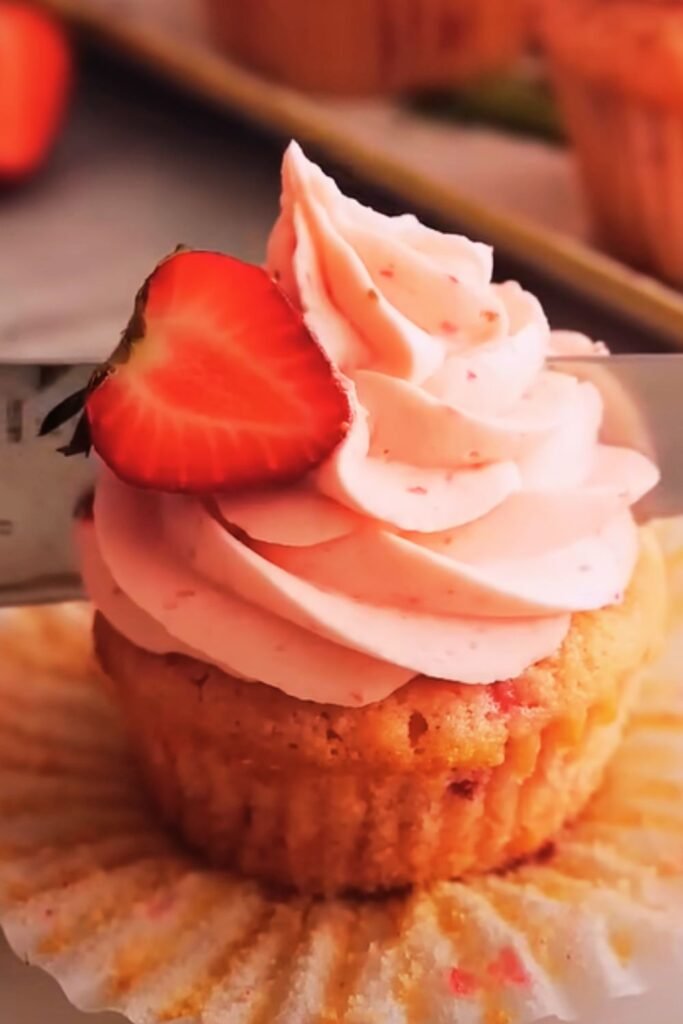
Have you ever encountered a dessert so visually stunning that you hesitated to take a bite? That’s precisely the reaction I get whenever I serve my Chocolate Strawberry Hi-Hat Cupcakes. These magnificent treats combine rich chocolate cake, fresh strawberry buttercream piled sky-high, and a shiny chocolate shell that cracks delightfully with each bite.
When I first discovered hi-hat cupcakes, I was immediately captivated by their dramatic appearance. These aren’t your average cupcakes—they’re a statement piece, a conversation starter, and most importantly, an absolutely divine flavor combination. The marriage of chocolate and strawberry creates a classic pairing that never disappoints, while the contrasting textures add an element of excitement.
In this guide, I’ll walk you through creating these showstopping cupcakes from scratch. Don’t be intimidated by their fancy appearance—with my step-by-step instructions, even novice bakers can achieve professional-looking results. So let’s tie on our aprons and create a dessert that’s bound to impress!
What Are Hi-Hat Cupcakes?
Before diving into the recipe, let’s understand what makes a hi-hat cupcake special:
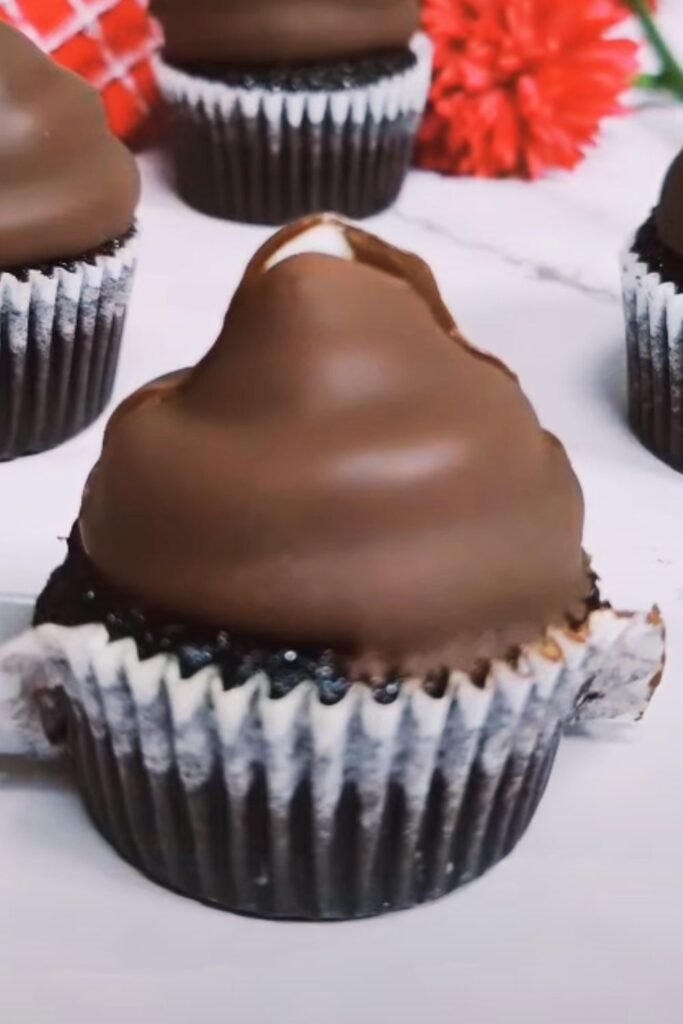
Hi-hat cupcakes : Named for their tall, conical swirl of frosting that resembles a high hat, these cupcakes feature an exceptionally tall frosting peak that’s been dipped in chocolate, creating a hard shell around the soft interior.
Unlike regular cupcakes where frosting is simply piped on top, hi-hats feature:
- A standard cupcake base
- An exceptionally tall swirl of sturdy frosting (usually 2-3 inches high)
- A coating of hardened chocolate that encases the frosting
- A delightful textural contrast between soft cake, creamy frosting, and crisp chocolate shell
The result is a multi-textural dessert experience that’s as fun to eat as it is beautiful to behold.
The Perfect Chocolate Base
Every great cupcake starts with an exceptional base, and these are no exception. I’ve developed a chocolate cupcake recipe that’s moist, deeply flavored, and sturdy enough to support that magnificent frosting tower.
Ingredients for Chocolate Cupcakes (Makes 12):
- 1 cup all-purpose flour
- ½ cup unsweetened cocoa powder (Dutch-processed for deeper flavor)
- ¾ teaspoon baking powder
- ½ teaspoon baking soda
- ¼ teaspoon salt
- 2 large eggs, room temperature
- ¾ cup granulated sugar
- ½ cup brown sugar, packed
- ⅓ cup vegetable oil
- 2 teaspoons pure vanilla extract
- ½ cup buttermilk, room temperature
- ½ cup hot coffee (enhances chocolate flavor)
Step-by-Step Instructions:
- Preheat your oven to 350°F (175°C) and line a standard 12-cup muffin tin with cupcake liners.
- In a medium bowl, whisk together the flour, cocoa powder, baking powder, baking soda, and salt. Set aside.
- In a large bowl, beat the eggs, granulated sugar, and brown sugar together until light and fluffy, about 2 minutes with an electric mixer.
- Add the oil and vanilla extract to the egg mixture and beat until well incorporated.
- Gradually add the dry ingredients to the wet ingredients, alternating with the buttermilk, mixing on low speed just until combined. Begin and end with the dry ingredients (dry → buttermilk → dry → buttermilk → dry).
- Slowly add the hot coffee and mix until just combined. The batter will be thin—this is normal!
- Divide the batter evenly among the cupcake liners, filling each about ⅔ full.
- Bake for 18-20 minutes, or until a toothpick inserted into the center comes out with just a few moist crumbs.
- Allow the cupcakes to cool in the pan for 5 minutes before transferring to a wire rack to cool completely.
Baker’s Notes:
The key to achieving truly moist chocolate cupcakes lies in a few crucial techniques:
- Don’t overmix once you add the flour—this develops gluten and creates tough cupcakes
- The hot coffee doesn’t make the cupcakes taste like coffee; it enhances and deepens the chocolate flavor
- Room temperature ingredients create a smoother batter that bakes more evenly
- Allow cupcakes to cool completely before frosting (at least 1 hour)
Luscious Strawberry Buttercream
The strawberry buttercream is the star of these cupcakes. It needs to be stable enough to hold its shape when piped high and dipped in chocolate, yet creamy enough to deliver that melt-in-your-mouth experience. I use a Swiss meringue buttercream base with concentrated strawberry flavor.
Ingredients for Strawberry Buttercream:
- 5 large egg whites (about 150g)
- 1¼ cups granulated sugar
- Pinch of salt
- 2 cups (4 sticks) unsalted butter, softened but still cool, cut into tablespoon-sized pieces
- 2 teaspoons pure vanilla extract
- ½ cup freeze-dried strawberries, ground into powder
- 3 tablespoons strawberry preserves, strained to remove seeds
Making the Buttercream:
- In a heatproof bowl of a stand mixer, whisk together egg whites, sugar, and salt.
- Create a double boiler by placing the bowl over a saucepan of simmering water (don’t let the bottom of the bowl touch the water).
- Whisking constantly, heat the mixture until it reaches 160°F (70°C) on an instant-read thermometer and the sugar has fully dissolved (rub a bit between your fingers—it shouldn’t feel grainy).
- Transfer the bowl to your stand mixer fitted with the whisk attachment. Beat on medium-high speed until stiff peaks form and the mixture has cooled to room temperature, about 8-10 minutes. The bowl should no longer feel warm to the touch.
- Switch to the paddle attachment. With the mixer running on low speed, add butter one tablespoon at a time, waiting for each piece to incorporate before adding the next.
- Once all butter is incorporated, turn the speed to medium-high and beat until the buttercream is smooth and silky, about 3-5 minutes. If it looks curdled, keep beating—it will come together!
- Add vanilla extract and mix until combined.
- Add the freeze-dried strawberry powder and strained strawberry preserves. Beat until fully incorporated and the frosting is smooth and uniform in color.
Why This Method Works:
The combination of freeze-dried strawberries and preserves gives you the best of both worlds:
| Ingredient | Contribution | Why It’s Essential |
|---|---|---|
| Freeze-dried strawberries | Intense flavor without added moisture | Prevents buttercream from becoming too soft |
| Strawberry preserves | Fresh, vibrant flavor and natural color | Adds authentic strawberry taste without artificial flavoring |
| Swiss meringue base | Stability and silky texture | Creates a frosting that holds its shape while remaining creamy |
This method yields a buttercream that’s:
- Stable enough for the tall hi-hat shape
- Strong enough to withstand the chocolate dipping process
- Packed with genuine strawberry flavor
- Naturally pink with no artificial coloring needed
Building the Hi-Hat Structure
Now comes the fun part—creating that impressive hi-hat structure!
You’ll Need:
- Completely cooled chocolate cupcakes
- Strawberry buttercream at room temperature
- Piping bag fitted with a large round tip (I recommend Wilton 1A or similar)
- Patience and a steady hand!
Steps:
- Transfer the strawberry buttercream to your prepared piping bag.
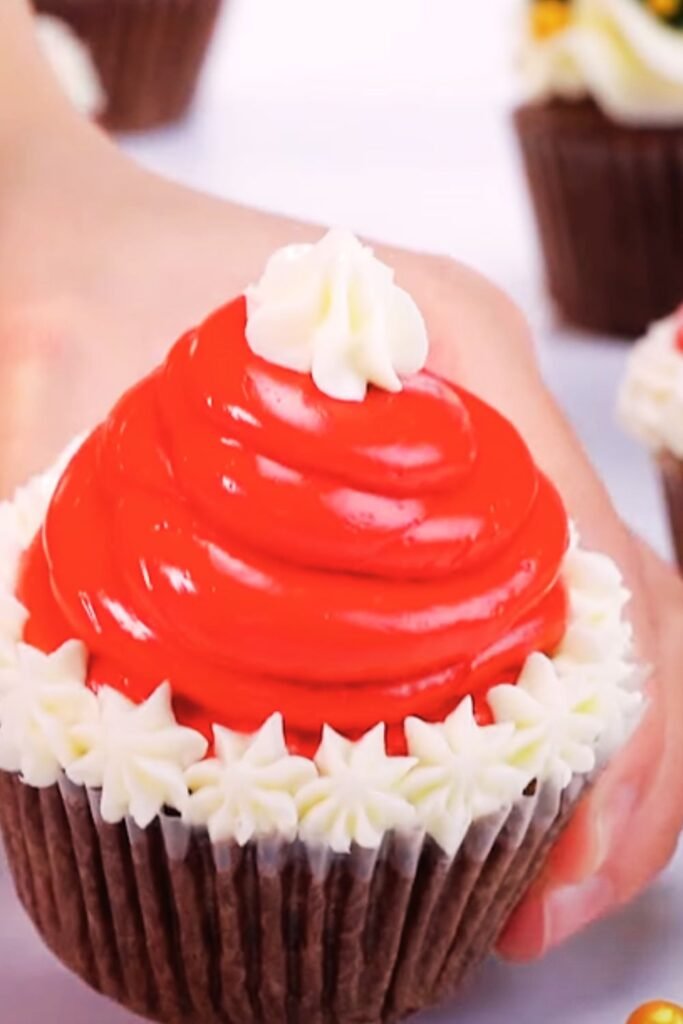
- Starting from the outer edge of a cupcake, pipe a spiral of frosting, moving inward and gradually building height.
- As you reach the center, apply slightly more pressure and pull up while releasing pressure to create a peak.
- Place the frosted cupcakes in the refrigerator for at least 30 minutes (or freezer for 15 minutes) to firm up before dipping. This step is crucial—the frosting must be firm enough to hold its shape when dipped in chocolate.
Troubleshooting:
- If your buttercream is too soft to hold its shape, refrigerate it for 15-20 minutes, then remix before piping.
- If your peaks are falling over, your buttercream may be too warm. Chill the piped cupcakes immediately.
- For extra stability, you can freeze the frosted cupcakes for 10-15 minutes just before dipping.
The Magic Chocolate Shell
The chocolate coating is what transforms these from ordinary frosted cupcakes into spectacular hi-hats. The perfect coating creates a thin, crisp shell that cracks beautifully when bitten into, providing a delightful textural contrast.
Ingredients for Chocolate Coating:
- 12 ounces high-quality semisweet or dark chocolate (60-70% cacao), finely chopped
- 3 tablespoons neutral vegetable oil (such as canola or safflower)
Preparing the Chocolate:
- Place the chopped chocolate in a heatproof bowl.
- Heat in 30-second intervals in the microwave at 50% power, stirring between each interval, until mostly melted with just a few small pieces remaining.
- Remove from microwave and stir until completely smooth. The residual heat will melt the remaining pieces.
- Stir in the vegetable oil until fully incorporated.
- Allow the chocolate mixture to cool to about 90°F (32°C)—it should feel just slightly warm to the touch. This temperature is crucial for proper coating.
The Dipping Process:
- Transfer the chocolate coating to a container deep enough for dipping—I find that a 2-cup measuring cup works perfectly.
- Remove frosted cupcakes from the refrigerator or freezer.
- Holding a cupcake by its base, quickly but carefully dip the frosted top into the chocolate, submerging the frosting completely.
- Lift straight up in one smooth motion, allowing excess chocolate to drip back into the container.
- Give the cupcake a gentle twirl as you lift to help the excess chocolate drip off evenly.
- Place the dipped cupcake on a wire rack or baking sheet.
- Repeat with remaining cupcakes, stirring the chocolate occasionally to maintain a smooth consistency.
- Allow the chocolate to set completely before serving, about 20-30 minutes at room temperature, or 10 minutes in the refrigerator.
Pro Tips for Perfect Dipping:
- The chocolate should be the right temperature—too hot and it will melt your frosting; too cold and it won’t coat smoothly
- Work quickly but don’t rush—each dip should take just a couple of seconds
- If the chocolate starts to thicken too much, warm it gently for 10-15 seconds
- Have paper towels handy for wiping any drips from the bottom of the cupcakes
Elegant Finishing Touches
While these cupcakes are already showstoppers, a few finishing touches can elevate them even further:
Decoration Ideas:
- Fresh strawberry slices or halves placed on top before the chocolate sets
- A light dusting of freeze-dried strawberry powder
- Tiny white chocolate hearts or stars
- A drizzle of contrasting white chocolate
- Edible gold leaf or shimmer dust for special occasions
I personally love topping each cupcake with a small fresh strawberry with the green top still attached—it provides a visual clue to the flavor inside and adds a beautiful pop of color.
Storage and Serving Suggestions
These cupcakes are at their absolute best when served at cool room temperature, which allows the chocolate shell to maintain its perfect texture while letting the buttercream soften just enough to be creamy.
Storage Guidelines:
| Storage Method | Maximum Time | Notes |
|---|---|---|
| Room temperature | 2-3 hours | Best for serving; chocolate will be perfectly crisp |
| Refrigerator | Up to 3 days | Cover loosely to protect but allow air circulation |
| Freezer | Up to 1 month | Store in airtight container; thaw in refrigerator |
Serving Suggestions:
- Place cupcakes on a tiered stand for an impressive dessert table display
- Serve alongside fresh strawberries for a cohesive presentation
- Pair with a glass of cold milk or hot coffee
- For a special dessert course, serve with a small scoop of vanilla ice cream on the side
Special Occasions Perfect for Hi-Hat Cupcakes
These stunning cupcakes make a memorable addition to many special occasions:
- Valentine’s Day celebrations (the chocolate-strawberry combination is perfect!)
- Bridal showers (especially for spring and summer weddings)
- Mother’s Day brunches
- Birthday parties for anyone who loves chocolate and strawberry
- Dinner parties where you want to impress with a homemade dessert
Because they’re so visually striking, these cupcakes can become the centerpiece of your dessert table with minimal additional decoration needed.
Variations to Try
While the chocolate-strawberry combination is divine, you can adapt this recipe to create other exciting flavor profiles:
Alternative Flavor Combinations:
- Vanilla cake base with chocolate buttercream and dark chocolate coating
- Chocolate cake with mint buttercream and dark chocolate coating
- Lemon cake with blueberry buttercream and white chocolate coating
- Chocolate cake with peanut butter buttercream and milk chocolate coating
- Vanilla cake with raspberry buttercream and dark chocolate coating
To adapt the strawberry buttercream recipe for different flavors, simply substitute the freeze-dried strawberries and preserves with your desired flavor additions.
Equipment Essentials
Having the right tools makes creating these cupcakes much easier. Here’s what I consider essential:
- Stand mixer with whisk and paddle attachments (a hand mixer will work but requires more effort)
- Large round piping tip (Wilton 1A or similar)
- Sturdy piping bags
- Candy/deep fry thermometer for checking chocolate temperature
- Measuring cups and spoons
- Medium-sized deep container for chocolate dipping
- Wire cooling rack
- Muffin tin and cupcake liners
Troubleshooting Common Issues
Even with the best preparation, issues can arise. Here’s how to handle the most common problems:
Frosting Problems:
- Buttercream is too soft: Chill in refrigerator for 15-20 minutes, then rewhip.
- Buttercream appears curdled: Continue beating—it will eventually come together. If not, gently warm the bowl with a hairdryer from a distance while mixing.
- Frosting won’t hold its shape: Your butter might be too warm. Refrigerate buttercream for 15 minutes, then try again.
Chocolate Coating Issues:
- Chocolate is too thick: Add a bit more oil, 1 teaspoon at a time.
- Chocolate is setting too quickly: Work faster or reheat slightly.
- Frosting melts during dipping: Your chocolate is too hot or your frosting too soft. Cool chocolate more and/or freeze frosted cupcakes longer before dipping.
- Chocolate shell cracks or falls off: The shell may be too thick. Add a bit more oil to thin the chocolate.
Cupcake Problems:
- Cupcakes sink in the middle: Oven temperature may be too high, or cupcakes were underbaked. Check your oven with a separate thermometer and ensure toothpick comes out clean when testing.
- Cupcakes are dry: Likely overbaked. Reduce baking time by 1-2 minutes next time.
Health and Dietary Adaptations
While these cupcakes are definitely a special treat, you can make adaptations to suit various dietary needs:
Gluten-Free Version:
Substitute the all-purpose flour with a one-to-one gluten-free flour blend. Add ¼ teaspoon xanthan gum if your blend doesn’t already contain it.
Dairy-Free Version:
- Replace butter in frosting with plant-based butter sticks (not tub margarine)
- Use coconut oil or vegan shortening for additional stability if needed
- Substitute buttermilk with plant-based milk + 1 teaspoon vinegar
Reduced Sugar Option:
- Reduce sugar in cake batter by up to ¼ cup
- Use dark chocolate (70% or higher) for coating
- Reduce sugar in meringue by up to ⅛ cup, though this may affect stability
Note on Food Allergies:
These cupcakes contain common allergens including eggs, dairy, and wheat. Always inform guests of ingredients when serving at gatherings.
Questions & Answers
Do I have to use coffee in the cupcake recipe? No, you can substitute the hot coffee with hot water. The coffee enhances the chocolate flavor without adding coffee taste, but hot water will still produce delicious cupcakes.
Can I make these cupcakes ahead of time? Yes! You can make the cupcakes up to 3 days in advance and store them in an airtight container. The buttercream can be made 2 days ahead and refrigerated (bring to room temperature and rewhip before using). Once assembled, the hi-hat cupcakes can be refrigerated for up to 3 days.
Why do my cupcakes crack on top? Cracking usually happens when the oven temperature is too high. Try reducing your oven temperature by 25°F and see if that helps. Also make sure you’re not overfilling the cupcake liners.
Can I use fresh strawberries instead of freeze-dried? Fresh strawberries contain too much moisture for the buttercream and will make it too soft to hold the hi-hat shape. Stick with freeze-dried strawberries for the powder and preserves for the concentrated flavor.
What if I don’t have a stand mixer? A hand mixer will work, though you’ll need more patience for the Swiss meringue buttercream. Beat the egg white mixture until completely cool and stiff peaks form (about 10-15 minutes with a hand mixer).
Can I use chocolate chips for the coating? While chocolate chips will work in a pinch, they contain stabilizers that make them melt differently. I recommend using bar chocolate for the smoothest, most professional results.
My frosting collapsed when I dipped it. What went wrong? Your frosting may not have been cold enough, or your chocolate may have been too hot. Make sure the frosted cupcakes are thoroughly chilled and your chocolate has cooled to just above body temperature before dipping.
How do I eat these without making a mess? Hi-hat cupcakes are admittedly challenging to eat neatly! I recommend peeling the wrapper back partially and eating from the top down, or using a fork if you’re feeling fancy. The chocolate shell will crack, but that’s part of the fun!
Final Thoughts
Creating these Chocolate Strawberry Hi-Hat Cupcakes may seem intimidating at first glance, but the process is actually quite manageable when broken down into steps. The dramatic presentation and incredible flavor combination make them well worth the effort.
I still remember the first time I served these at a family gathering—the gasps of admiration followed by the silence of everyone enjoying that first perfect bite made all the work worthwhile. There’s something truly special about creating a dessert that brings such joy to others.
So gather your ingredients, set aside some time to enjoy the process, and prepare to amaze your family and friends with what might just become your new signature dessert. The combination of rich chocolate, fresh strawberry flavor, and contrasting textures creates a truly unforgettable cupcake experience that elevates the ordinary to extraordinary.
Happy baking!
Leave a Reply