There’s something magical about the combination of tart apples, rich caramel, and creamy cheesecake that makes my heart skip a beat every time I think about it. I’ve been perfecting this Caramel Apple Cheesecake recipe for years, and I can honestly say it’s become the crown jewel of my dessert repertoire. The moment that first forkful hits your tongue, you’ll understand why this dessert has become my go-to for special occasions and cozy autumn evenings alike.
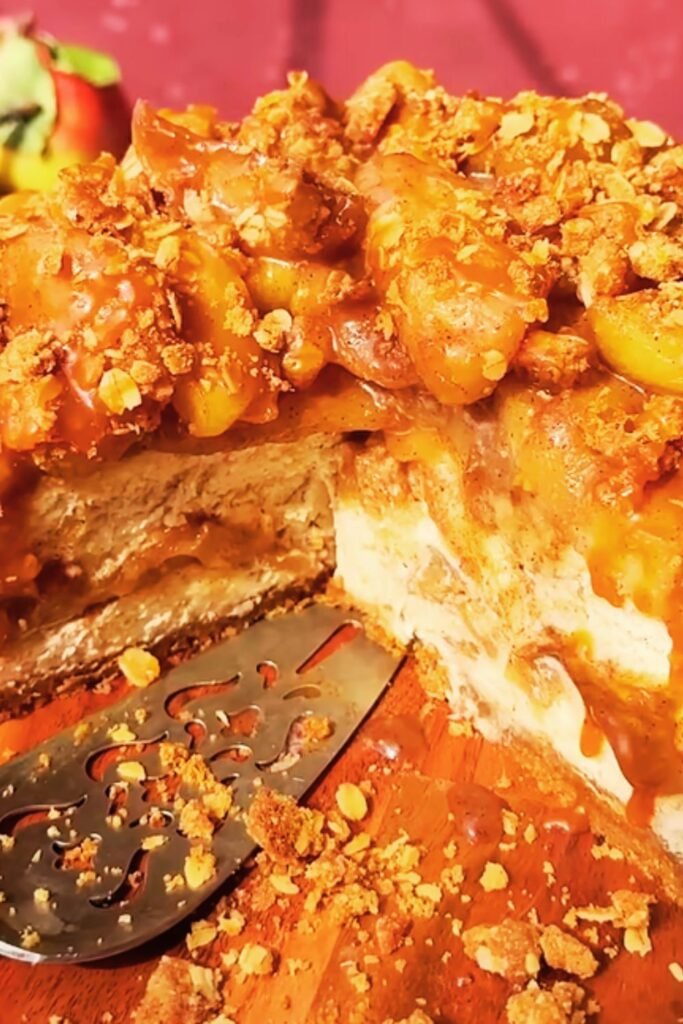
What sets this cheesecake apart from ordinary desserts is the perfect balance of textures and flavors. The graham cracker crust provides a satisfying crunch, while the silky smooth cheesecake filling melts in your mouth. The caramelized apples add just the right amount of tartness to cut through the richness, and that glossy caramel drizzle on top? Pure poetry in dessert form.
I remember the first time I made this cheesecake for my family’s Thanksgiving dinner. The kitchen was filled with the warm, inviting aroma of cinnamon and vanilla, and everyone kept wandering in asking when it would be ready. When I finally served it, the room went completely silent except for the sounds of pure enjoyment. That’s when I knew I had created something truly special.
Understanding the Perfect Caramel Apple Cheesecake
Graham Cracker Crust : A buttery, slightly sweet foundation made from crushed graham crackers, butter, and sugar that provides textural contrast to the creamy filling
Cream Cheese Filling : The heart of the dessert, made with full-fat cream cheese, eggs, sugar, and vanilla, creating that signature dense yet smooth texture
Caramelized Apples : Fresh apples cooked with butter, brown sugar, and warm spices until tender and golden, adding natural sweetness and tartness
Homemade Caramel Sauce : A rich, glossy sauce made from sugar, butter, and cream that serves as both an ingredient and a stunning finish
The beauty of this dessert lies in how each component complements the others. The tangy cream cheese balances the sweet caramel, while the spiced apples add complexity and prevent the dessert from being overly rich. I’ve learned that using the right apple variety is crucial – I always reach for Granny Smith or Honeycrisp apples because they hold their shape during cooking and provide that perfect tart-sweet balance.
Essential Ingredients and Their Roles
| Ingredient | Quantity | Purpose | Pro Tips |
|---|---|---|---|
| Cream Cheese | 32 oz (4 packages) | Main filling base | Must be room temperature for smooth mixing |
| Large Eggs | 4 | Binding and structure | Add one at a time to prevent curdling |
| Granulated Sugar | 1 cup | Sweetness and texture | Don’t overmix after adding |
| Vanilla Extract | 2 teaspoons | Flavor enhancement | Use pure vanilla, not imitation |
| Granny Smith Apples | 4 large | Tartness and texture | Peel and dice uniformly |
| Brown Sugar | ¾ cup | Caramel flavor base | Pack firmly when measuring |
| Heavy Cream | 1 cup | Richness and smoothness | Room temperature works best |
| Unsalted Butter | ½ cup | Flavor and moisture | Use high-quality butter |
| Graham Crackers | 1½ cups crushed | Crust foundation | Crush to fine crumbs |
| Ground Cinnamon | 1 teaspoon | Warm spice note | Fresh spices make a difference |
When I’m shopping for ingredients, I always make sure my cream cheese is the full-fat variety – never use low-fat substitutes as they’ll affect both texture and flavor. The eggs should be large and at room temperature, which helps create that perfectly smooth filling without lumps. For the apples, I choose firm varieties that won’t turn to mush during cooking.
Step-by-Step Preparation Guide
Preparing the Graham Cracker Crust
I start by preheating my oven to 325°F and wrapping the outside of a 9-inch springform pan with heavy-duty aluminum foil. This step is crucial for preventing water from seeping in during the water bath process.
For the crust, I crush 1½ cups of graham crackers until they’re fine crumbs – I use my food processor, but you can also place them in a sealed bag and crush with a rolling pin. I mix these crumbs with ⅓ cup melted butter and 2 tablespoons of sugar until the mixture resembles wet sand. The key is ensuring every crumb is coated with butter.
I press this mixture firmly into the bottom of my prepared pan, using the bottom of a measuring cup to create an even layer. Then I bake it for 10 minutes until it’s set and lightly golden. This pre-baking step ensures the crust won’t become soggy once the filling is added.
Creating the Caramelized Apples
While the crust is baking, I prepare my caramelized apples. I peel and dice 4 large Granny Smith apples into uniform ½-inch pieces – consistency in size ensures even cooking. In a large skillet over medium heat, I melt 3 tablespoons of butter and add the diced apples along with ½ cup brown sugar, 1 teaspoon cinnamon, and a pinch of salt.
I cook the apples, stirring occasionally, for about 8-10 minutes until they’re tender but still hold their shape. The sugar will caramelize and coat the apples in a glossy, amber sauce. I remove them from heat and let them cool while I prepare the cheesecake filling.
Mastering the Cheesecake Filling
The filling is where patience truly pays off. I beat 32 ounces of room-temperature cream cheese with an electric mixer until it’s completely smooth and fluffy, about 3-4 minutes. I scrape down the bowl frequently to ensure no lumps remain.
Gradually, I add 1 cup of granulated sugar, beating until well combined. Then comes the crucial part – adding the eggs one at a time, beating just until each is incorporated. Overbeating at this stage can introduce too much air, leading to cracks during baking.
I mix in 2 teaspoons of vanilla extract, ½ cup of sour cream, and ¼ cup of heavy cream until just combined. The mixture should be smooth and creamy without being overbeaten.
Assembly and Baking Process
I pour half of the cheesecake filling over the prepared crust, then distribute half of the caramelized apples evenly over the surface. I pour the remaining filling on top and finish with the rest of the apples, gently pressing them slightly into the surface.
For the water bath, I place the wrapped springform pan in a larger roasting pan and carefully pour hot water until it reaches halfway up the sides of the springform pan. This gentle, moist heat prevents the cheesecake from cracking and ensures even cooking.
I bake the cheesecake for 55-65 minutes until the center is almost set but still slightly jiggly. The edges should be firm and lightly golden. I turn off the oven and crack the door open, allowing the cheesecake to cool gradually for 1 hour before removing it from the water bath.
Crafting the Perfect Caramel Sauce
While the cheesecake cools, I prepare my homemade caramel sauce. In a heavy-bottomed saucepan, I heat 1 cup of granulated sugar over medium-high heat, stirring constantly with a wooden spoon until it melts and turns a deep amber color. This process requires patience and attention – the sugar can go from perfect to burnt in seconds.
Once the sugar is caramelized, I quickly whisk in 6 tablespoons of butter, one piece at a time. The mixture will bubble vigorously, so I’m careful to avoid splattering. Then I gradually add ½ cup of heavy cream, whisking constantly until smooth. I remove it from heat and stir in 1 teaspoon of vanilla and a pinch of sea salt.
The caramel sauce should be smooth and glossy. If it’s too thick, I add a bit more cream; if it’s too thin, I let it cool slightly to thicken naturally.
Cooling and Serving Techniques
| Cooling Stage | Time Required | Temperature | What to Expect |
|---|---|---|---|
| Initial Oven Cool | 1 hour | Oven off, door cracked | Gradual temperature reduction |
| Room Temperature | 2-3 hours | 70°F | Surface sets completely |
| Refrigeration | Minimum 4 hours | 40°F | Filling firms up |
| Overnight Chill | 8-12 hours | 40°F | Optimal texture achieved |
The cooling process is just as important as the baking. I let my cheesecake cool completely at room temperature before refrigerating it for at least 4 hours, though overnight is ideal. This gradual cooling prevents cracking and allows the flavors to meld beautifully.
When I’m ready to serve, I run a thin knife around the edges of the pan before releasing the springform sides. I use a sharp knife dipped in warm water and wiped clean between each cut to ensure clean slices.
Presentation and Garnishing Ideas
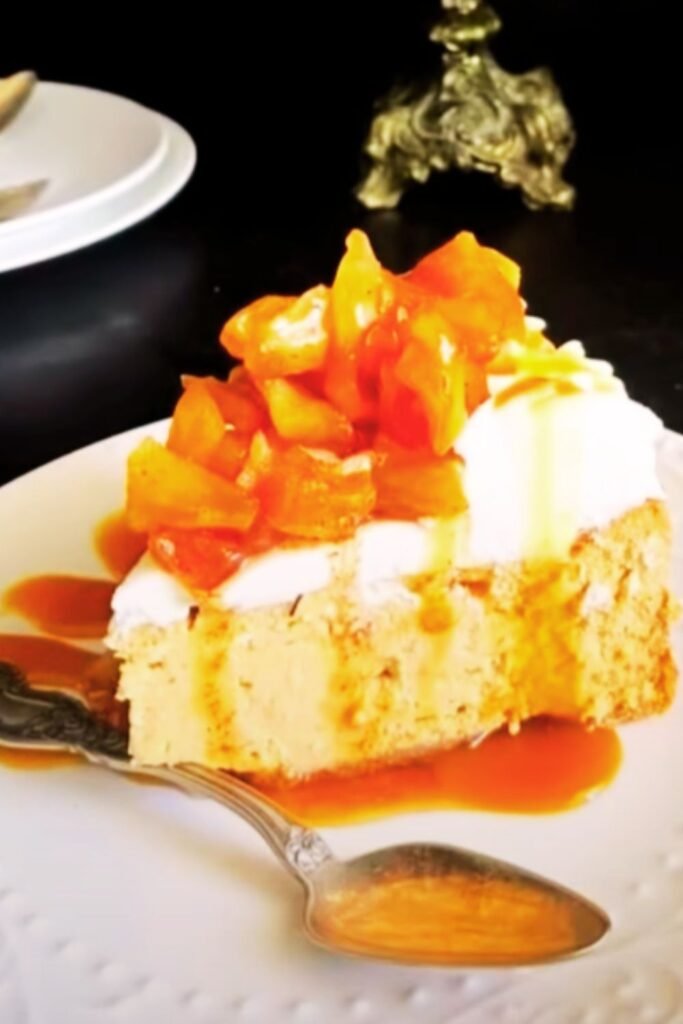
I drizzle the homemade caramel sauce generously over each slice and often garnish with a few extra caramelized apple pieces. Sometimes I add a dollop of freshly whipped cream or a sprinkle of cinnamon for extra visual appeal. Chopped toasted pecans or walnuts make an excellent addition for those who enjoy a bit of crunch.
For special occasions, I like to arrange thin apple slices in a fan pattern on top of each slice and dust with a light sprinkle of powdered sugar. The contrast of colors and textures makes for a restaurant-quality presentation that never fails to impress.
Storage and Make-Ahead Tips
This cheesecake actually improves with time, making it perfect for advance preparation. I store it covered in the refrigerator for up to 5 days, and it freezes beautifully for up to 3 months. When freezing, I wrap individual slices in plastic wrap and store them in airtight containers.
The caramel sauce can be made up to a week in advance and stored in the refrigerator. I simply reheat it gently in the microwave or on the stovetop, stirring until smooth, before serving.
Troubleshooting Common Issues
Cracked Surface : Usually caused by overbeating the filling, sudden temperature changes, or overbaking. Use the water bath method and cool gradually.
Soggy Crust : Often results from not pre-baking the crust or using too much butter. Always pre-bake and ensure proper butter-to-crumb ratio.
Lumpy Filling : Caused by cold cream cheese or overbeating. Ensure all ingredients are at room temperature and mix just until combined.
Sunken Center : Typically from opening the oven door too frequently or underbaking. Maintain consistent oven temperature and test for doneness properly.
I’ve made my share of mistakes over the years, and each one taught me something valuable. The most important lesson I’ve learned is that patience is your best friend when making cheesecake. Rushing any step usually leads to problems that could have been easily avoided.
Nutritional Information and Dietary Modifications
| Nutrient | Per Slice (12 servings) | Daily Value % |
|---|---|---|
| Calories | 485 | 24% |
| Total Fat | 32g | 41% |
| Saturated Fat | 19g | 95% |
| Cholesterol | 165mg | 55% |
| Sodium | 385mg | 17% |
| Carbohydrates | 45g | 16% |
| Fiber | 2g | 7% |
| Sugars | 38g | – |
| Protein | 8g | 16% |
While this is certainly an indulgent dessert, I’ve successfully made lighter versions by substituting some of the cream cheese with Greek yogurt and using sugar alternatives. The texture changes slightly, but the flavor remains delicious.
For those with dietary restrictions, I’ve experimented with gluten-free graham crackers for the crust and dairy-free cream cheese alternatives. While the results are different from the traditional version, they can still be quite satisfying.
Serving Suggestions and Pairings
I love serving this cheesecake with a hot cup of coffee or chai tea – the warm spices complement the apple and cinnamon flavors beautifully. For a more elegant presentation, I sometimes pair it with a glass of dessert wine or port, though sparkling cider makes an excellent non-alcoholic option that echoes the apple theme.
The richness of this dessert means that a little goes a long way. I typically cut it into 12 generous slices, but for smaller appetites or when serving multiple desserts, 16 slices work well too.
Seasonal Variations and Creative Twists
During peak apple season, I love experimenting with different apple varieties. Honeycrisp apples add extra sweetness, while Braeburn apples provide a nice balance of tart and sweet. I’ve even used a mixture of varieties for more complex flavor profiles.
For holiday variations, I sometimes add a tablespoon of bourbon to the caramel sauce or incorporate warming spices like nutmeg and allspice into the apple mixture. A thin layer of salted caramel in the middle of the cheesecake filling creates an extra surprise for guests.
Questions and Answers
Q: Can I make this cheesecake without a water bath? A: While it’s possible, I strongly recommend using the water bath method. It provides gentle, even heat that prevents cracking and ensures a creamy texture. Without it, you risk a drier, more likely to crack cheesecake.
Q: How do I know when my cheesecake is done baking? A: The edges should be set and slightly puffed, while the center should still have a slight jiggle when you gently shake the pan. It will continue to set as it cools. An instant-read thermometer should read 150°F in the center.
Q: Why did my caramel sauce turn grainy? A: This usually happens when the sugar crystallizes during cooking. Make sure your pan and utensils are completely clean, avoid stirring too vigorously, and add the cream slowly while whisking constantly.
Q: Can I use store-bought caramel sauce instead of making my own? A: Absolutely! While homemade caramel has the best flavor, a high-quality store-bought sauce works well in a pinch. I recommend warming it slightly before drizzling for better consistency.
Q: What’s the best way to prevent cracks in my cheesecake? A: Use room temperature ingredients, don’t overbeat the filling, use a water bath, and cool the cheesecake gradually. Most importantly, resist the urge to open the oven door during baking.
Q: How far in advance can I make this cheesecake? A: This cheesecake actually tastes better after sitting overnight, so I often make it 1-2 days ahead. It stays fresh in the refrigerator for up to 5 days, making it perfect for entertaining.
Q: Can I freeze individual slices? A: Yes! I wrap individual slices tightly in plastic wrap and store them in the freezer for up to 3 months. Thaw overnight in the refrigerator before serving.
Q: What if I don’t have a springform pan? A: While a springform pan makes removal easier, you can use a regular 9-inch cake pan lined with parchment paper. Just be extra careful when removing the cheesecake, and you may need to serve it directly from the pan.
Q: Why is my cheesecake filling lumpy? A: This typically happens when the cream cheese isn’t at room temperature or when ingredients are added too quickly. Always start with room temperature cream cheese and add ingredients gradually, mixing just until combined.
Q: Can I make mini cheesecakes instead of one large one? A: Definitely! Use a muffin tin lined with paper cups and reduce the baking time to 18-22 minutes. They’re perfect for portion control and make lovely individual desserts for parties.
This Caramel Apple Cheesecake has become more than just a recipe to me – it’s a way to bring joy and warmth to the people I care about. The process of making it is almost as rewarding as the moment I see someone take that first bite and their eyes light up with delight. Whether you’re making it for a special occasion or just because you want to treat yourself and your loved ones, I promise this dessert will create memories that last long after the last crumb is gone.