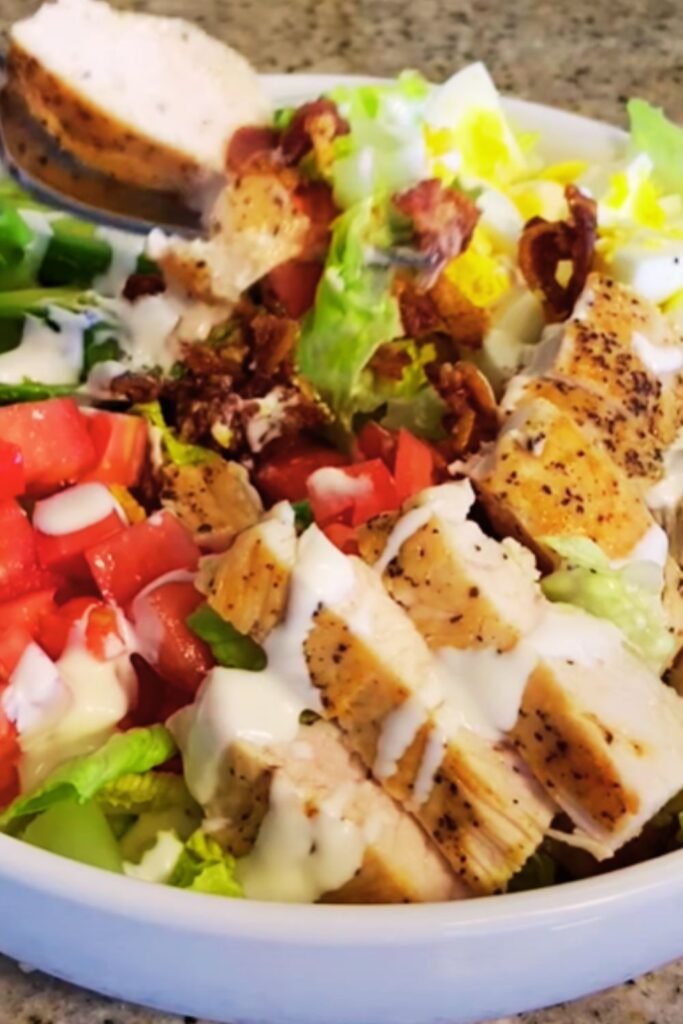
I’ve been making salads for over fifteen years, and I can confidently say that the Crispy Chicken Cobb Salad stands as one of my absolute favorites. There’s something magical about the combination of perfectly seasoned crispy chicken, creamy avocado, tangy blue cheese, and crisp bacon all nestled on a bed of fresh greens. This isn’t just any ordinary salad – it’s a complete meal that satisfies even the heartiest appetites.
The beauty of this recipe lies in its versatility and the way each component complements the others. When I first discovered this combination, I was amazed at how the textures and flavors worked together. The crunch of the chicken coating contrasts beautifully with the smooth avocado, while the salty bacon balances the fresh vegetables perfectly.
What makes my version special is the extra attention I pay to getting that chicken coating incredibly crispy. I’ve experimented with various techniques over the years, and I’ve finally perfected a method that creates an irresistibly crunchy exterior while keeping the meat tender and juicy inside.
Understanding the Cobb Salad Legacy
Before diving into my crispy chicken variation, let me share some background about this classic American salad. The original Cobb salad was created in 1937 at the Brown Derby restaurant in Hollywood. The traditional version typically includes mixed greens, tomatoes, bacon, hard-boiled eggs, avocado, blue cheese, and chicken.
My twist on this classic involves transforming the chicken into a crispy, golden-brown centerpiece that elevates the entire dish. The key is in the preparation – each component needs to be treated with care to achieve the perfect balance of flavors and textures.
Essential Ingredients Breakdown
For the Crispy Chicken:
- Chicken Breasts: I prefer boneless, skinless chicken breasts, pounded to even thickness
- Buttermilk: Creates tenderness and helps the coating adhere perfectly
- All-Purpose Flour: The base for our crispy coating
- Cornstarch: My secret ingredient for extra crispiness
- Seasonings: Paprika, garlic powder, onion powder, salt, and black pepper
For the Salad Base:
- Mixed Greens: I use a combination of romaine lettuce, arugula, and spinach
- Cherry Tomatoes: Adds sweetness and vibrant color
- Bacon: Thick-cut bacon provides the best flavor and texture
- Hard-Boiled Eggs: Creamy protein that complements the other ingredients
- Avocado: Adds richness and healthy fats
- Blue Cheese: Sharp, tangy flavor that ties everything together
- Red Onion: Provides a mild bite and beautiful color contrast

Nutritional Information Table
| Nutrient | Per Serving (1/4 recipe) | Daily Value % |
|---|---|---|
| Calories | 485 | 24% |
| Protein | 42g | 84% |
| Total Fat | 28g | 36% |
| Saturated Fat | 8g | 40% |
| Cholesterol | 145mg | 48% |
| Sodium | 890mg | 39% |
| Total Carbs | 18g | 7% |
| Dietary Fiber | 6g | 21% |
| Sugars | 8g | – |
| Vitamin A | 2,850 IU | 57% |
| Vitamin C | 25mg | 28% |
| Calcium | 180mg | 14% |
| Iron | 3.2mg | 18% |
Step-by-Step Preparation Guide
Preparing the Crispy Chicken
I always start with the chicken because it requires the most time and attention. The key to achieving that perfect crispy coating is patience and proper technique.
First, I take my chicken breasts and pound them to an even thickness of about ¾ inch. This ensures even cooking and prevents the outside from burning while the inside remains raw. I place each breast between plastic wrap and use a meat mallet to gently pound them out.
Next comes the buttermilk marinade. I submerge the pounded chicken in buttermilk with a pinch of salt and let it sit for at least 30 minutes, though I prefer to let it marinate for 2-3 hours in the refrigerator. The acids in the buttermilk break down the proteins, resulting in incredibly tender meat.
For the coating, I combine 2 cups of all-purpose flour with ¼ cup of cornstarch. The cornstarch is my secret weapon – it creates an extra crispy texture that regular flour alone can’t achieve. I season this mixture generously with:
- 2 teaspoons paprika
- 1 teaspoon garlic powder
- 1 teaspoon onion powder
- 1 teaspoon salt
- ½ teaspoon black pepper
When I’m ready to coat the chicken, I remove each piece from the buttermilk, allowing excess to drip off, then dredge it thoroughly in the seasoned flour mixture. I make sure to press the coating firmly onto the chicken to ensure it adheres well.
Cooking the Chicken to Perfection
I heat about 2 inches of oil in a heavy-bottomed pot to 350°F. Temperature control is crucial here – too hot and the coating burns before the chicken cooks through; too cool and the coating becomes soggy and greasy.
I carefully lower the chicken into the oil, being careful not to overcrowd the pot. I cook each piece for about 6-8 minutes, turning once halfway through. The internal temperature should reach 165°F, and the coating should be golden brown and crispy.
After removing the chicken from the oil, I let it drain on a wire rack set over paper towels. This prevents the bottom from becoming soggy while maintaining the crispiness all around.
Ingredient Preparation Timeline
| Component | Prep Time | Best Practice |
|---|---|---|
| Chicken Marinade | 30 min – 3 hours | Longer marination = more tender chicken |
| Bacon Cooking | 8-10 minutes | Cook until crispy but not burnt |
| Egg Boiling | 12 minutes | Start in cold water, boil 10 min, ice bath |
| Avocado Prep | 2 minutes | Slice just before serving to prevent browning |
| Vegetable Washing | 5 minutes | Dry thoroughly for best texture |
| Dressing Making | 3 minutes | Can be made up to 3 days ahead |
Preparing the Supporting Cast
While the chicken is marinating, I prepare the other components. I start by cooking the bacon until it’s crispy but not burnt. I prefer to cook it in the oven at 400°F for about 8-10 minutes, as this gives me more even results than pan-frying.
For the hard-boiled eggs, I use my foolproof method: I place the eggs in a pot, cover with cold water, bring to a boil, then reduce heat and simmer for 10 minutes. Immediately after cooking, I transfer them to an ice bath to stop the cooking process and make them easier to peel.
I wash and dry my greens thoroughly, as any excess moisture will make the salad soggy. I use a salad spinner to remove as much water as possible, then lay the greens on paper towels to air dry while I prepare the other ingredients.
The avocado gets sliced just before serving to prevent browning, and I give it a light sprinkle of lemon juice for extra protection and flavor.
Creating the Perfect Dressing
Classic Blue Cheese Dressing
While store-bought dressing works in a pinch, I always prefer making my own. My blue cheese dressing is creamy, tangy, and full of flavor without being overpowering.
Ingredients:
- ½ cup mayonnaise
- ¼ cup sour cream
- 2 tablespoons buttermilk
- 1 tablespoon lemon juice
- 1 teaspoon Worcestershire sauce
- ¼ teaspoon garlic powder
- ¼ cup crumbled blue cheese
- Salt and pepper to taste
I whisk together all ingredients except the blue cheese, then gently fold in the cheese crumbles. I like to leave some larger chunks for texture while ensuring the dressing is well combined.
Alternative Dressing Options
| Dressing Type | Main Ingredients | Flavor Profile |
|---|---|---|
| Ranch | Mayo, buttermilk, herbs | Creamy, herbaceous |
| Honey Mustard | Dijon, honey, oil | Sweet, tangy |
| Balsamic Vinaigrette | Balsamic, olive oil, garlic | Acidic, robust |
| Lemon Herb | Lemon juice, olive oil, herbs | Bright, fresh |
Assembly Techniques for Maximum Impact
The way I assemble this salad makes all the difference in both presentation and eating experience. I use a large, shallow bowl or individual plates, depending on whether I’m serving family-style or plated portions.
I start by creating a bed of mixed greens, making sure they’re evenly distributed. Then I slice the crispy chicken into strips about ½ inch thick. The key is to slice it just before serving to maintain maximum crispiness.
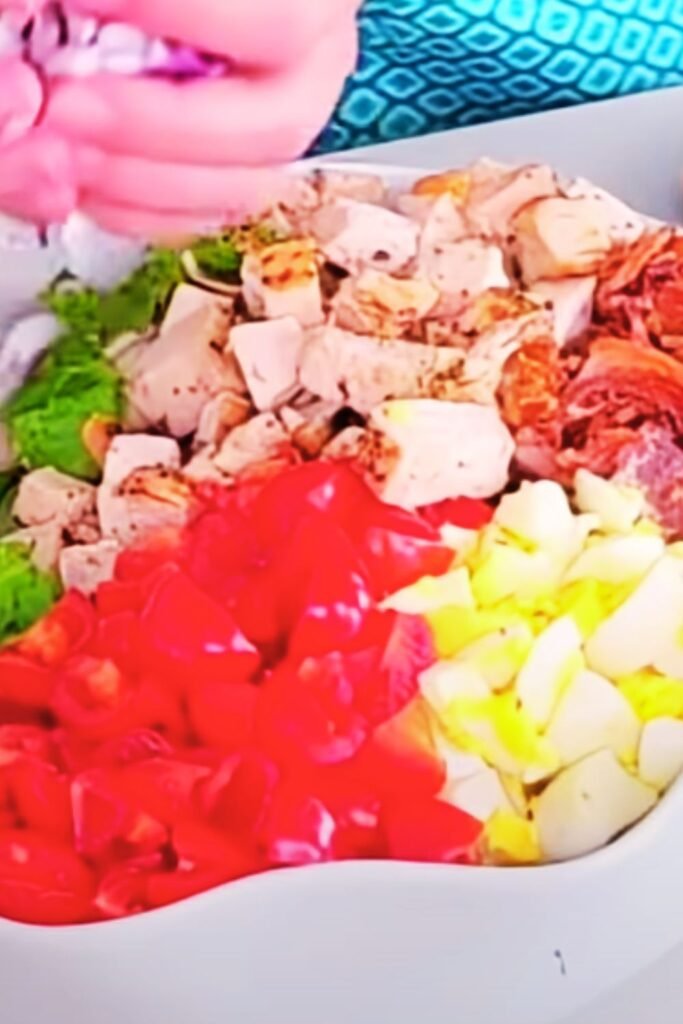
I arrange the chicken strips on top of the greens, then add the other components in distinct sections rather than mixing everything together. This creates visual appeal and allows each person to get the exact combination they prefer in each bite.
The typical arrangement I use is:
- Chicken strips down the center
- Bacon crumbles on one side
- Sliced hard-boiled eggs on another
- Cherry tomatoes scattered throughout
- Avocado slices fanned on one side
- Blue cheese crumbles sprinkled over everything
- Thinly sliced red onion as a garnish
Serving Suggestions and Variations
This salad is substantial enough to serve as a main course for lunch or dinner. I typically serve it with some crusty bread or dinner rolls on the side, though it’s perfectly satisfying on its own.
For a lighter option, I sometimes serve smaller portions as a starter before a main course. The rich flavors and varied textures make it an excellent appetizer for dinner parties.
Popular Variations I’ve Tried
Buffalo Chicken Cobb: I toss the cooked chicken in buffalo sauce before slicing and add some diced celery to the mix. The blue cheese dressing works perfectly with the spicy chicken.
Mediterranean Twist: I substitute feta cheese for blue cheese, add kalamata olives, and use a lemon-herb vinaigrette instead of the creamy dressing.
Southwestern Style: I season the chicken with cumin and chili powder, add black beans and corn, substitute pepper jack for blue cheese, and use a lime-cilantro dressing.
Storage and Meal Prep Tips
One of the great things about this salad is how well it works for meal prep. I can prepare most components ahead of time and assemble just before serving.
Here’s my meal prep strategy:
- Cook and store the chicken in the refrigerator for up to 3 days
- Cook bacon and store in an airtight container for up to 5 days
- Hard-boil eggs and store in the shell for up to 1 week
- Wash and dry greens, store in the refrigerator for up to 5 days
- Make dressing up to 3 days ahead
The only components I don’t prep ahead are the avocado (which I slice fresh) and the final assembly.
Troubleshooting Common Issues
Problem: Soggy Chicken Coating
Solution: Ensure oil temperature is correct (350°F) and don’t overcrowd the pot. Let chicken rest on a wire rack after cooking.
Problem: Wilted Greens
Solution: Make sure greens are completely dry before assembling and don’t dress the salad until just before serving.
Problem: Bland Flavor
Solution: Season each component individually and don’t be afraid to use salt throughout the preparation process.
Nutritional Benefits and Considerations
This salad packs impressive nutritional value despite being indulgent. The chicken provides high-quality protein, while the avocado contributes healthy monounsaturated fats. The mixed greens offer various vitamins and minerals, and the eggs add additional protein and nutrients.
The bacon and blue cheese do add significant sodium and saturated fat, so I sometimes reduce these quantities for a lighter version. The beauty of this salad is its adaptability – you can adjust portions of different ingredients to meet your dietary needs.
Questions and Answers
Q: Can I make this salad ahead of time? I recommend preparing all components separately and assembling just before serving. The crispy chicken will lose its crunch if dressed too early, and the greens will wilt.
Q: What’s the best way to reheat leftover chicken? I reheat the chicken in a 350°F oven for about 5-7 minutes to restore some crispiness. Avoid microwaving as it will make the coating soggy.
Q: Can I use chicken thighs instead of breasts? Absolutely! Chicken thighs will be even more flavorful and juicy. Just adjust the cooking time as needed to reach an internal temperature of 165°F.
Q: How do I prevent the avocado from browning? Slice the avocado just before serving and toss with a little lemon or lime juice. If you must prep ahead, store cut avocado with the pit and cover tightly.
Q: Is there a healthier version of this salad? You can bake the chicken instead of frying, use turkey bacon, reduce the cheese quantity, and use a lighter dressing like vinaigrette.
Q: What other greens work well in this salad? Mixed spring greens, butter lettuce, or even kale (massaged with a little olive oil) work wonderfully. I avoid iceberg lettuce as it lacks flavor and nutrition.
Q: Can I substitute the blue cheese? Certainly! Feta, goat cheese, or even sharp cheddar work well. Each will give the salad a different flavor profile.
Q: How long does the homemade dressing last? My blue cheese dressing keeps well in the refrigerator for up to 5 days in an airtight container. Give it a good stir before using.
This Crispy Chicken Cobb Salad has become a staple in my kitchen, and I’m confident it will become one of your favorites too. The combination of textures and flavors creates a satisfying meal that feels both indulgent and nourishing. Whether you’re cooking for family dinner or entertaining guests, this salad never fails to impress.