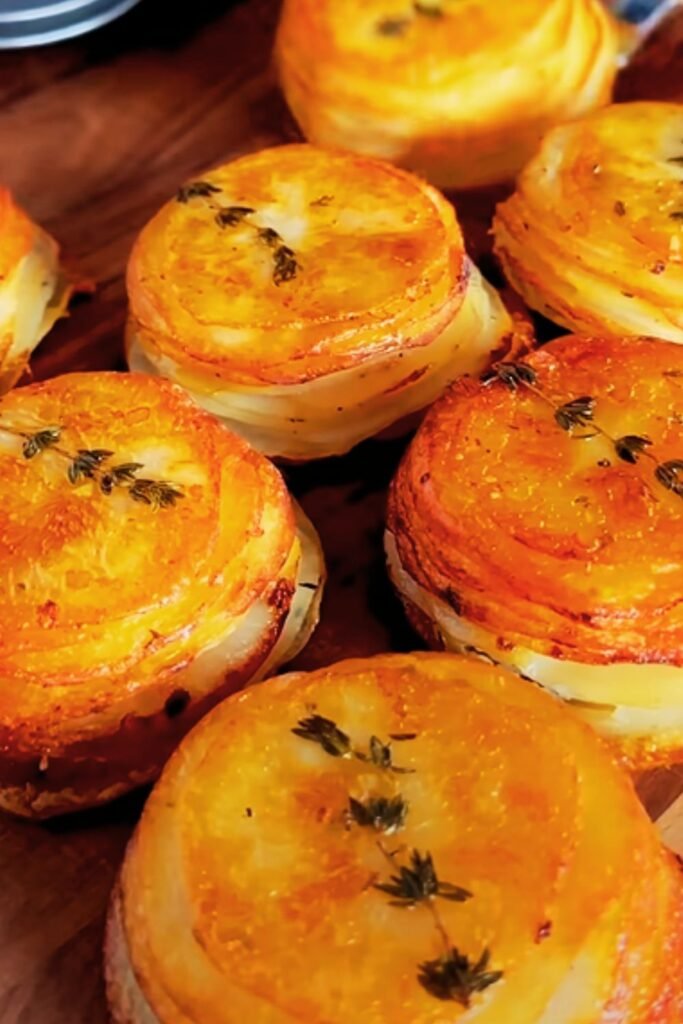
There’s something magical about the humble potato. Versatile, comforting, and capable of transforming into countless delicious forms – one of which has completely stolen my heart. I’m talking about crispy potato stacks: those impressive-looking towers of thinly sliced potatoes that are crispy on the outside, tender on the inside, and absolutely bursting with flavor.
When I first discovered potato stacks, I was immediately drawn to their elegant presentation. Those perfectly aligned layers of golden-brown potatoes looked like something from a fine dining establishment. But appearances can be deceiving – in the best possible way! These stacks may look fancy, but they’re actually quite simple to prepare.
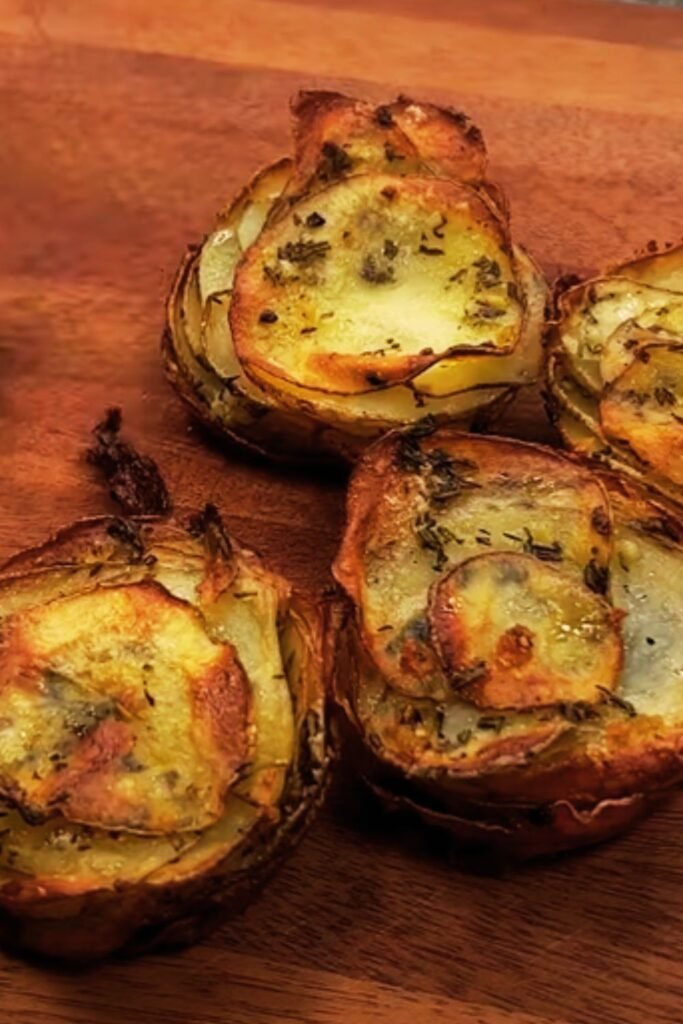
What truly sets potato stacks apart is their magnificent texture. Each slice becomes wonderfully crispy around the edges while the centers remain luxuriously creamy. The contrast is simply divine. Add to that the endless flavor possibilities, and you’ve got yourself a side dish that frequently outshines the main course.
In this article, I’ll share my tried-and-true recipe for creating the perfect crispy potato stacks. We’ll explore variations, troubleshoot common issues, and discover how to customize these delightful towers to your taste preferences. Whether you’re looking to impress guests or simply elevate your weeknight dinner, these potato stacks are guaranteed to become a staple in your culinary repertoire.
What Makes The Perfect Potato Stack?
Before diving into the recipe itself, let’s talk about what exactly makes a potato stack worth raving about. The perfect potato stack should have:
- Uniform slices: Even thickness ensures consistent cooking
- Crispy edges: The hallmark of a properly prepared stack
- Tender centers: Creating that perfect textural contrast
- Rich flavor infusion: Butter and seasonings permeating every layer
- Structural integrity: Stacks that hold together when served
Each of these elements contributes to the overall experience of biting into these delectable potato towers. Now, let’s explore the ingredients and tools you’ll need to create potato stack perfection in your own kitchen.
Essential Ingredients & Equipment
The Right Potato Matters
Not all potatoes are created equal when it comes to making potato stacks. Here’s what you should know:
Yukon Gold : My top choice for potato stacks. Their buttery flavor and medium starch content creates the perfect balance between crispy edges and creamy centers.
Russet Potatoes : Higher in starch, they become extremely crispy but can sometimes dry out. Good choice if maximum crispiness is your goal.
Red Potatoes : Lower in starch with a waxy texture that holds shape well but doesn’t crisp up as nicely. Best when you want more defined layers.
Essential Equipment
To achieve potato stack perfection, you’ll need:
- Mandoline slicer: Absolutely crucial for achieving those paper-thin, uniform slices.
- Muffin tin: Creates perfectly portioned individual stacks.
- Pastry brush: For applying butter to each layer (and the muffin cups).
- Sharp knife: A good alternative if you don’t have a mandoline (though slices will be thicker).
Fat Is Your Friend
The fat component is crucial for flavor and texture:
Butter : Creates rich flavor and promotes browning. I prefer unsalted so I can control the salt content.
Olive Oil : Adds fruity notes and helps increase the smoke point when mixed with butter.
Duck Fat : For special occasions – creates exceptional crispness and flavor.
Ghee : Perfect if you want intense butter flavor without the milk solids that can burn.
The Perfect Crispy Potato Stack Recipe
Now that we understand the fundamentals, let’s dive into my signature recipe that never fails to impress.
Ingredients
- 2 pounds (about 4-5 medium) Yukon Gold potatoes, scrubbed clean
- 6 tablespoons unsalted butter, melted
- 2 tablespoons olive oil
- 3 cloves garlic, minced very finely
- 1 tablespoon fresh thyme leaves (or 1 teaspoon dried)
- 1 tablespoon fresh rosemary, finely chopped (or 1 teaspoon dried)
- 1½ teaspoons kosher salt
- ¾ teaspoon freshly ground black pepper
- ½ teaspoon smoked paprika
- ¼ cup freshly grated Parmesan cheese (optional but recommended)
Step-by-Step Preparation
- Preheat your oven to 375°F (190°C) and position a rack in the middle.
- Prepare the flavor base: In a small bowl, combine the melted butter, olive oil, minced garlic, thyme, rosemary, salt, pepper, and smoked paprika. Stir well to combine.
- Prepare your potatoes: Without peeling them (the skins add texture and nutrition), slice the potatoes into very thin rounds (approximately 1/16-inch thick) using a mandoline slicer. If you don’t have a mandoline, use a very sharp knife and try to keep the slices as uniform as possible.
- Prepare your muffin tin: Generously brush the cups of a standard-sized muffin tin with some of your seasoned butter mixture. This prevents sticking and adds flavor to the exterior.
- Build your stacks: Working quickly to prevent the potatoes from oxidizing, place potato slices into the muffin cups, brushing every few layers with the butter mixture. The slices should be slightly overlapping as you stack them. Fill each cup to just above the rim, as the potatoes will shrink during cooking.
- Apply final touches: Drizzle any remaining butter mixture over the tops of your stacks. If using Parmesan, sprinkle it evenly across all stacks.
- Cover and bake: Cover the muffin tin with aluminum foil and bake for 35 minutes.
- Uncover for browning: Remove the foil and continue baking for an additional 25-30 minutes, until the edges are deeply golden and crispy, and the centers are tender when pierced with a knife.
- Rest briefly: Allow the stacks to cool in the muffin tin for 5 minutes. This crucial step helps them set up and maintain their structure.
- Remove and serve: Carefully loosen the edges with a small offset spatula or butter knife, and gently lift each stack out of the muffin cup. Serve immediately while hot and crispy.

Troubleshooting Common Issues
Even experienced cooks can encounter challenges when making potato stacks. Here are solutions to the most common problems:
Common Problems & Solutions
| Problem | Likely Cause | Solution |
|---|---|---|
| Stacks fall apart when removed | Not cooled enough or slices too thick | Allow to cool 5-10 minutes before removing; slice potatoes thinner |
| Potatoes not crispy | Too much moisture or oven temperature too low | Pat potato slices dry before assembling; ensure oven is fully preheated |
| Center potatoes undercooked | Stacks too dense or cooking time too short | Arrange slices more loosely; extend initial covered baking time |
| Edges burning before center cooks | Oven too hot or slices uneven | Lower oven temperature by 25°F; focus on uniform slicing |
| Potatoes sticking to muffin tin | Insufficient greasing | Be more generous with butter/oil on muffin tin surfaces |
| Browning uneven | Poor heat distribution in oven | Rotate muffin tin halfway through uncovered baking time |
| Seasoning tastes bland | Under-seasoned or seasoning not reaching all layers | Season more generously; ensure butter mixture reaches all layers |
Flavor Variations to Keep Things Interesting
One of the things I love most about potato stacks is their versatility. Here are some of my favorite flavor variations to try:
Mediterranean
- Add 1 tablespoon finely chopped sun-dried tomatoes
- Substitute fresh oregano for the rosemary
- Sprinkle with crumbled feta instead of Parmesan
- Finish with a drizzle of quality olive oil and lemon zest
Steakhouse Style
- Increase black pepper to 1 teaspoon
- Add 1 tablespoon minced shallots to the butter mixture
- Use aged Gruyère instead of Parmesan
- Garnish with chives just before serving
Spicy Southwest
- Add ½ teaspoon cumin and ¼ teaspoon cayenne to the butter mixture
- Incorporate 1 tablespoon finely chopped jalapeño
- Substitute cilantro for the thyme
- Top with crumbled cotija cheese and lime zest
Autumn Harvest
- Add ¼ teaspoon ground nutmeg and cinnamon
- Include 1 tablespoon finely chopped sage
- Finish with a drizzle of maple syrup
- Garnish with crushed pecans
Make-Ahead and Storage Tips
While crispy potato stacks are best enjoyed fresh from the oven, there are ways to prep them ahead and store leftovers properly:
Make-Ahead Options:
- Slice and store: Slice potatoes and store them in cold water in the refrigerator for up to 24 hours. Drain and pat dry thoroughly before assembling.
- Assemble and refrigerate: Assemble the stacks in the muffin tin, cover tightly with plastic wrap, and refrigerate for up to 8 hours before baking. Allow an extra 5-10 minutes of baking time if starting from cold.
- Par-bake option: Bake covered for 30 minutes, then cool completely. Refrigerate in the muffin tin covered with foil. Finish the uncovered baking portion (30-35 minutes) just before serving.
Storage & Reheating:
- Refrigerator: Store cooled leftovers in an airtight container for up to 3 days.
- Freezer: Flash-freeze individual stacks on a baking sheet, then transfer to a freezer bag. Freeze for up to 1 month.
- Reheating: For best results, reheat in a 350°F oven for 10-15 minutes until hot and crispy again. Avoid microwave reheating as it makes the potatoes soggy.
Serving Suggestions
Potato stacks pair beautifully with many main dishes and can be served in various settings:
Main Course Pairings
- Roasted chicken or turkey
- Grilled or pan-seared steak
- Baked salmon or other fish
- Roasted vegetable medley for a vegetarian option
- Braised short ribs for special occasions
Presentation Ideas
- Serve on a wooden board with fresh herbs scattered around for a rustic look
- Place individual stacks on small plates with a dollop of crème fraîche and chives
- Create a stack centerpiece on a serving platter surrounded by your protein of choice
- Serve mini versions (made in mini muffin tins) as elegant appetizers
Complementary Side Dishes
- Simple green salad with vinaigrette
- Steamed green vegetables like asparagus or broccoli
- Roasted Brussels sprouts or carrots
- Sautéed mushrooms with herbs
Accompaniments
- Herb-infused sour cream
- Roasted garlic aioli
- Fresh herb oil drizzle
- Balsamic reduction
Nutritional Considerations
For those watching their nutrition, here’s a breakdown of what you can expect from crispy potato stacks and some modification options:
Nutritional Profile Per Serving (1 standard stack):
- Calories: Approximately 180-220 kcal
- Carbohydrates: 25-30g
- Fat: 10-12g
- Protein: 3-4g
- Fiber: 2-3g
Dietary Modifications:
- Lower fat: Reduce butter by half and increase olive oil proportion
- Gluten-free: Already naturally gluten-free
- Vegan: Substitute plant-based butter and omit cheese or use nutritional yeast
- Lower carb: Make thinner stacks or substitute some potato layers with turnip or rutabaga slices
- Higher protein: Add a thin slice of prosciutto or smoked salmon between layers
The Health Benefits of Potatoes
Despite sometimes getting a bad rap in low-carb circles, potatoes actually offer several nutritional benefits:
- Rich in potassium (more than bananas)
- Good source of vitamin C and B6
- Contain resistant starch when cooled (beneficial for gut health)
- Provide filling fiber, especially when skins are included
- Naturally fat-free and sodium-free (until we add butter and salt!)
Questions & Answers About Crispy Potato Stacks
Q: Can I make these without a mandoline slicer? While a mandoline produces the ideal ultra-thin, uniform slices, you can use a sharp chef’s knife or the slicing blade on a food processor. The key is consistency in thickness. Your stacks may need slightly longer to cook if the slices are thicker than 1/16 inch.
Q: Why are my potato stacks still raw in the middle after following the recipe? This typically happens when the potato slices are too thick or packed too tightly. Try slicing thinner, arranging more loosely, or extending the initial covered baking time by 10-15 minutes. Also ensure your oven is properly calibrated to the correct temperature.
Q: Can I use sweet potatoes instead? Absolutely! Sweet potatoes make delicious stacks with a few adjustments. They contain more moisture and sugar, so reduce the oven temperature to 350°F and expect a slightly longer cooking time. They pair wonderfully with cinnamon, nutmeg, and a touch of maple syrup.
Q: Do I need to peel the potatoes? I recommend leaving the skins on for three reasons: added nutrition, enhanced texture, and visual appeal. Just make sure to scrub them thoroughly. If you strongly prefer peeled potatoes, that works too – the stacks will still be delicious but may be slightly less sturdy.
Q: How far in advance can I make these for a dinner party? For optimal crispiness, I recommend the par-baking method mentioned in the make-ahead section. Complete the first 35 minutes of covered baking up to a day ahead, then finish the uncovered portion just before serving. This gives you the best balance of convenience and quality.
Q: My potatoes turned brown while I was slicing them. Is this a problem? This oxidation is normal but can be prevented. Work quickly and place sliced potatoes in cold water with a splash of lemon juice or vinegar if not assembling immediately. Just be sure to thoroughly pat them dry before assembling your stacks.
Q: Can I make one large potato stack instead of individual portions? Yes! Use a well-greased 9-inch cake pan or cast iron skillet. The technique remains the same, but you’ll need to extend the cooking time by about 15-20 minutes. Let it rest for 10 minutes before cutting into wedges to serve.
Q: What’s the best way to achieve maximum crispiness? For extra-crispy stacks, pat the potato slices completely dry before layering, use a slightly higher oven temperature (390°F instead of 375°F) for the uncovered portion, and consider adding a tablespoon of cornstarch to your seasoned butter mixture.

Final Thoughts
Crispy potato stacks represent the perfect marriage of simple ingredients and elegant presentation. They remind us that sometimes the most impressive dishes come from basic components treated with care and attention to detail.
What I love most about this recipe is its adaptability. Whether you’re cooking for a fancy dinner party or a comfortable family meal, these stacks fit right in. They can be dressed up or down, flavored boldly or subtly, and always manage to elicit oohs and aahs when brought to the table.
The contrast between the shatteringly crisp edges and the tender, buttery interiors creates a textural experience that elevates the humble potato to star status. And while they may look intimidating at first glance, I hope this comprehensive guide has shown you just how achievable they really are.
So heat up that oven, pull out your mandoline (carefully!), and prepare to create a side dish that just might become the talk of your next gathering. Trust me when I say that mastering crispy potato stacks is well worth the effort – your taste buds and dinner guests will thank you.
Now go forth and stack those spuds with confidence! I’d love to hear about your potato stack adventures and any creative variations you discover along the way.