When I first attempted General Tso’s chicken at home, I made the classic mistake of thinking I needed a vat of oil and a prayer to achieve that signature crispy exterior. After countless kitchen experiments, burnt fingertips, and one memorable incident involving my smoke detector, I discovered something revolutionary: you can create restaurant-quality General Tso’s chicken without drowning your kitchen in oil or risking third-degree burns.
The secret lies in understanding the science behind achieving that coveted crispy texture while maintaining juicy, tender chicken inside. Through years of perfecting this technique, I’ve developed a method that delivers all the satisfaction of traditional General Tso’s with half the mess and significantly less oil.
Understanding General Tso’s Chicken
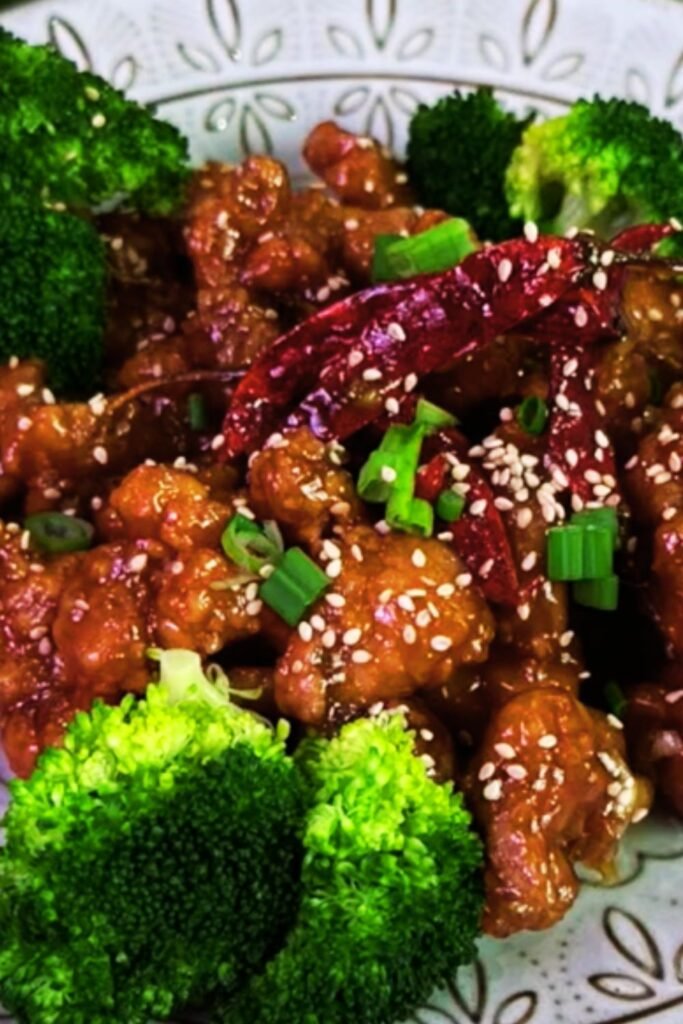
General Tso’s Chicken: A Chinese-American dish featuring bite-sized pieces of chicken coated in a crispy batter, then tossed in a sweet, tangy, and slightly spicy sauce. Named after Qing Dynasty military leader General Tso Tsung-tang, though the dish bears no resemblance to traditional Hunan cuisine.
Velvet Texture: The ideal interior texture of properly prepared General Tso’s chicken – tender, moist, and almost silky in consistency.
Cornstarch Coating: A light dusting technique that creates an ultra-crispy exterior without heavy batters or excessive oil absorption.
Wok Hei: The distinctive “breath of the wok” flavor that comes from high-heat cooking, achievable even in home kitchens with proper technique.
The beauty of this no-deep-fry method lies in its accessibility. I remember the first time I successfully achieved that satisfying crunch using just a regular skillet and a few tablespoons of oil. The chicken emerged golden, crispy, and absolutely delicious – without the lingering smell of oil that usually haunts my kitchen for days.
The Science Behind Crispy Without Deep-Frying
My journey to master this technique taught me that achieving crispiness isn’t just about oil quantity – it’s about surface area, moisture control, and temperature management. When chicken pieces are properly prepared and cooked at the right temperature, they develop a beautiful crust that rivals any deep-fried version.
The key factors I’ve identified through extensive testing include:
- Moisture removal: Patting chicken completely dry before coating
- Cornstarch ratio: Using the perfect balance for maximum crispiness
- Oil temperature: Maintaining consistent heat for even browning
- Spacing: Avoiding overcrowding to prevent steaming
Essential Ingredients Breakdown
| Ingredient | Quantity | Purpose | Substitution Options |
|---|---|---|---|
| Chicken Thighs (boneless) | 2 lbs | Main protein, stays moist | Chicken breast (reduce cooking time) |
| Cornstarch | 1/2 cup | Primary coating for crispiness | Potato starch, tapioca starch |
| All-Purpose Flour | 1/4 cup | Binding agent | Rice flour, gluten-free flour |
| Egg White | 1 large | Coating adhesion | Whole egg, buttermilk |
| Soy Sauce | 3 tbsp | Umami base | Tamari, coconut aminos |
| Rice Vinegar | 2 tbsp | Acidity balance | White vinegar, apple cider vinegar |
| Brown Sugar | 1/3 cup | Sweetness and caramelization | Coconut sugar, maple syrup |
| Fresh Ginger | 2 tbsp minced | Aromatic foundation | Ground ginger (1 tsp) |
| Garlic | 4 cloves minced | Flavor depth | Garlic powder (1 tsp) |
| Dried Red Chilies | 4-6 pieces | Heat element | Red pepper flakes, fresh chilies |
| Green Onions | 3 stalks | Fresh garnish | Chives, regular onions |
| Sesame Oil | 1 tsp | Finishing flavor | Toasted sesame oil preferred |
| Vegetable Oil | 3-4 tbsp | Cooking medium | Peanut oil, canola oil |
My Foolproof Preparation Method
The preparation phase is where I see most home cooks stumble. I’ve refined this process to eliminate guesswork and ensure consistent results every time.
Chicken Preparation Steps
I start by selecting the right cut – boneless, skinless chicken thighs are my preference because they remain juicy even if slightly overcooked. The marbling of fat throughout thigh meat provides insurance against dryness.
Step 1: Proper Cutting Technique Cut chicken into uniform 1-inch pieces. I learned this the hard way – inconsistent sizing leads to uneven cooking. Some pieces burn while others remain undercooked.
Step 2: Moisture Control Pat each piece completely dry with paper towels. This step is non-negotiable. Any surface moisture will prevent proper crisping and cause the coating to become soggy.
Step 3: Initial Seasoning Season lightly with salt and white pepper. Allow to rest for 15 minutes. This brief curing period helps draw out additional moisture while seasoning penetrates the meat.
Creating the Perfect Coating
My coating system uses a three-component approach that I’ve perfected through countless iterations:
Primary Coating Mix:
- 1/2 cup cornstarch
- 1/4 cup all-purpose flour
- 1 teaspoon garlic powder
- 1/2 teaspoon white pepper
- 1/2 teaspoon salt
Binding Agent:
- 1 egg white, lightly beaten
- 1 tablespoon soy sauce
- 1 teaspoon rice wine or dry sherry
The egg white provides adhesion without the heaviness of whole eggs, while the soy sauce adds an extra layer of umami that penetrates the coating.
The No-Deep-Fry Cooking Technique
This is where the magic happens. I use what I call the “shallow-fry rotation method” – a technique that achieves deep-fry results with minimal oil.
Heat Management
I heat 3-4 tablespoons of oil in a large, heavy-bottomed skillet over medium-high heat. The oil temperature should reach 350°F (175°C). Without a thermometer, I test by dropping a small piece of coating into the oil – it should sizzle immediately and float to the surface.
Cooking Process
First Phase – Initial Crisping (3-4 minutes): Place coated chicken pieces in a single layer, ensuring no overcrowding. I typically cook in two batches rather than cramming everything together. The initial sizzle should be audible but not violent.
Second Phase – Rotation (2-3 minutes): Using tongs, rotate each piece to expose all surfaces to the hot oil. This rotation technique is crucial – it ensures even browning without the need for complete oil submersion.
Third Phase – Final Crisping (1-2 minutes): Increase heat slightly for the final minute to achieve maximum crispiness. The chicken should be golden brown and register 165°F (74°C) internally.

Sauce Mastery: The Heart of General Tso’s
The sauce is where General Tso’s chicken transforms from simple fried chicken to something extraordinary. My version balances sweet, sour, salty, and spicy elements in perfect harmony.
Sauce Component Analysis
| Component | Primary Ingredient | Flavor Profile | Measurement |
|---|---|---|---|
| Sweetness | Brown Sugar | Caramel notes | 1/3 cup |
| Umami | Soy Sauce | Salty depth | 3 tablespoons |
| Acidity | Rice Vinegar | Bright tang | 2 tablespoons |
| Heat | Dried Chilies | Gentle warmth | 4-6 pieces |
| Aromatics | Ginger & Garlic | Fragrant base | 2 tbsp + 4 cloves |
| Thickening | Cornstarch Slurry | Glossy texture | 2 tsp + 2 tbsp water |
| Finishing | Sesame Oil | Nutty richness | 1 teaspoon |
Sauce Preparation Technique
I prepare the sauce while the chicken cooks, timing everything for simultaneous completion. In a small saucepan, I combine soy sauce, rice vinegar, and brown sugar, whisking until the sugar dissolves completely.
The aromatics – minced ginger, garlic, and dried chilies – go in next. I cook this mixture over medium heat until fragrant, about 30 seconds. The key is not to brown the garlic, which would introduce bitterness.
The cornstarch slurry (2 teaspoons cornstarch mixed with 2 tablespoons cold water) gets whisked in gradually. I’ve learned to add it slowly while stirring constantly to prevent lumps. The sauce should thicken to a glossy, coating consistency within 1-2 minutes.
Assembly and Final Touches
The final assembly is a delicate dance of timing and technique. I remove the crispy chicken from the skillet and quickly drain on paper towels for 30 seconds – just long enough to shed excess oil without losing heat.
Working quickly, I toss the hot chicken with the warm sauce in a large bowl. The residual heat from both components helps the sauce adhere perfectly to the crispy coating without making it soggy.
Fresh elements are crucial at this stage. I fold in sliced green onions and toasted sesame seeds just before serving. These additions provide textural contrast and fresh flavor that cuts through the richness.
Nutritional Comparison: Traditional vs. No-Deep-Fry Method
| Nutritional Aspect | Traditional Deep-Fried | No-Deep-Fry Method | Difference |
|---|---|---|---|
| Calories per serving | 485 | 320 | -165 calories |
| Total Fat | 28g | 12g | -16g |
| Saturated Fat | 6g | 3g | -3g |
| Carbohydrates | 35g | 32g | -3g |
| Protein | 28g | 30g | +2g |
| Sodium | 1,240mg | 980mg | -260mg |
| Cooking Oil Used | 2-3 cups | 3-4 tablespoons | 85% reduction |
This comparison demonstrates the significant health benefits of my no-deep-fry method while maintaining the dish’s essential character and satisfaction level.
Troubleshooting Common Issues
Through my years of perfecting this recipe, I’ve encountered every possible pitfall. Here are the solutions to the most common problems:
Soggy Coating: Usually caused by insufficient moisture removal or overcrowding. Always pat chicken completely dry and cook in smaller batches.
Uneven Browning: Results from inconsistent oil temperature or irregular piece sizes. Maintain steady heat and cut chicken uniformly.
Sauce Too Thick: Add warm water, one teaspoon at a time, while stirring. The sauce should coat the back of a spoon but still flow freely.
Sauce Too Thin: Mix additional cornstarch slurry (1 teaspoon cornstarch + 1 tablespoon water) and add gradually while cooking.
Lack of Crispiness: Often due to low oil temperature or rushing the process. Ensure oil reaches proper temperature before adding chicken.
Serving Suggestions and Pairings
I serve my General Tso’s chicken over steamed jasmine rice, which provides a neutral base that absorbs the flavorful sauce. The rice also helps balance the dish’s intensity.
For vegetables, I prefer simple steamed broccoli or sautéed snap peas. These add color, nutrition, and textural variety without competing with the main dish’s bold flavors.
A light cucumber salad dressed with rice vinegar and a touch of sesame oil provides refreshing contrast. The cool, crisp texture and clean flavor cleanse the palate between bites of the rich chicken.
For a complete meal presentation, I arrange everything on individual plates rather than family-style serving. This allows for better portion control and more attractive presentation.
Storage and Reheating Guidelines
Proper storage maintains the dish’s quality for future enjoyment. I store leftover chicken and sauce separately in airtight containers in the refrigerator for up to three days.
Reheating Method: I reheat the chicken in a 400°F oven for 5-7 minutes to restore crispiness, then toss with gently warmed sauce. Microwave reheating results in soggy coating and should be avoided.
Freezing: The cooked chicken (without sauce) freezes well for up to one month. Thaw overnight in the refrigerator before reheating. I don’t recommend freezing the sauced dish, as the coating becomes mushy upon thawing.
Advanced Variations and Adaptations
Once you’ve mastered the basic technique, several variations can add excitement to your repertoire:
Spicy Version: Double the dried chilies and add fresh sliced jalapeños to the sauce for heat lovers.
Honey Glaze: Replace half the brown sugar with honey for a more complex sweetness and beautiful glossy finish.
Orange Twist: Add fresh orange zest and a tablespoon of orange juice to the sauce for citrus brightness.
Cashew Addition: Toss in roasted cashews just before serving for extra richness and crunch.
Equipment Recommendations
| Equipment | Purpose | Investment Level | Alternative Options |
|---|---|---|---|
| Heavy-bottomed Skillet | Even heat distribution | Medium | Cast iron, carbon steel |
| Digital Thermometer | Oil temperature control | Low | Visual cues (bubbling test) |
| Fine-mesh Strainer | Coating ingredients | Low | Large fork for mixing |
| Tongs | Safe chicken handling | Low | Two forks technique |
| Small Saucepan | Sauce preparation | Low | Use main skillet between batches |
The investment in proper equipment pays dividends in consistent results and cooking enjoyment. However, I’ve successfully made this dish with basic kitchen tools when necessary.
Frequently Asked Questions
Q: Can I use chicken breast instead of thighs? Yes, but reduce cooking time slightly as breast meat cooks faster and can become dry. I recommend pounding breast pieces to even thickness for uniform cooking.
Q: How do I know when the oil is hot enough without a thermometer? Drop a small piece of the coating mixture into the oil. If it sizzles immediately and floats, the temperature is correct. If it burns quickly, reduce heat.
Q: Can I make this dish gluten-free? Absolutely. Replace the all-purpose flour with rice flour and use tamari instead of soy sauce. The texture remains excellent with these substitutions.
Q: Why does my coating fall off during cooking? This usually happens when the chicken isn’t properly dried or the coating isn’t pressed firmly onto the surface. Ensure chicken is completely dry and press coating gently but firmly.
Q: Can I prepare components ahead of time? Yes, you can coat the chicken up to 2 hours ahead and refrigerate. The sauce can be made a day in advance and gently rewarmed before serving.
Q: What’s the best way to achieve restaurant-level flavor at home? The key is high heat and not overcrowding the pan. Cook in smaller batches to maintain oil temperature and achieve proper browning.
Q: How spicy is this dish typically? My version provides gentle warmth rather than intense heat. The dried chilies add flavor complexity more than significant spiciness. Adjust quantity based on your preference.
Q: Can I double the recipe for a crowd? Yes, but cook the chicken in smaller batches to maintain crispiness. The sauce recipe doubles perfectly and can be kept warm while cooking multiple batches.
This no-deep-fry method has revolutionized my approach to General Tso’s chicken, making it accessible for regular weeknight cooking while maintaining all the flavors and textures I crave. The technique transfers beautifully to other crispy chicken dishes, opening up a world of possibilities for healthier versions of traditionally deep-fried favorites. With practice, you’ll develop the confidence to adjust seasonings and cooking times to suit your preferences, making this recipe truly your own.