There’s something magical about creating your own Thai sweet chilli sauce from scratch. I’ve been making this beloved condiment for years, and I can honestly say that once you taste homemade versus store-bought, you’ll never go back. The balance of sweet, spicy, tangy, and umami flavors in authentic Thai sweet chilli sauce is simply unmatched when made fresh in your own kitchen.
Thai sweet chilli sauce, known as “nam jim kai” in Thailand, translates literally to “chicken dipping sauce.” While it’s traditionally served with chicken, this versatile condiment has found its way into countless dishes across the globe. I first learned to make this sauce during my travels through Thailand, where street vendors would whip up batches fresh daily, filling the air with the most incredible aroma of garlic, chilies, and rice vinegar.
What sets homemade Thai sweet chilli sauce apart is the ability to control every element – the heat level, sweetness, and texture. Store-bought versions often contain preservatives and artificial flavors that mask the bright, fresh taste of quality ingredients. When you make it yourself, you’re working with pure, simple ingredients that create layers of complex flavor.
Understanding Thai Sweet Chilli Sauce
Thai Sweet Chilli Sauce is a translucent, glossy sauce with a perfect balance of sweet and heat. The sauce typically has a syrupy consistency that coats food beautifully while providing bursts of flavor from visible chili flakes and garlic pieces.
Nam Jim Kai refers to the traditional Thai name for this sauce, emphasizing its original purpose as a chicken accompaniment, though its uses have expanded far beyond poultry.
Rice Vinegar serves as the acidic base that balances the sweetness and provides the characteristic tang that makes this sauce so addictive.
Fish Sauce adds the essential umami depth that distinguishes authentic Thai sweet chilli sauce from Western interpretations.
Essential Ingredients Breakdown
The beauty of Thai sweet chilli sauce lies in its simplicity. Each ingredient plays a crucial role in creating the final flavor profile, and understanding these components will help you master the technique.
| Ingredient | Purpose | Quantity (1 cup sauce) | Substitutions |
|---|---|---|---|
| Fresh Red Chilies | Heat and flavor base | 4-6 large chilies | Dried chilies (rehydrated) |
| Garlic | Aromatic foundation | 4-5 cloves | Garlic powder (1 tsp) |
| Rice Vinegar | Acidity and tang | 1/2 cup | White vinegar |
| Sugar | Sweetness balance | 1/2 cup | Palm sugar, brown sugar |
| Fish Sauce | Umami depth | 2 tablespoons | Salt (1 tsp) |
| Water | Consistency control | 1/4 cup | As needed |
| Cornstarch | Thickening agent | 1 tablespoon | Potato starch |
I’ve experimented with different chili varieties over the years, and I’ve found that fresh red Fresno chilies or red jalapeños work exceptionally well for this sauce. They provide the right balance of heat and flavor without overwhelming the other ingredients. If you prefer more heat, add a few bird’s eye chilies to the mix.
The sugar component is where you can really customize your sauce. Traditional recipes call for white sugar, but I’ve had excellent results using palm sugar, which adds a subtle caramel note that complements the chilies beautifully. Brown sugar also works well and adds depth to the overall flavor profile.
Step-by-Step Preparation Method
Creating perfect Thai sweet chilli sauce requires attention to timing and technique. I’ve refined this process through countless batches, and these steps will ensure consistent results every time.
Preparation Phase
Start by preparing all your ingredients before you begin cooking. This sauce comes together quickly, so having everything ready is essential for success.
- Remove stems from chilies and roughly chop them, keeping the seeds for heat
- Peel and mince garlic cloves finely
- Measure out your liquids and have them ready
- Create a cornstarch slurry by mixing cornstarch with cold water
Cooking Process
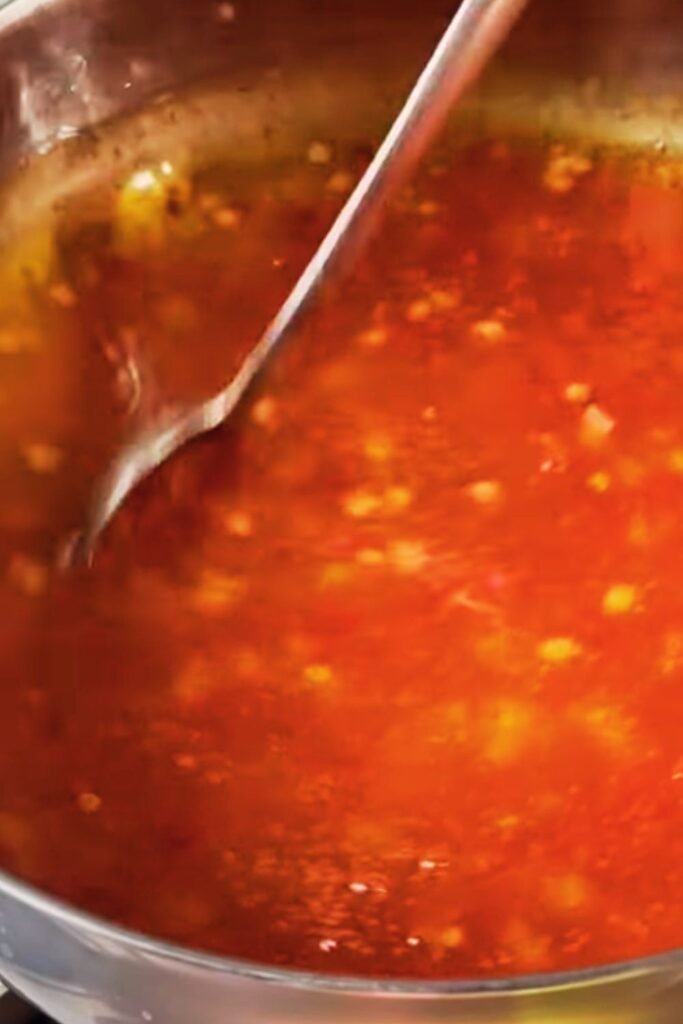
- Create the base: In a medium saucepan, combine chopped chilies, minced garlic, rice vinegar, and water. Bring this mixture to a gentle boil over medium heat.
- Add sweetness: Gradually add sugar while stirring continuously. The mixture will bubble vigorously as the sugar dissolves. Continue cooking for 3-4 minutes until the sugar completely dissolves.
- Build flavor: Add fish sauce and continue simmering. The sauce should maintain a gentle bubble. Cook for another 5-7 minutes, allowing the flavors to meld and the liquid to reduce slightly.
- Thicken the sauce: Slowly drizzle in your cornstarch slurry while stirring constantly. The sauce will begin to thicken immediately. Continue cooking for 2-3 minutes until you achieve the desired consistency.
- Final adjustments: Taste and adjust seasoning as needed. You might want more sugar for sweetness, more fish sauce for umami, or more vinegar for tang.
The entire cooking process should take approximately 15-20 minutes from start to finish. The sauce is ready when it coats the back of a spoon and has a glossy, translucent appearance.
Texture and Consistency Mastery
Achieving the perfect texture is crucial for authentic Thai sweet chilli sauce. The sauce should be thick enough to cling to food but not so thick that it becomes gloppy. I’ve learned that the key is cooking the sauce just long enough to activate the cornstarch without overcooking it.
The ideal consistency is similar to honey – it should pour smoothly but coat whatever you’re dipping into it. If your sauce becomes too thick, simply add a tablespoon of warm water and stir until smooth. If it’s too thin, create another small cornstarch slurry and add it gradually while the sauce is still warm.
Flavor Profile Variations
One of the things I love most about making Thai sweet chilli sauce at home is the ability to customize the flavor profile to suit different preferences and dishes.
Heat Level Adjustments
| Heat Level | Chili Adjustment | Additional Notes |
|---|---|---|
| Mild | Use 2-3 chilies, remove all seeds | Perfect for children |
| Medium | Use 4-5 chilies, keep half the seeds | Standard restaurant level |
| Hot | Use 6-8 chilies, keep all seeds | Add bird’s eye chilies |
| Extra Hot | Add 2-3 bird’s eye chilies | Use gloves when handling |
Sweetness Variations
The sweetness level can dramatically change the sauce’s character. I prefer a balanced approach, but you might want to experiment with different sugar ratios:
- Traditional: Equal parts sugar and vinegar
- Reduced sugar: 1/3 cup sugar to 1/2 cup vinegar
- Extra sweet: 2/3 cup sugar to 1/2 cup vinegar
Aromatic Additions
For special occasions, I sometimes add aromatic elements that elevate the sauce:
- Lemongrass: Add one stalk (bruised) during cooking, remove before serving
- Ginger: A small piece adds warmth and complexity
- Lime leaves: Two leaves provide citrusy fragrance
- Cilantro stems: Add during cooking for herbal notes
Storage and Preservation
Proper storage is essential for maintaining the quality and safety of your homemade Thai sweet chilli sauce. Unlike commercial versions with preservatives, homemade sauce requires careful handling.
Refrigerator Storage
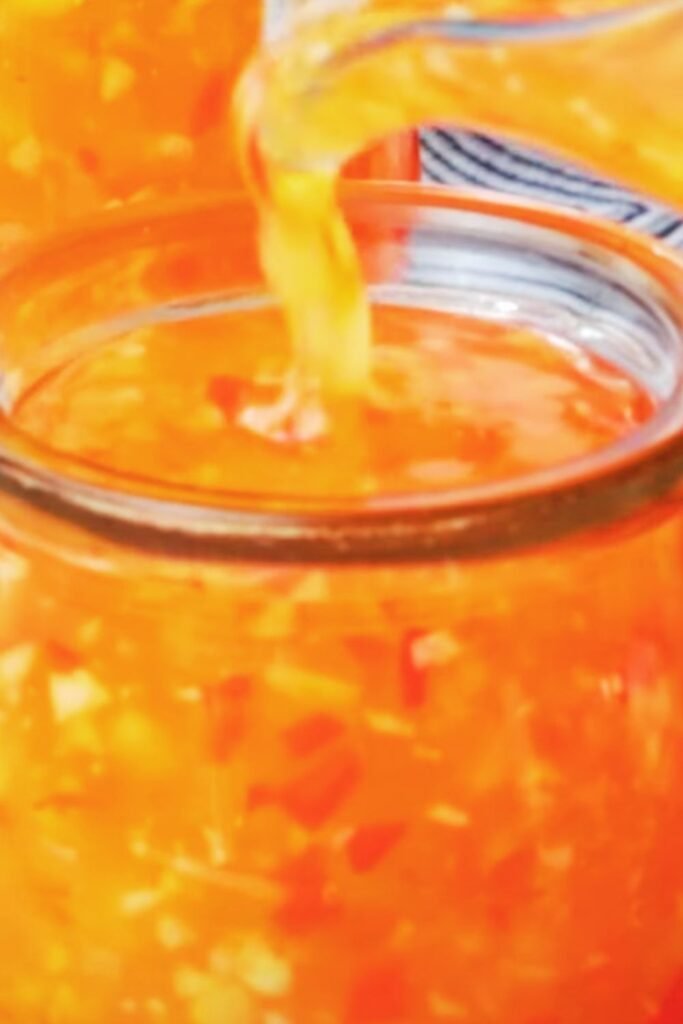
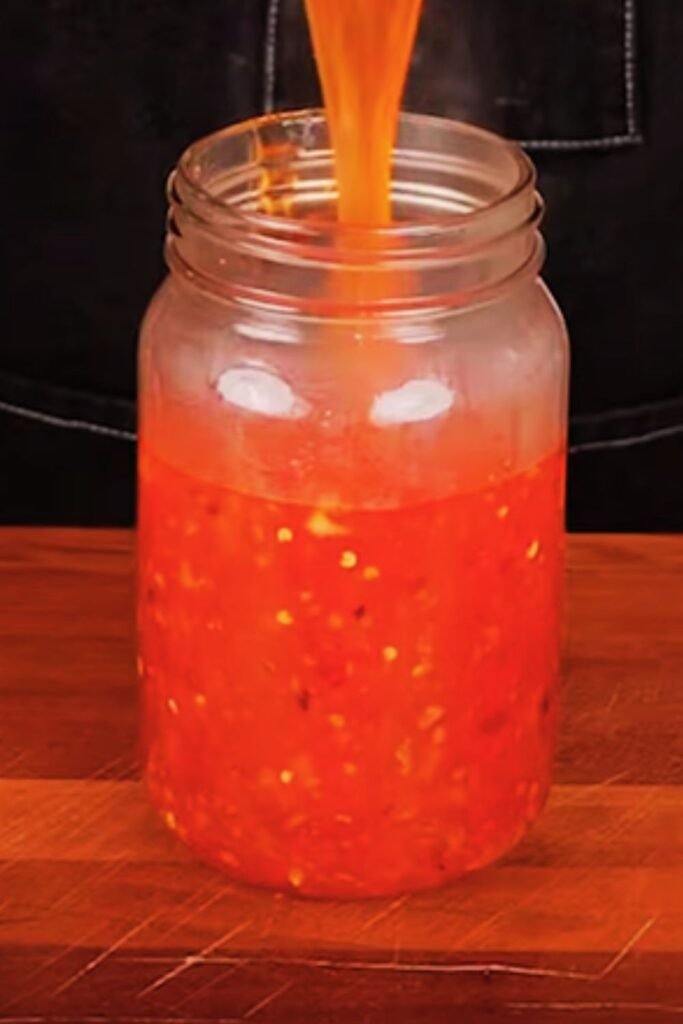
Transfer your cooled sauce to a clean, airtight glass jar. I prefer wide-mouth mason jars because they’re easy to clean and allow for easy access. Properly stored, the sauce will maintain its quality for up to 3 weeks in the refrigerator.
Freezer Storage
For longer storage, Thai sweet chilli sauce freezes beautifully. Pour the sauce into ice cube trays for convenient portions, then transfer frozen cubes to freezer bags. This method allows you to thaw exactly what you need for individual meals.
Signs of Spoilage
Always check your sauce before use. Signs that it’s time to discard include:
- Mold growth on the surface
- Off odors or sour smell
- Separation that doesn’t resolve with stirring
- Bubbling or fermentation activity
Serving Suggestions and Pairings
The versatility of Thai sweet chilli sauce never ceases to amaze me. While it’s traditionally served with chicken, I’ve discovered countless ways to incorporate it into various dishes.
Traditional Applications
- Spring rolls: The classic pairing that showcases the sauce’s ability to complement fresh vegetables and herbs
- Grilled chicken: Brush on during the last few minutes of cooking for a glossy finish
- Fish cakes: The sweet-heat combination balances the richness of fried foods perfectly
- Satay: Use as a dipping sauce alongside peanut sauce for variety
Modern Fusion Uses
I’ve experimented with incorporating Thai sweet chilli sauce into fusion dishes with excellent results:
- Pizza base: Replace tomato sauce for a Thai-inspired pizza
- Stir-fry glaze: Add during the last minute of cooking for instant flavor
- Salad dressing: Thin with lime juice and oil for a unique vinaigrette
- Marinade base: Combine with soy sauce and ginger for meat marinades
Cooking Integration
The sauce works wonderfully when incorporated into cooking rather than just used as a condiment:
- Glazed vegetables: Toss roasted vegetables with sauce in the last 5 minutes
- Noodle dishes: Add to pad thai or lo mein for extra flavor layers
- Soup base: Use as a starting point for hot and sour soups
- Meat glaze: Brush on ribs or chicken wings during grilling
Nutritional Information and Health Benefits
Understanding the nutritional profile of homemade Thai sweet chilli sauce helps you make informed decisions about incorporating it into your diet.
| Nutrient | Per 2 Tablespoons | Daily Value % |
|---|---|---|
| Calories | 45 | 2% |
| Carbohydrates | 11g | 4% |
| Sugars | 10g | – |
| Sodium | 380mg | 16% |
| Protein | 1g | 2% |
| Fat | 0g | 0% |
| Vitamin C | 8mg | 9% |
Health Benefits
Capsaicin from the chilies provides metabolic benefits and may help with pain relief. The compound responsible for the heat in chilies has been studied for its anti-inflammatory properties.
Garlic compounds contribute antioxidant properties and may support cardiovascular health. Fresh garlic contains allicin, which has antimicrobial properties.
Vinegar may help with blood sugar regulation and provides acetic acid, which some studies suggest supports healthy digestion.
Troubleshooting Common Issues
Through years of making this sauce, I’ve encountered various challenges and developed solutions for the most common problems.
Sauce Too Thin
If your sauce isn’t thickening properly, the issue is usually with the cornstarch slurry. Make sure you’re using cold water to create the slurry, and add it slowly while the sauce is at a gentle boil. If the sauce is still too thin after cooking, create a fresh slurry and add it gradually.
Sauce Too Thick
Over-thickening happens when too much cornstarch is added or when the sauce is cooked too long. Simply add warm water, one tablespoon at a time, while stirring until you reach the desired consistency.
Crystallized Sugar
If your sugar crystallizes during cooking, it’s usually because the heat is too high. Reduce the heat and add a splash of water to help dissolve the crystals. Stir gently until smooth.
Unbalanced Flavor
Flavor imbalances are easy to correct:
- Too sweet: Add more vinegar or a pinch of salt
- Too sour: Add more sugar gradually
- Too salty: Add sugar and a splash of water
- Not enough heat: Add chili flakes or hot sauce
Cultural Significance and Authenticity
Thai sweet chilli sauce represents more than just a condiment – it’s a window into Thai culinary philosophy of balancing flavors. The concept of achieving harmony between sweet, sour, salty, and spicy elements is fundamental to Thai cooking.
In Thailand, this sauce is often made fresh daily in restaurants and street food stalls. The preparation is considered an art form, with each cook developing their own signature balance. What I find fascinating is how this simple sauce embodies the Thai principle of “krung gaeng” – the careful balancing of flavors that makes Thai cuisine so distinctive.
Making this sauce at home connects you to this tradition while allowing for personal interpretation. I encourage experimentation within the traditional framework, as this is how authentic recipes evolve and adapt to different palates and available ingredients.
Advanced Techniques and Tips
After making hundreds of batches of Thai sweet chilli sauce, I’ve developed several advanced techniques that elevate the final product.
Roasting Ingredients
For deeper flavor, try roasting your chilies and garlic before adding them to the sauce. This adds a subtle smokiness that complements the sweet-heat profile beautifully. Simply char them lightly in a dry pan before chopping.
Infusion Method
Sometimes I create an infusion by gently heating the vinegar with aromatics like lemongrass or lime leaves before adding other ingredients. This creates a more complex flavor base.
Texture Variations
Experiment with different textures:
- Smooth: Strain the finished sauce for a completely smooth consistency
- Chunky: Leave larger pieces of chili and garlic for texture
- Pureed: Blend everything before cooking for a uniform appearance
Questions and Answers
Q: How long does homemade Thai sweet chilli sauce last in the refrigerator? Properly stored in an airtight container, homemade Thai sweet chilli sauce will maintain its quality for up to 3 weeks in the refrigerator. The high acid content from the vinegar and sugar helps preserve it naturally.
Q: Can I use dried chilies instead of fresh ones? Absolutely! Dried chilies work well and often provide more intense heat. Rehydrate them in warm water for 15 minutes before using. You might need to adjust the water content in your recipe accordingly.
Q: Why is my sauce not thickening properly? The most common cause is inactive cornstarch. Make sure you’re creating a slurry with cold water and adding it to actively simmering sauce. If the sauce has cooled too much, the cornstarch won’t activate properly.
Q: Can I make this sauce without fish sauce? Yes, though it will change the flavor profile significantly. You can substitute with soy sauce for umami, or simply add a pinch of salt. The sauce will be less complex but still delicious.
Q: What’s the best way to adjust the heat level? Start with fewer chilies and add more if needed. Remember that much of the heat comes from the seeds and membranes, so removing these will reduce spiciness while maintaining chili flavor.
Q: Can I double or triple the recipe? Certainly! This sauce scales well. Just be aware that larger batches may require longer cooking times to achieve the proper consistency. Stir frequently to prevent sticking.
Q: Is it normal for the sauce to separate? Some separation is normal, especially if stored for a while. Simply stir before using. If separation is excessive, it might indicate the sauce wasn’t properly emulsified during cooking.
Q: Can I use this sauce as a cooking ingredient? Absolutely! Thai sweet chilli sauce works beautifully as a glaze, marinade base, or stir-fry sauce. Add it during the last few minutes of cooking to prevent burning the sugars.
Q: What’s the difference between homemade and store-bought versions? Homemade versions are fresher, more flavorful, and allow you to control ingredients and consistency. Store-bought versions often contain preservatives and artificial flavors that can mask the natural ingredient flavors.
Q: Can I make a sugar-free version? You can experiment with sugar substitutes, but the texture and flavor will be different. Monk fruit sweetener or erythritol work better than artificial sweeteners for this application.
This homemade Thai sweet chilli sauce will transform your cooking and give you a deep appreciation for the art of flavor balancing. The process is meditative, the results are spectacular, and the satisfaction of creating something this delicious from simple ingredients is unmatched. Whether you’re drizzling it over spring rolls or using it as a glaze for grilled meats, this sauce will become an indispensable part of your culinary repertoire.