When I first discovered the magic of Lotus Biscoff cookies, my dessert game changed forever. There’s something absolutely irresistible about those caramelized, spiced European cookies that makes them perfect for creating show-stopping desserts. Today, I’m sharing my ultimate recipe for a Lotus Biscoff Icebox Cake that requires zero baking skills but delivers maximum flavor impact.
This incredible no-bake dessert has become my go-to for dinner parties, family gatherings, and those moments when I need something spectacular but don’t want to turn on my oven. The beauty of an icebox cake lies in its simplicity – layers of cookies soften into cake-like perfection while mingling with luscious cream layers, creating a dessert that tastes like you spent hours in the kitchen.
What Makes Lotus Biscoff Special?
Before diving into my recipe, let me share why Lotus Biscoff cookies are the star of this dessert. Originally created in 1932 by the Lotus Bakeries in Belgium, these cookies are known for their distinctive caramelized flavor that comes from a unique baking process. The cookies are baked at high temperatures, creating that signature golden color and deep, complex taste that’s simultaneously sweet, spicy, and slightly salty.
Key characteristics of Lotus Biscoff cookies:
- Caramelized sugar creates depth of flavor
- Warm spices including cinnamon and nutmeg
- Crispy texture that softens beautifully when layered
- Natural vanilla undertones
- Perfect balance of sweet and slightly salty notes
Essential Ingredients Breakdown
Creating the perfect Lotus Biscoff Icebox Cake requires understanding each ingredient’s role in the final dessert. Here’s my detailed ingredient analysis:
| Ingredient | Quantity | Purpose | Substitution Options |
|---|---|---|---|
| Lotus Biscoff Cookies | 2 packages (8.8 oz each) | Base structure and flavor foundation | Speculoos cookies, Graham crackers |
| Heavy Whipping Cream | 3 cups | Creates light, airy texture | Coconut cream (chilled) |
| Cream Cheese | 8 oz, softened | Adds richness and stability | Mascarpone cheese |
| Biscoff Cookie Butter | 1 cup | Intensifies flavor profile | Homemade cookie butter |
| Powdered Sugar | 1 cup | Sweetens and stabilizes | Granulated sugar (blend first) |
| Vanilla Extract | 2 teaspoons | Enhances overall flavor | Vanilla bean paste |
| Unflavored Gelatin | 1 packet | Optional stabilizer | Agar powder |
| Whole Milk | 1/2 cup | For soaking cookies | Heavy cream, almond milk |
Step-by-Step Assembly Process
Preparation Phase
I always start by gathering all my ingredients and tools. This dessert requires patience, so having everything ready makes the process smooth and enjoyable.
Essential tools:
- 9×13 inch rectangular dish or large trifle bowl
- Electric mixer (stand or hand mixer)
- Large mixing bowls
- Measuring cups and spoons
- Offset spatula for smooth layers
- Food processor (optional, for crushing cookies)
Layer Construction Method
Step 1: Prepare the Cookie Base I begin by creating my first cookie layer. Instead of simply placing whole cookies, I slightly dampen them with milk. This technique ensures even softening throughout the dessert. I dip each cookie briefly in milk – just enough to moisten but not soak completely.
Step 2: Create the Cream Mixture In my stand mixer, I combine softened cream cheese with Biscoff cookie butter. The key here is ensuring both ingredients are at room temperature for smooth blending. I beat them together until completely smooth and no lumps remain, usually about 3-4 minutes.
Next, I gradually add powdered sugar, beating continuously. The mixture should become light and fluffy. Finally, I incorporate vanilla extract, mixing just until combined.
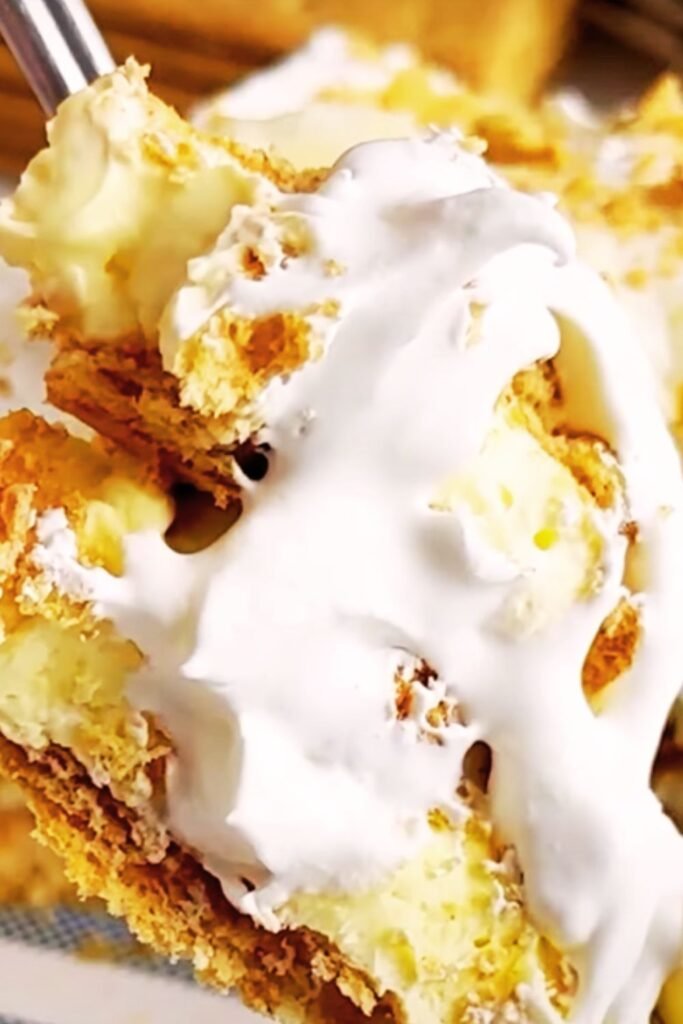
Step 3: Whip the Cream In a separate bowl, I whip heavy cream to soft peaks. This is crucial – over-whipping will result in a grainy texture. I then gently fold the whipped cream into the cream cheese mixture in three additions, maintaining the light, airy texture.
Step 4: Assembly Technique My layering method ensures every bite has perfect balance:
- First layer: Arrange dampened cookies in a single layer at the bottom of my dish
- Second layer: Spread one-third of the cream mixture evenly over cookies
- Third layer: Add another layer of dampened cookies
- Fourth layer: Spread another third of cream mixture
- Fifth layer: Final layer of cookies
- Sixth layer: Remaining cream mixture, smoothed with an offset spatula
Finishing Touches
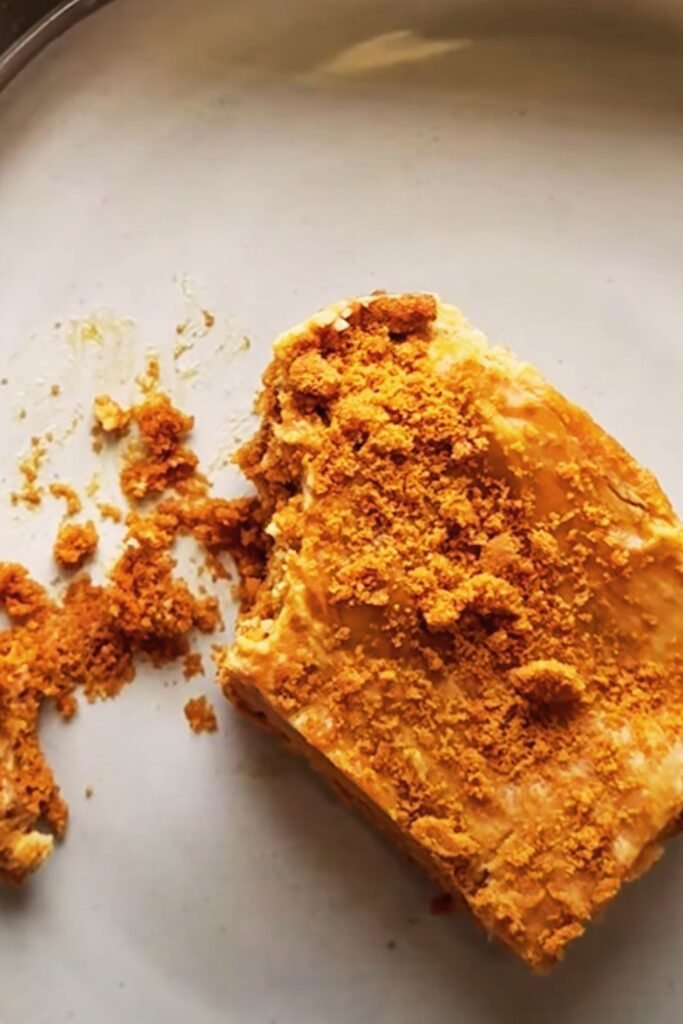
I reserve about 10-12 cookies for crushing into various sizes – some fine crumbs, some chunky pieces. This creates textural interest on top of my final cream layer. I also drizzle additional melted Biscoff cookie butter in decorative patterns.
Chilling and Setting Guidelines
The magic of icebox cakes happens during the chilling process. I refrigerate my assembled cake for a minimum of 6 hours, but overnight (12-24 hours) produces the best results. During this time, several transformations occur:
Hour 1-2: Cookies begin absorbing moisture from cream Hour 3-4: Cookie texture starts softening significantly
Hour 5-6: Layers begin melding together Hour 8+: Cookies achieve cake-like consistency Hour 12+: Flavors fully develop and integrate
Flavor Variations I Love
Chocolate Biscoff Fusion
I sometimes add a layer of chocolate ganache between my cream layers. I make simple ganache with equal parts heavy cream and dark chocolate, cooled to spreading consistency.
Salted Caramel Enhancement
Adding ribbons of salted caramel sauce throughout the layers creates an elevated flavor profile. I make my own caramel or use high-quality store-bought versions.
Coffee Infusion
For coffee lovers, I sometimes dissolve instant espresso powder into the milk used for dampening cookies. This adds sophisticated depth without overwhelming the Biscoff flavor.
Fruit Integration
Fresh berries, particularly strawberries or raspberries, provide beautiful color contrast and bright acidity that balances the rich sweetness.
Nutritional Information and Considerations
| Nutrient | Per Serving (1/12 of cake) | Daily Value % |
|---|---|---|
| Calories | 485 | 24% |
| Total Fat | 28g | 36% |
| Saturated Fat | 17g | 85% |
| Cholesterol | 95mg | 32% |
| Sodium | 320mg | 14% |
| Total Carbs | 54g | 20% |
| Sugars | 38g | – |
| Protein | 6g | 12% |
| Calcium | 120mg | 9% |
| Iron | 2mg | 11% |
Storage and Serving Guidelines
Proper Storage Methods
I always cover my icebox cake tightly with plastic wrap or store it in an airtight container. Properly stored, it maintains quality for up to 5 days in the refrigerator. The texture actually continues improving through day 3.
Serving Recommendations
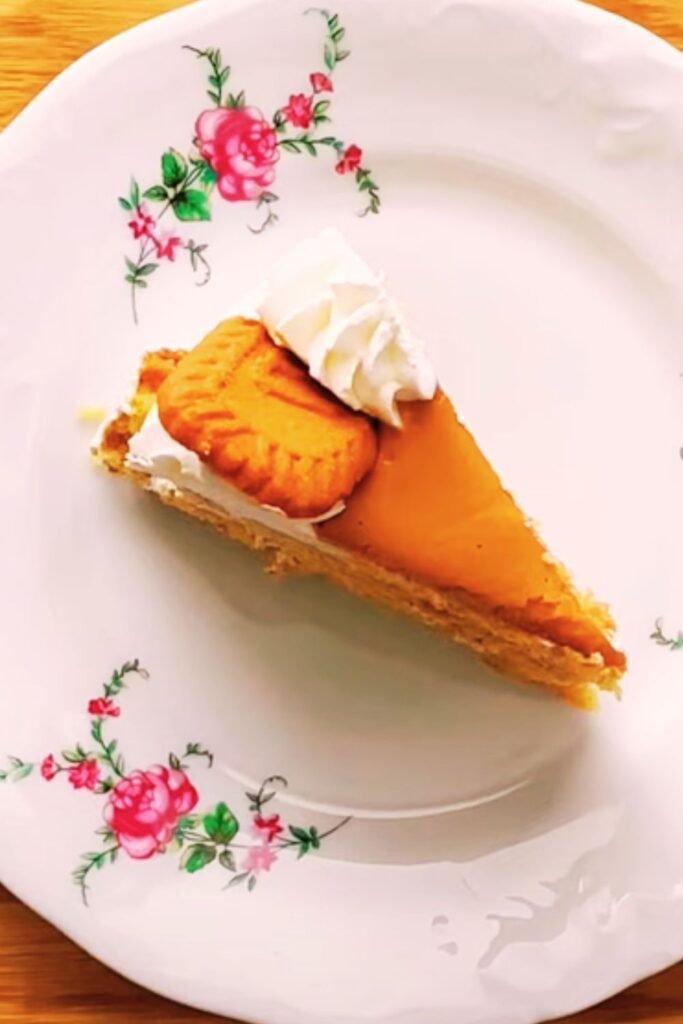
I serve this dessert chilled, cutting with a sharp knife wiped clean between cuts for neat slices. Each serving should showcase all the beautiful layers.
Perfect accompaniments:
- Fresh berries for color and acidity
- Vanilla ice cream for temperature contrast
- Hot coffee or espresso to complement flavors
- Mint leaves for fresh aromatic notes
- Additional cookie butter for ultimate indulgence
Troubleshooting Common Issues
Problem: Layers Sliding Apart
Solution: Ensure cream mixture isn’t too soft when assembling. Chill between layers if needed.
Problem: Cookies Not Softening Properly
Solution: Check milk dampening technique. Cookies should be moist but not soggy.
Problem: Cream Mixture Too Runny
Solution: Ensure cream cheese is properly softened but not warm. Whip cream to proper consistency.
Problem: Uneven Layers
Solution: Use offset spatula and take time smoothing each layer before adding the next.
Advanced Techniques for Perfection
Professional Presentation Tips
I’ve learned several tricks that elevate this dessert from homemade to bakery-quality:
Border Definition: I pipe additional whipped cream around the edges using a star tip for professional appearance.
Temperature Control: I work in a cool kitchen and chill my mixing bowls beforehand for best cream texture.
Flavor Balance: I taste my cream mixture before assembly, adjusting sweetness or cookie butter intensity as needed.
Visual Appeal: I create height variation by slightly crushing some cookies while leaving others whole, creating interesting texture throughout.
Make-Ahead Strategies
This dessert is perfect for entertaining because it must be made ahead. Here’s my timeline for stress-free preparation:
3 Days Before: Shop for ingredients, ensure cream cheese is fresh 2 Days Before: Assemble complete cake, cover and refrigerate
Day Before: Check cake texture, add final garnishes if desired Day Of: Remove 10 minutes before serving for easier cutting
Seasonal Adaptations
Summer Modifications
During hot weather, I sometimes add gelatin to my cream mixture for extra stability. I also incorporate fresh summer fruits between layers.
Winter Enhancements
Cold months call for warming spices. I sometimes add a pinch of cardamom or extra cinnamon to my cream mixture.
Holiday Presentations
For special occasions, I garnish with gold leaf, fresh flowers (food-safe varieties), or seasonal decorations that complement the golden Biscoff color.
Questions and Answers
Q: Can I make this dessert gluten-free? I’ve successfully made gluten-free versions using gluten-free graham crackers or gingersnaps. The texture differs slightly, but the concept works beautifully.
Q: How far ahead can I prepare this cake? I’ve made this up to 3 days in advance with excellent results. The flavors actually improve with time, though texture is optimal within 48 hours.
Q: Can I freeze portions of this dessert? Yes, I freeze individual slices wrapped tightly in plastic wrap for up to 2 months. I thaw them overnight in the refrigerator before serving.
Q: What’s the best way to transport this cake? I use a cake carrier with a tight-fitting lid and keep it level during transport. The chilled cake travels well and maintains its shape.
Q: Can I reduce the sweetness level? Absolutely. I sometimes use less powdered sugar in the cream mixture or incorporate plain cream cheese layers to balance the sweetness.
Q: What happens if I over-whip the cream? If cream becomes grainy, I gently fold in a few tablespoons of unwhipped cream to restore smooth texture.
Q: Can I use different cookie varieties? While Biscoff cookies provide the signature flavor, I’ve experimented with gingersnaps, graham crackers, and even chocolate wafers for different flavor profiles.
Q: How do I know when the cookies have softened enough? The cookies should feel tender when pressed gently with a fork, similar to cake texture. This typically occurs after 8-12 hours of chilling.
Q: Is there a dairy-free version of this recipe? I’ve made successful dairy-free versions using coconut cream, dairy-free cream cheese alternatives, and plant-based milk for dampening cookies.
Q: What’s the secret to clean, neat slices? I use a sharp knife dipped in warm water and wiped clean between each cut. This prevents dragging and creates professional-looking slices.
This Lotus Biscoff Icebox Cake has become one of my most requested desserts, and I understand why. It combines convenience with spectacular results, requiring no special baking skills while delivering restaurant-quality presentation and flavor. The beauty lies in its simplicity – quality ingredients, proper technique, and patience create something truly magical. Whether you’re entertaining guests or treating your family, this dessert never fails to impress and satisfy.