There’s something magical about Biscoff cookies that transforms any dessert into pure indulgence. When I first discovered the world of no-bake cheesecakes, I knew I had to create something that celebrated this beloved spiced cookie butter. This no-bake Biscoff cheesecake combines the rich, caramelized flavor of Biscoff cookies with the silky smoothness of cream cheese, creating a dessert that’s both sophisticated and comfortingly familiar.
What makes this recipe particularly special is its accessibility – you don’t need to turn on your oven or worry about cracking tops or water baths. Instead, you’ll create layers of flavor that develop beautifully in the refrigerator, resulting in a dessert that tastes like it came from a high-end patisserie.
Understanding the Magic Behind No-Bake Cheesecakes
No-Bake Cheesecake: A type of cheesecake that sets through refrigeration rather than baking, typically using gelatin or whipped cream to achieve the proper texture.
Biscoff Spread: A smooth, creamy paste made from crushed Biscoff cookies, offering notes of cinnamon, nutmeg, and caramelized sugar.
Stabilization: The process of ensuring your cheesecake maintains its structure without traditional baking methods, usually achieved through proper ratios of cream cheese, whipped cream, and setting agents.
The beauty of no-bake cheesecakes lies in their forgiving nature. Unlike traditional baked versions, you won’t face issues with cracking, overbaking, or water bath complications. However, achieving the perfect texture requires understanding how different ingredients work together to create that coveted creamy consistency.
Essential Ingredients and Their Roles
| Ingredient | Quantity | Purpose | Substitution Options |
|---|---|---|---|
| Biscoff Cookies | 200g (7 oz) | Crust base and texture | Graham crackers, digestive biscuits |
| Unsalted Butter | 85g (6 tbsp) | Crust binding | Coconut oil (solid), margarine |
| Full-Fat Cream Cheese | 600g (21 oz) | Main body and richness | Mascarpone (reduce by 100g) |
| Biscoff Spread | 200g (7 oz) | Primary flavor | Speculoos spread, homemade cookie butter |
| Heavy Cream | 300ml (1¼ cups) | Lightness and volume | Coconut cream (chilled) |
| Powdered Sugar | 80g (⅔ cup) | Sweetness and stability | Granulated sugar (blend to powder) |
| Vanilla Extract | 2 tsp | Flavor enhancement | Vanilla paste, vanilla bean |
| Gelatin Powder | 1 packet (7g) | Setting agent | Agar powder (use 2 tsp) |
Step-by-Step Preparation Guide
Preparing the Crust Foundation
Creating the perfect crust sets the stage for your entire cheesecake. I always start by ensuring my Biscoff cookies are completely crushed – any large pieces will create an uneven base that affects both texture and presentation.
• Place Biscoff cookies in a food processor and pulse until you achieve fine, uniform crumbs • Melt butter completely and allow it to cool slightly before mixing • Combine cookie crumbs with melted butter until the mixture resembles wet sand • Press firmly into the bottom of a 9-inch springform pan using the back of a measuring cup • Refrigerate the crust for at least 30 minutes while preparing the filling
The key to a stable crust lies in achieving the right moisture level. Too dry, and it will crumble when sliced; too wet, and it becomes soggy. The mixture should hold together when pressed but not feel greasy.
Crafting the Perfect Filling
The filling represents the heart of your cheesecake, where technique matters as much as ingredients. Room temperature cream cheese is crucial – cold cream cheese will create lumps that are nearly impossible to eliminate.
• Remove cream cheese from refrigerator 2-3 hours before use • Sprinkle gelatin over 3 tablespoons of cold water and let bloom for 5 minutes • Heat bloomed gelatin gently until completely dissolved, then cool slightly • Beat cream cheese until completely smooth and free of lumps • Gradually add Biscoff spread, mixing until fully incorporated • Add powdered sugar and vanilla, beating until smooth • Slowly drizzle in cooled gelatin mixture while beating continuously
Achieving the Perfect Whipped Cream
Properly whipped cream provides the lightness that distinguishes no-bake cheesecakes from their dense, baked counterparts. I prefer to slightly under-whip my cream initially, as it will firm up further when folded into the cheese mixture.
• Chill your bowl and beaters in the freezer for 15 minutes before whipping • Pour cold heavy cream into the chilled bowl • Begin whipping on medium speed, gradually increasing to high • Stop at soft peaks – the cream should hold its shape but still look slightly glossy • Gently fold one-third of the whipped cream into the cheese mixture to lighten it • Fold in remaining whipped cream in two additions, maintaining as much air as possible
Advanced Techniques for Professional Results
Temperature Control and Timing
Temperature management throughout the process determines your final texture. Every component should be at the optimal temperature when combined:
Room Temperature Components: Cream cheese, eggs (if using), Biscoff spread Chilled Components: Heavy cream, mixing bowls, beaters Cooled Components: Dissolved gelatin, melted butter (slightly cooled)
Layering and Assembly Strategy
• Pour half the filling over the prepared crust, spreading evenly • Add a layer of crushed Biscoff cookies for textural interest • Top with remaining filling, ensuring smooth, even coverage • Gently tap the pan to release air bubbles • Smooth the top with an offset spatula for professional appearance

Troubleshooting Common Issues
| Problem | Cause | Solution | Prevention |
|---|---|---|---|
| Lumpy texture | Cold cream cheese | Beat longer, strain if necessary | Use room temperature ingredients |
| Loose consistency | Insufficient gelatin | Add more dissolved gelatin | Measure gelatin accurately |
| Cracked surface | Over-mixing after adding cream | Fold gently, don’t beat | Use folding motion for final steps |
| Soggy crust | Too much butter | Press out excess, add more crumbs | Measure butter precisely |
| Won’t set | Warm ingredients | Chill all components properly | Control temperature throughout |
Flavor Variations and Creative Adaptations
While the classic Biscoff version is absolutely divine, I’ve experimented with several variations that showcase different aspects of this versatile base recipe:
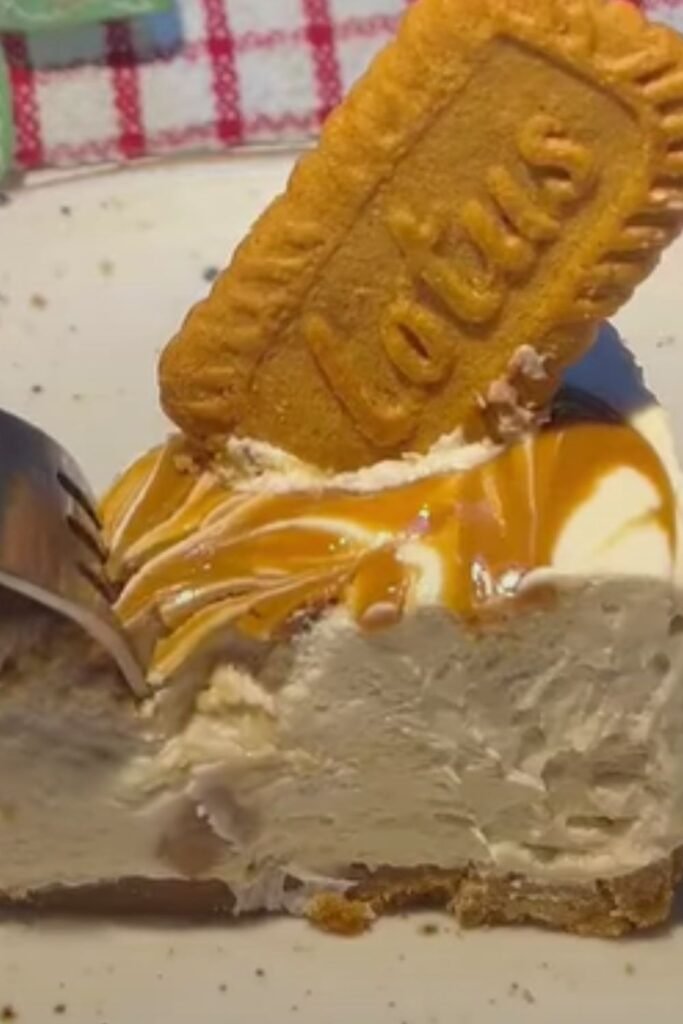
Salted Caramel Biscoff: Swirl 4 tablespoons of salted caramel sauce through the filling before the final fold of whipped cream.
Chocolate Biscoff Fusion: Replace 50g of Biscoff spread with melted dark chocolate and add 2 tablespoons of cocoa powder to the crust.
Coffee Enhanced: Dissolve 2 teaspoons of instant espresso in the gelatin mixture for a sophisticated coffee note that complements the spiced cookies beautifully.
Seasonal Spice Boost: Add ½ teaspoon each of cinnamon and nutmeg to enhance the natural spices in the Biscoff cookies.
Storage and Serving Guidelines
Proper storage ensures your cheesecake maintains its perfect texture and flavor profile:
• Refrigerate for minimum 6 hours, preferably overnight • Cover tightly with plastic wrap to prevent absorption of refrigerator odors • Store for up to 5 days in refrigerator • Freeze individual slices wrapped in plastic wrap and foil for up to 3 months • Thaw frozen slices in refrigerator for 4-6 hours before serving
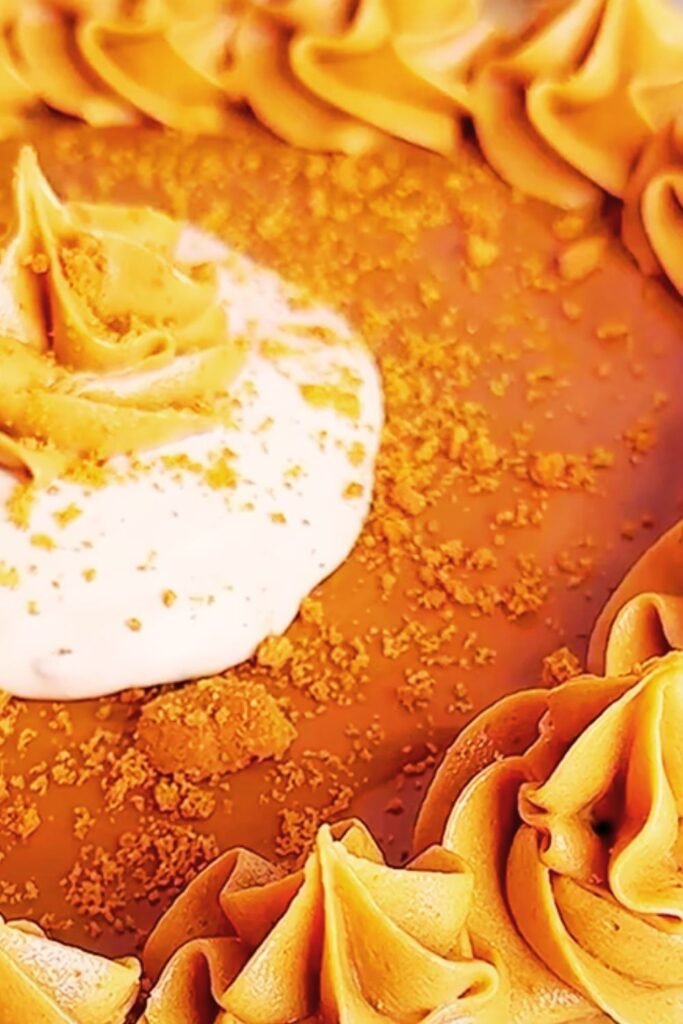
Presentation and Garnishing Ideas
The visual appeal of your cheesecake can elevate the entire dessert experience:
• Dust with powdered sugar just before serving • Drizzle with melted Biscoff spread in decorative patterns • Garnish with whole or halved Biscoff cookies around the edge • Add a dollop of freshly whipped cream and a cookie crumb sprinkle • Create height with stacked cookie pieces for dramatic effect
Nutritional Considerations and Dietary Modifications
| Serving Size | Calories | Fat | Carbs | Protein | Sugar |
|---|---|---|---|---|---|
| 1 slice (1/12 of cake) | 485 | 35g | 38g | 8g | 32g |
| With light cream cheese | 425 | 28g | 38g | 8g | 32g |
| Vegan version | 520 | 38g | 42g | 6g | 35g |
Dietary Adaptations
Gluten-Free Option: Substitute Biscoff cookies with gluten-free gingersnap cookies or make a almond flour crust with added spices.
Reduced Sugar: Replace powdered sugar with sugar-free powdered sweetener, reducing quantity by half initially and adjusting to taste.
Dairy-Free Alternative: Use vegan cream cheese and coconut cream (thick part only from chilled can) with coconut oil instead of butter.
Seasonal Serving Suggestions
This versatile dessert adapts beautifully to different seasons and occasions:
Spring Celebrations: Serve with fresh strawberries and a light berry compote to balance the richness.
Summer Gatherings: Accompany with vanilla ice cream and fresh mint for a cooling contrast.
Autumn Festivities: Present alongside spiced pear slices and a drizzle of honey for seasonal harmony.
Winter Holidays: Pair with hot coffee or spiced chai tea, and dust with cinnamon for warmth.
Professional Tips for Consistent Success
After making this recipe countless times, I’ve discovered several techniques that guarantee professional results every time:
• Always taste your Biscoff spread before using – different brands vary in sweetness and intensity • Use a kitchen scale for accuracy, especially with cream cheese and Biscoff spread • Line your springform pan with parchment paper for easy removal • Run a knife around the edges before refrigerating to prevent cracking • Serve at the optimal temperature – remove from refrigerator 15 minutes before slicing for the best texture
Frequently Asked Questions
Q: Can I make this cheesecake without gelatin?
Yes, you can omit the gelatin, but the texture will be softer and more mousse-like. Ensure you whip the cream to stiff peaks and refrigerate for at least 8 hours for proper setting.
Q: Why did my cheesecake turn out grainy?
Graininess typically results from cold cream cheese or over-mixing after adding the whipped cream. Always use room temperature cream cheese and fold gently during the final steps.
Q: Can I use homemade Biscoff spread?
Absolutely! Homemade spread often has a more intense flavor. You might need to adjust the sweetness in the filling accordingly.
Q: How do I prevent the crust from sticking to the pan?
Line the bottom of your springform pan with parchment paper and lightly grease the sides. This ensures clean removal and perfect presentation.
Q: Can I double this recipe for a larger crowd?
Yes, this recipe doubles well. Use a 10-inch springform pan or make two 9-inch cheesecakes. Increase refrigeration time to ensure proper setting.
Q: What’s the best way to slice clean pieces?
Use a sharp knife warmed in hot water and wiped clean between each cut. This prevents the filling from sticking to the blade and creates clean, professional-looking slices.
Q: Can I add fresh fruit to this recipe?
While you can add fruit as a topping, avoid mixing it into the filling as the moisture content can affect the setting properties of the cheesecake.
This no-bake Biscoff cheesecake represents the perfect marriage of convenience and indulgence. The rich, spiced flavor of Biscoff cookies transforms into an elegant dessert that rivals any bakery creation. Whether you’re preparing for a special celebration or simply craving something extraordinary, this recipe delivers consistent, impressive results that will have everyone asking for the recipe. The beauty lies not just in its taste, but in its forgiving nature – allowing both novice and experienced bakers to create something truly spectacular without the stress of traditional baking methods.