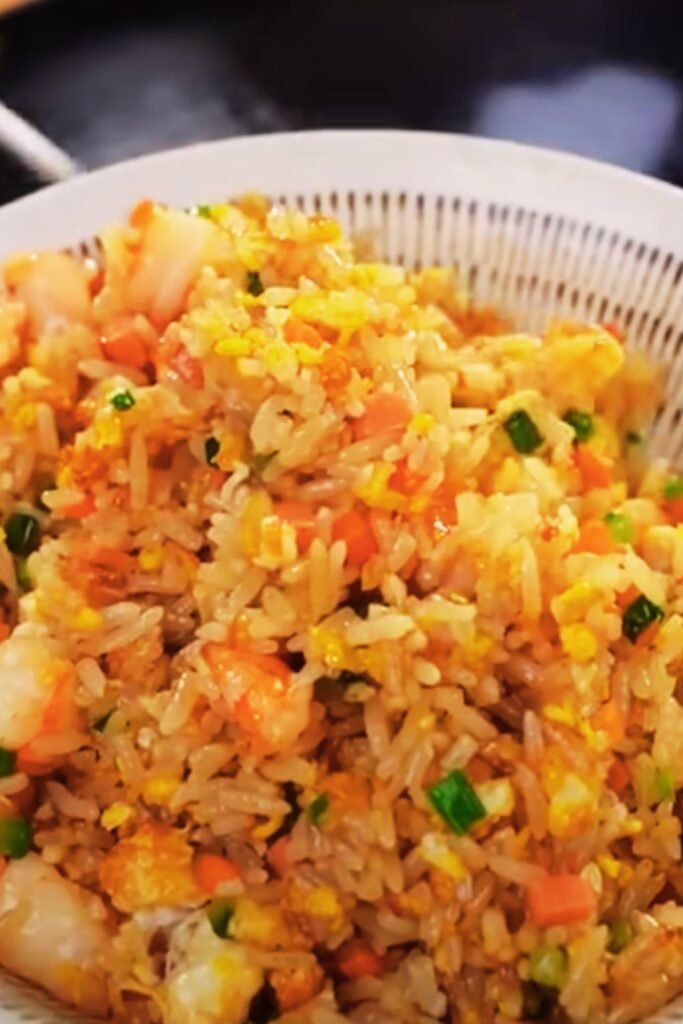
Have you ever watched in awe as a hibachi chef flipped, diced, and sizzled your fried rice to perfection on a blazing hot grill? That theatrical experience is part of what makes hibachi dining so special, but what if I told you that you could recreate that same mouthwatering fried rice in your own kitchen? I’ve spent years perfecting my hibachi fried rice technique, and today I’m sharing all my hard-earned secrets with you.
What Makes Hibachi Fried Rice Special?
Hibachi fried rice isn’t just any fried rice. This Japanese-inspired dish has a distinct flavor profile and cooking method that sets it apart from Chinese or other Asian variations. The term “hibachi” actually refers to the traditional heating device used in Japan, but in American restaurants, it typically means food cooked on a flat teppanyaki grill at high heat.
What truly distinguishes hibachi fried rice is:
- The intense heat that creates a slight char on the rice
- The simple yet perfect seasoning (primarily butter, soy sauce, and garlic)
- The distinctive chopping technique that integrates the ingredients
- The freshness and quality of ingredients
Essential Ingredients for Authentic Hibachi Fried Rice
The beauty of hibachi fried rice lies in its simplicity. While restaurant versions might vary slightly, these core ingredients create that authentic hibachi flavor we all crave:
| Ingredient | Quantity | Notes |
|---|---|---|
| Day-old medium-grain white rice | 4 cups | Must be cold! Fresh rice becomes mushy |
| Unsalted butter | 3-4 tablespoons | The secret ingredient that most home cooks miss |
| Soy sauce | 3-4 tablespoons | Use low-sodium for better control of saltiness |
| Eggs | 2 large | Room temperature works best |
| Sweet onion | 1/2 cup, finely diced | Yellow onion provides the right sweetness |
| Carrots | 1/2 cup, finely diced | For color and sweetness |
| Frozen peas | 1/2 cup | No need to thaw beforehand |
| Green onions | 1/4 cup, chopped | Reserve some for garnish |
| Minced garlic | 1-2 teaspoons | Fresh is best, but jarred works too |
| Sesame oil | 1 teaspoon | A little goes a long way |
| Salt and white pepper | To taste | White pepper is traditional but black works too |
| Optional protein | 1 cup | Chicken, shrimp, beef, or tofu work wonderfully |
The Right Tools for Hibachi-Style Cooking
While a commercial teppanyaki grill would be ideal, most of us don’t have that luxury at home. Here’s what I’ve found works best for home cooking:
- Large carbon steel or cast iron pan – The heavier, the better to retain heat
- Metal spatulas – Preferably with flat edges for chopping and flipping
- High heat cooking oil – Avocado oil or refined peanut oil work well
Don’t worry if your equipment isn’t perfect. I’ve made fantastic hibachi fried rice with just a regular non-stick pan and a wooden spatula. The technique matters more than having professional tools.
Preparation: The Key to Success
If there’s one thing I’ve learned from watching hibachi chefs, it’s that preparation is everything. Here’s how I get ready:
- Rice preparation: Cook your rice the day before. Once cooked, spread it on a baking sheet and let it cool completely before refrigerating overnight. This dries it out and prevents clumping.
- Mise en place: Chop all vegetables and protein beforehand and arrange them in small bowls. Hibachi cooking happens quickly, so having everything ready is crucial.
- Seasoning mix: I combine soy sauce and sesame oil in a small bowl to add at once—this prevents overcooking while measuring ingredients.
- Heat management: Preheat your cooking surface thoroughly before adding any ingredients. A drop of water should sizzle and evaporate immediately on contact.
Step-by-Step Hibachi Fried Rice Method
Now for the main event! Follow these steps carefully:
1. Prepare Your Protein (Optional)
If you’re adding protein to your fried rice:
- Cut protein into small, uniform pieces (about 3/4-inch cubes)
- Season lightly with salt and pepper
- Cook separately in a hot pan with a touch of oil until just done
- Set aside and keep warm
2. Heat Your Cooking Surface
- Set your pan over high heat for at least 2-3 minutes
- Add 1 tablespoon of high-heat oil and swirl to coat
- The surface should be smoking slightly before proceeding
3. Cook the Eggs
- Pour beaten eggs onto the hot surface
- Let them set for about 5 seconds
- Use your spatula to scramble them quickly
- Remove when just set but still slightly moist
- Set aside on a plate
4. Sauté the Vegetables
- Add another tablespoon of oil if needed
- Add onions and carrots first, cooking for 1-2 minutes until softened
- Add garlic and cook for 30 seconds until fragrant
- Toss in frozen peas (they’ll cook quickly from the heat)
5. The Rice Method
- Break up any clumps of cold rice with your hands before adding
- Add 2 tablespoons of butter to the pan and let it melt
- Add rice to the pan in an even layer
- Press down slightly, then let it sit undisturbed for 30 seconds to develop a slight crust
- Begin flipping and mixing the rice using chopping motions with your spatula
- Cook for 2-3 minutes until the rice is heated through
6. Combine and Season
- Add the eggs and cooked vegetables back to the pan
- Add your protein if using
- Pour the soy sauce/sesame oil mixture around the perimeter of the pan
- Add remaining butter
- Mix vigorously, using chopping motions to break up any clumps
- Season with white pepper and salt to taste
- Add green onions and mix one final time
7. Serve
- Transfer to serving plates or bowls
- Garnish with additional green onions
- Serve immediately while hot
Understanding Hibachi Rice Texture
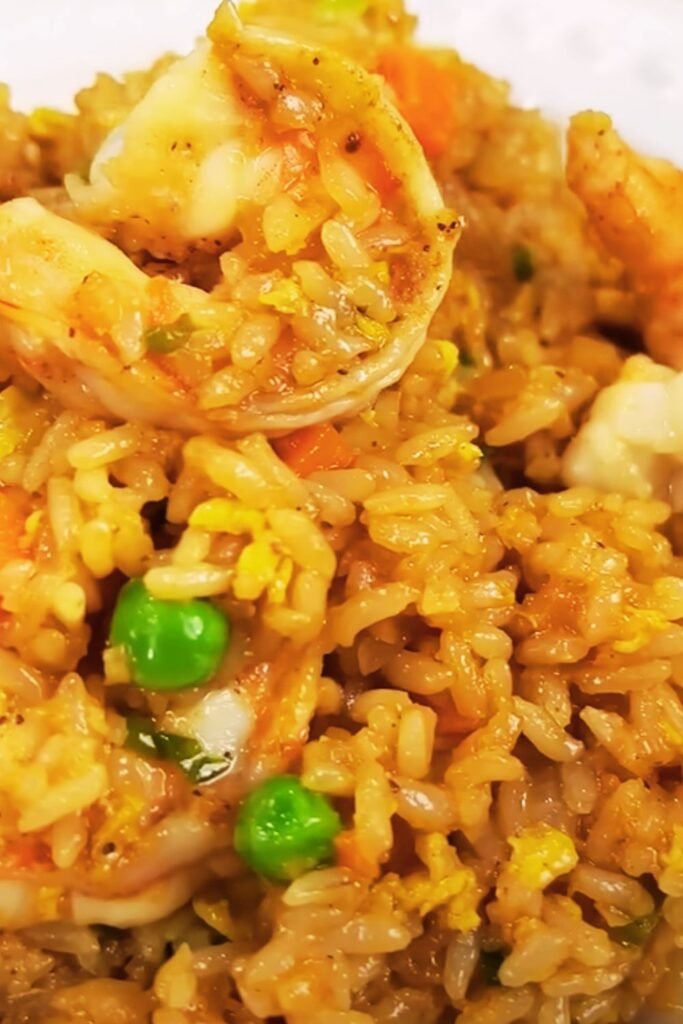
The perfect hibachi fried rice has a specific texture that’s different from other varieties. Each grain should be separate and distinct—never mushy or clumped together. You’re aiming for rice that’s:
- Firm but tender
- Slightly chewy
- Lightly crisped in spots
- Glistening with butter and soy sauce
- Not wet or soggy
Achieving this texture relies on three key factors: using day-old rice, cooking with very high heat, and using the proper chopping and mixing technique.
Common Hibachi Fried Rice Mistakes to Avoid
In my many attempts to perfect this dish, I’ve made plenty of mistakes. Learn from them:
- Using freshly cooked rice – This creates a gummy, mushy mess. Always use day-old rice.
- Cooking at too low heat – Hibachi cooking requires intense heat to create flavor and prevent sogginess.
- Overcrowding the pan – Work in batches if necessary. Too much food lowers the temperature.
- Over-saucing – Too much soy sauce makes the rice wet and salty. Start with less; you can always add more.
- Not breaking up rice clumps – Cold rice needs to be separated before hitting the pan.
- Skipping the butter – Butter is essential for authentic hibachi flavor.
Variations to Try
While I believe in mastering the basic recipe first, here are some delicious variations to explore:
Garlic Butter Hibachi Rice
- Double the garlic
- Add an extra tablespoon of butter
- Finish with a squeeze of lemon
Spicy Hibachi Rice
- Add 1-2 teaspoons of sriracha or sambal oelek
- Include 1/4 teaspoon of cayenne pepper
- Garnish with sliced fresh jalapeños
Veggie-Loaded Hibachi Rice
- Add mushrooms, zucchini, and bell peppers
- Increase vegetable quantities for a more produce-heavy dish
- Consider adding edamame for protein
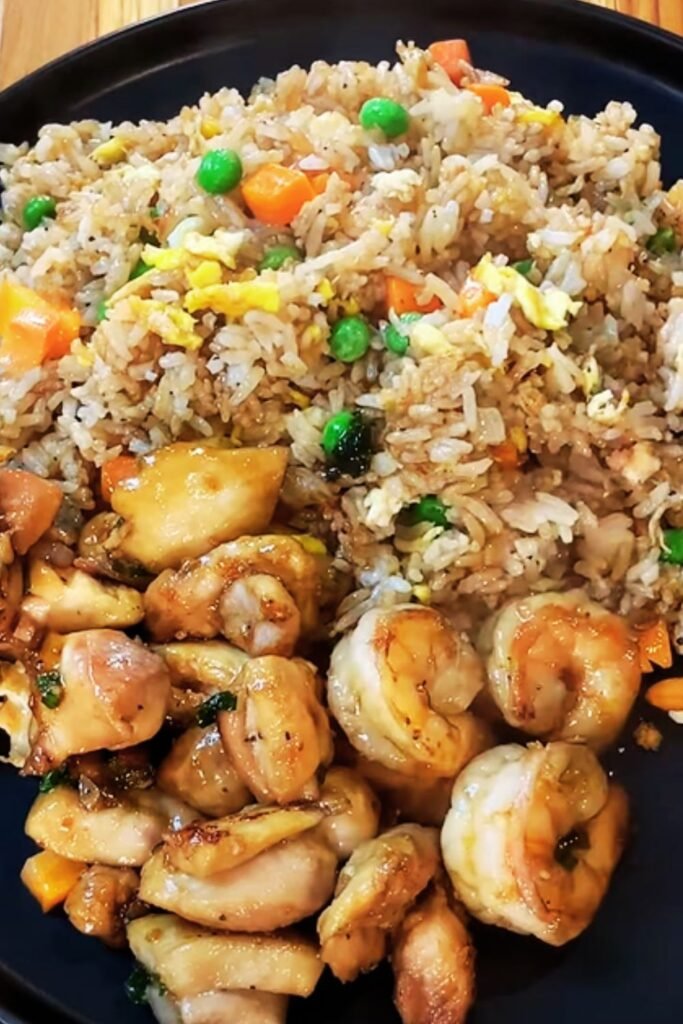
Serving Suggestions
Hibachi fried rice is versatile enough to be a main dish or side. Here’s how I like to serve it:
- As a main dish with grilled vegetables and yum yum sauce
- Alongside hibachi-style proteins like teriyaki chicken or steak
- With a simple miso soup for a balanced meal
- In a bento box with Japanese pickles and edamame
For a complete hibachi experience, serve with clear soup, a simple green salad with ginger dressing, and perhaps some gyoza on the side.
Storing and Reheating Leftover Hibachi Fried Rice
If you’re lucky enough to have leftovers:
| Storage Method | Maximum Time | Reheating Instructions |
|---|---|---|
| Refrigerator | 3-4 days | Heat in pan with a splash of water and teaspoon of butter |
| Freezer | Up to 2 months | Thaw overnight in refrigerator before reheating |
When reheating, always use high heat and add a small amount of butter to refresh the flavors. A quick stir-fry will revive the texture better than microwave reheating.
Nutritional Profile of Hibachi Fried Rice
While hibachi fried rice is delicious, it’s good to be aware of its nutritional aspects:
| Nutrient | Amount per Serving (approx. 1 cup) | % Daily Value |
|---|---|---|
| Calories | 320-380 | – |
| Carbohydrates | 45-55g | 15-18% |
| Protein | 8-12g (more with added protein) | 16-24% |
| Fat | 12-18g | 15-23% |
| Sodium | 600-800mg | 26-35% |
| Fiber | 2-3g | 7-11% |
To create a lighter version:
- Use less butter and more oil
- Opt for low-sodium soy sauce
- Increase the vegetable content
- Use brown rice instead of white (though texture will differ)
Scaling the Recipe for Parties
Hibachi fried rice is perfect for gatherings! Here’s how I approach cooking for a crowd:
- Cook rice 1-2 days ahead and refrigerate
- Prep all vegetables and proteins the day before
- Cook in batches of no more than 4 servings at a time
- Keep finished batches warm in a 200°F oven
- Refresh with a small amount of butter just before serving
For very large groups, consider setting up a DIY hibachi station with a portable induction burner or electric griddle where you can cook fresh batches throughout the event.
Mastering Hibachi Techniques
With practice, you can develop some of the signature hibachi chef moves:
- The chop and scoop – Rapidly chop and mix ingredients using the edge of your spatula
- The flip – Quickly toss ingredients into the air (start with small amounts!)
- The volcano – Stack onion rings and create a steam “eruption” (advanced—try this outdoors first!)
Remember, these techniques take practice. Start slow and build your confidence. The theatrical elements are fun but not necessary for delicious results.
Frequently Asked Questions
Q: Can I use fresh rice instead of day-old rice?
If you absolutely must use fresh rice, here’s a workaround: Spread freshly cooked rice on a baking sheet in a thin layer. Place in the refrigerator uncovered for 30-45 minutes. It won’t be as good as truly day-old rice, but it’s better than using hot, fresh rice.
Q: What’s the secret to the restaurant hibachi flavor?
The restaurant “secret” is a combination of extremely high heat (commercial grills reach 500°F+), generous use of butter, and good quality soy sauce. Some restaurants also use a dash of MSG, which you can add at home if desired (about 1/4 teaspoon).
Q: How can I make this recipe gluten-free?
Simply substitute tamari or certified gluten-free soy sauce for regular soy sauce. Everything else in the basic recipe is naturally gluten-free, but always check ingredient labels to be safe.
Q: Can I make hibachi fried rice with brown rice?
Yes, but the texture will be different. Brown rice works best when it’s slightly undercooked initially (about 5 minutes less than package directions), then cooled overnight. You may need to add an extra tablespoon of butter for moisture.
Q: Do I really need to use butter? Isn’t oil more traditional in Asian cooking?
While traditional Japanese cooking uses oils more commonly, the American hibachi restaurant style specifically uses butter for its rich flavor. This fusion approach is what gives hibachi fried rice its distinctive taste. For a more authentic Japanese flavor, you could use only oil, but it won’t have that signature hibachi restaurant taste.
Q: My rice keeps sticking to the pan. What am I doing wrong?
This usually happens when: 1) The pan isn’t hot enough before adding the rice; 2) The rice is too fresh/wet; or 3) You’re not using enough oil/butter. Make sure your cooking surface is extremely hot and well-oiled before adding the rice.
Q: How do hibachi chefs cook the rice so quickly?
Professional hibachi chefs have extremely hot cooking surfaces and years of experience. They also partially cook some ingredients beforehand. At home, proper prep work and a well-heated cooking surface will help speed things up.
Q: Can I make this vegetarian/vegan?
Absolutely! For vegetarian, simply omit animal protein. For vegan, replace butter with a plant-based butter alternative or additional oil, and consider adding firm tofu or edamame for protein.
A Final Note on Hibachi Fried Rice
Creating restaurant-quality hibachi fried rice at home is all about technique, temperature, and timing. Don’t be discouraged if your first attempt isn’t perfect—mine certainly wasn’t! Each time you make this dish, you’ll develop a better feel for the process.
Remember that the essence of hibachi cooking is about bringing people together around delicious food. So even if your rice doesn’t flip perfectly or your cooking surface isn’t professional-grade, the joy of sharing this special dish with family and friends is what truly matters.
Practice the basic technique until it becomes second nature, then feel free to experiment with your own variations. Before long, you’ll be creating hibachi fried rice that rivals your favorite restaurant’s version—perhaps even surpasses it, since you can customize it to your exact preferences.
Now heat up that pan, gather your ingredients, and prepare to impress yourself and your loved ones with amazing hibachi fried rice made right in your own kitchen!