There’s something magical about the transformation that happens when fresh shrimp meets a hot oven. The natural sweetness intensifies, the texture becomes tender yet firm, and the incredible aroma fills your kitchen with promises of a delightful meal to come. I’ve spent years perfecting my baked shrimp recipes, and I’m thrilled to share everything I’ve learned with you today.
Baking shrimp might sound straightforward, but the difference between merely acceptable and absolutely extraordinary results lies in understanding the nuances of this cooking method. Whether you’re a seafood enthusiast looking to expand your repertoire or someone who’s been hesitant to cook shrimp at home, this comprehensive guide will equip you with all the knowledge and techniques needed to create restaurant-quality baked shrimp dishes right in your own kitchen.
Why Baking is One of the Best Ways to Cook Shrimp
Before diving into specific recipes and techniques, let me share why I’ve fallen in love with baking as a method for preparing shrimp:
- Even Cooking: The consistent heat of an oven ensures your shrimp cook evenly from all sides
- Hands-Off Approach: Unlike stovetop methods that require constant attention, baking allows you to prepare other components of your meal
- Flavor Infusion: The enclosed oven environment helps marinades and seasonings thoroughly permeate the shrimp
- Less Oil Required: Compared to frying, baking requires minimal added fat while still delivering delicious results
- Perfect for Batch Cooking: You can easily prepare large quantities at once, making it ideal for entertaining
I discovered the joy of baked shrimp during a coastal vacation where a local chef shared his secrets with me. What struck me most was how this seemingly simple technique could produce such extraordinary results when done correctly.
Understanding Your Shrimp
Types of Shrimp and Their Characteristics
Before we heat up the oven, let’s talk about selecting the right shrimp. Not all varieties are created equal, and your choice can significantly impact the final dish.
Definition List: Common Shrimp Varieties
White Shrimp : Mild and slightly sweet with a tender texture. These are extremely versatile and excellent for baking with various flavor profiles.
Tiger Shrimp : Recognized by their distinctive striping, these have a more pronounced flavor and firmer texture. They stand up well to bold seasonings and longer baking times.
Pink Shrimp : Sweet and delicate with a hint of mineral flavor. These are ideal for recipes where you want the natural shrimp flavor to shine through.
Rock Shrimp : With a texture and taste similar to lobster, these small but mighty shrimp hold up beautifully in the oven and offer a unique eating experience.
Gulf Shrimp : Known for their clean, sweet flavor and medium texture. These are my personal favorite for most baked applications.
Size Matters: Choosing the Right Shrimp for Baking
Shrimp are sold by count per pound, and selecting the appropriate size for your recipe is crucial for success. Here’s a detailed breakdown:
| Size Designation | Count Per Pound | Best Baking Applications | Approximate Baking Time at 400°F |
|---|---|---|---|
| Colossal | Under 10 | Stuffed shrimp, centerpiece dishes | 12-15 minutes |
| Extra Large | 16-20 | Shrimp scampi, featured protein dishes | 10-12 minutes |
| Large | 21-30 | All-purpose baking, pasta dishes | 8-10 minutes |
| Medium | 31-40 | Casseroles, mixed dishes | 6-8 minutes |
| Small | 41-60 | Quick appetizers, garnishes | 5-6 minutes |
I generally prefer using large or extra-large shrimp for most of my baked recipes. They provide substantial bites while still cooking quickly and evenly. For special occasions, I’ll splurge on colossal shrimp, which make for an impressive presentation.
Fresh vs. Frozen: Making the Right Choice
Here’s a truth that might surprise you: unless you live right on the coast with access to day-boat shrimp, frozen shrimp often offer better quality than “fresh” shrimp at the seafood counter. Most shrimp are frozen shortly after harvesting to preserve freshness, and those displayed as “fresh” have typically been thawed for an unknown period.
When purchasing frozen shrimp:
- Look for IQF (individually quick frozen) shrimp, which allow you to thaw only what you need
- Check that the package is free of ice crystals, which may indicate temperature fluctuations
- Choose packages where you can see the shrimp aren’t damaged or discolored
- Look for wild-caught options when possible, as they typically have better flavor
I always keep a package of high-quality frozen shrimp in my freezer for last-minute meal solutions. When properly thawed, they’re virtually indistinguishable from fresh in baked preparations.
Essential Preparation Techniques
The Perfect Thaw: Bringing Frozen Shrimp to Temperature
Proper thawing is vital for achieving the best texture in your baked shrimp. Here’s my foolproof method:
- Place the frozen shrimp in a colander
- Set the colander in a large bowl
- Run cold water over the shrimp for 5-7 minutes, occasionally tossing them with your hands
- Once thawed, pat thoroughly dry with paper towels before proceeding with your recipe
Alternatively, you can thaw shrimp overnight in the refrigerator, but I find the cold water method more convenient for last-minute meal planning.
To Peel or Not to Peel?
This question generates much debate among shrimp enthusiasts. Here’s my take based on years of experimentation:
Benefits of Leaving the Shell On:
- Protects against overcooking
- Enhances flavor development
- Creates a more succulent texture
- Provides a more interactive eating experience
Benefits of Removing the Shell:
- Allows marinades and seasonings direct contact with the meat
- Makes eating more convenient, especially for guests
- Enables even browning on all surfaces
- Permits butterflying or other preparation methods
For most baked shrimp dishes, I prefer peeling but leaving the tails intact. This compromise offers the clean eating experience of peeled shrimp while preserving the visual appeal and grip-handle that tails provide.
Deveining: A Step You Shouldn’t Skip
The dark “vein” running along a shrimp’s back is actually its digestive tract. While not harmful, removing it improves both the appearance and taste of your dish. Here’s my quick deveining method:
- After peeling, lay the shrimp on its side
- Make a shallow cut along the back with a sharp paring knife
- Use the tip of the knife to gently lift out the dark vein
- Rinse briefly under cold water to remove any residue
For shell-on preparations, use kitchen scissors to cut through the shell and upper portion of the shrimp’s back, then devein as described above.
The Art of Flavoring Baked Shrimp
One of the wonderful characteristics of shrimp is their ability to absorb and complement a vast array of flavors. Let’s explore some winning combinations and techniques.
Marinades vs. Dry Rubs: When to Use Each
Marinade Basics: Marinades work by infusing shrimp with liquid-based flavors. Since shrimp are delicate, they don’t need the tenderizing properties that marinades provide for tougher proteins.
- Marinade Time: Unlike meat, shrimp should only marinate for 15-30 minutes maximum. Extended exposure to acidic ingredients will begin cooking the shrimp (similar to ceviche) and result in a mushy texture.
- Winning Combinations:
- Lemon juice + olive oil + garlic + herbs
- Lime juice + honey + soy sauce + ginger
- Orange juice + chili + cilantro + olive oil
Dry Rub Approach: Dry rubs create a flavorful crust on the outside of the shrimp and work particularly well for high-heat baking methods.
- Application Technique: Pat shrimp completely dry, then toss with a small amount of oil before applying the rub. This helps the seasonings adhere evenly.
- Flavor Profiles to Try:
- Cajun: paprika + cayenne + thyme + oregano + garlic powder
- Mediterranean: dried oregano + lemon zest + garlic powder + black pepper
- Tropical: coconut sugar + chili powder + ground ginger + lime zest
I’ve found that dry rubs work best when you’re looking for a more concentrated flavor punch, while marinades are ideal when you want the flavors to permeate throughout the shrimp.
Creating Complementary Butter and Oil Bases
Many of my favorite baked shrimp recipes involve a flavorful fat base that both prevents sticking and creates a delicious sauce. Here are some combinations I return to again and again:
Classic Garlic Butter Base:
- 4 tablespoons unsalted butter, melted
- 4 cloves garlic, minced
- 1 tablespoon lemon juice
- 1 teaspoon salt
- ¼ teaspoon red pepper flakes
- 2 tablespoons fresh parsley, chopped
Mediterranean Olive Oil Base:
- 3 tablespoons extra virgin olive oil
- 2 cloves garlic, minced
- 1 teaspoon dried oregano
- ½ teaspoon dried thyme
- Zest of one lemon
- ¼ teaspoon salt
Spicy Coconut Base:
- 2 tablespoons coconut oil, melted
- 1 tablespoon red curry paste
- 1 teaspoon honey
- 1 lime, juiced
- 1 tablespoon fresh cilantro, chopped
The key is to create a base that complements your shrimp without overpowering their natural sweetness. I always reserve some of the flavored butter or oil mixture to drizzle over the finished dish just before serving.
Mastering Baking Techniques for Perfect Shrimp Every Time
Temperature and Timing: The Critical Factors
If there’s one lesson I’ve learned from countless shrimp baking sessions, it’s that temperature precision and attentive timing are non-negotiable. Shrimp cook extremely quickly, and the line between perfectly done and rubbery is razor-thin.
Temperature Guidelines:
| Cooking Method | Temperature | Best For |
|---|---|---|
| Standard Baking | 375°F (190°C) | Most marinade-based recipes |
| High-Heat Roasting | 425°F (220°C) | Dry-rubbed shrimp with crispy exteriors |
| Low and Slow | 325°F (165°C) | Larger shrimp in sauce-based dishes |
| Broiling | High broiler setting | Quick cooking with caramelization |
How to Tell When Shrimp Are Perfectly Cooked:
The most reliable indicator is visual: perfectly cooked shrimp form a “C” shape, while overcooked shrimp curl into a tight “O” shape. They should also:
- Turn from translucent to opaque
- Develop a slight pink color all the way through
- Feel firm to the touch but still have some spring
I always err on the side of slightly undercooking, as residual heat will continue cooking the shrimp after removing them from the oven. Remember that smaller shrimp cook faster than larger ones, so adjust your timing accordingly.
Single-Layer Success: Proper Baking Pan Setup
For evenly cooked shrimp with beautiful caramelization, proper arrangement in your baking vessel is essential:
- Choose a pan large enough to arrange all shrimp in a single layer with some space between each piece
- For saucy preparations, use a baking dish with sides at least 2 inches high
- For drier preparations, a rimmed baking sheet works best
- Line your pan with parchment paper for easy cleanup
- If using a marinade or sauce, ensure it covers the bottom of the pan but doesn’t completely submerge the shrimp
I prefer using ceramic or glass baking dishes for most of my shrimp recipes, as they distribute heat evenly and don’t react with acidic ingredients in marinades.
Flipping: Yes or No?
Whether to flip your shrimp halfway through baking depends on your specific recipe:
When to Flip:
- When using a dry rub and seeking even browning
- When baking at high temperatures (400°F+)
- When baking extra-large or jumbo shrimp
When Not to Flip:
- When cooking in a substantial sauce
- When working with smaller shrimp that cook very quickly
- When you’ve arranged toppings on the shrimp that need to stay in place
If flipping is part of your recipe, use tongs rather than a spatula to avoid damaging the delicate shrimp. Gentle handling preserves their beautiful shape and texture.
Five Standout Baked Shrimp Recipes
Now that we’ve covered the fundamentals, let me share some of my most requested baked shrimp recipes. Each highlights different techniques and flavor profiles, giving you a versatile repertoire to draw from.
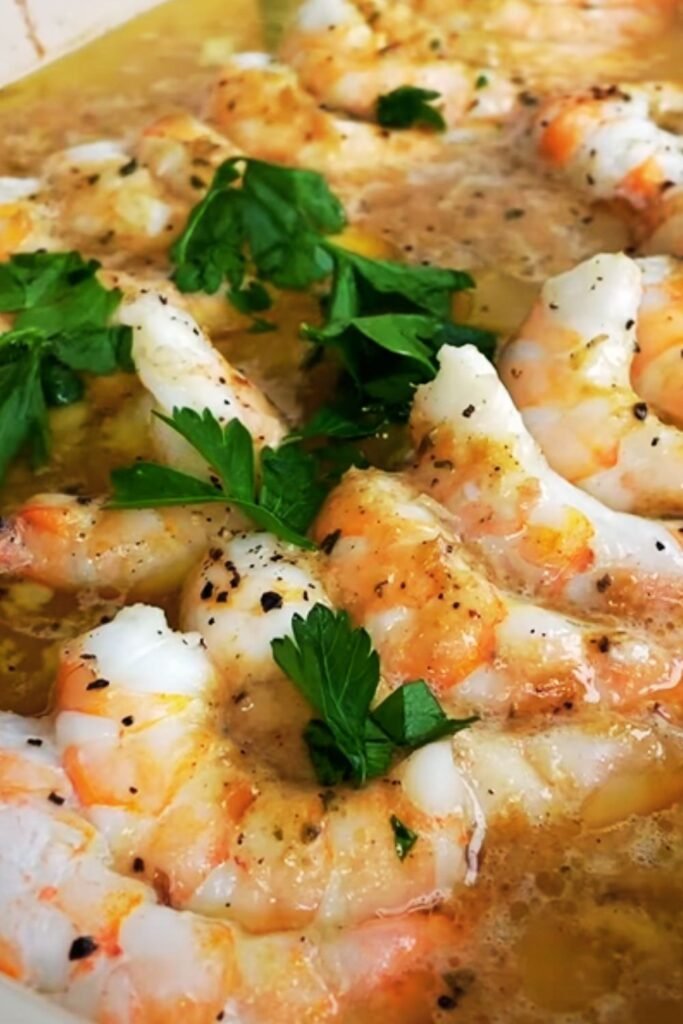
1. Classic Garlicky Lemon Baked Shrimp
This simple yet spectacular recipe lets the natural flavor of the shrimp shine through while enhancing it with bright, complementary notes.
Ingredients:
- 1 pound large shrimp (21-25 count), peeled and deveined
- 3 tablespoons olive oil
- 4 cloves garlic, minced
- 1 teaspoon salt
- ¼ teaspoon black pepper
- ¼ teaspoon red pepper flakes
- Zest and juice of 1 lemon
- 3 tablespoons fresh parsley, chopped
- 2 tablespoons butter, cut into small pieces
Instructions:
- Preheat oven to 375°F (190°C)
- In a mixing bowl, combine olive oil, garlic, salt, pepper, red pepper flakes, and lemon zest
- Add shrimp and toss to coat evenly
- Arrange shrimp in a single layer in a baking dish
- Dot with butter pieces throughout the dish
- Bake for 8-10 minutes until shrimp are just pink and opaque
- Remove from oven and immediately drizzle with lemon juice
- Sprinkle with fresh parsley before serving
This recipe works beautifully as a main course with crusty bread for soaking up the delicious pan juices, or as an elegant appetizer for your next gathering.
2. Mediterranean Herb-Crusted Shrimp
Drawing inspiration from the sunny flavors of the Mediterranean, this recipe creates a wonderful herb crust that complements the succulent shrimp.
Ingredients:
- 1 pound extra-large shrimp (16-20 count), peeled and deveined
- 2 tablespoons olive oil
- 2 tablespoons breadcrumbs
- 2 tablespoons grated Parmesan cheese
- 1 tablespoon fresh oregano, finely chopped
- 1 tablespoon fresh thyme leaves
- 2 cloves garlic, minced
- 1 teaspoon lemon zest
- ½ teaspoon salt
- ¼ teaspoon black pepper
- Lemon wedges for serving
Instructions:
- Preheat oven to 400°F (200°C)
- Line a baking sheet with parchment paper
- In a bowl, combine breadcrumbs, Parmesan, oregano, thyme, garlic, lemon zest, salt, and pepper
- In a separate bowl, toss shrimp with olive oil until evenly coated
- Add the breadcrumb mixture to the shrimp and toss gently to coat
- Arrange shrimp in a single layer on the prepared baking sheet
- Bake for 10-12 minutes until the coating is golden and shrimp are cooked through
- Serve hot with lemon wedges
I love serving this over a bed of warm orzo pasta tossed with a bit of olive oil and fresh herbs.
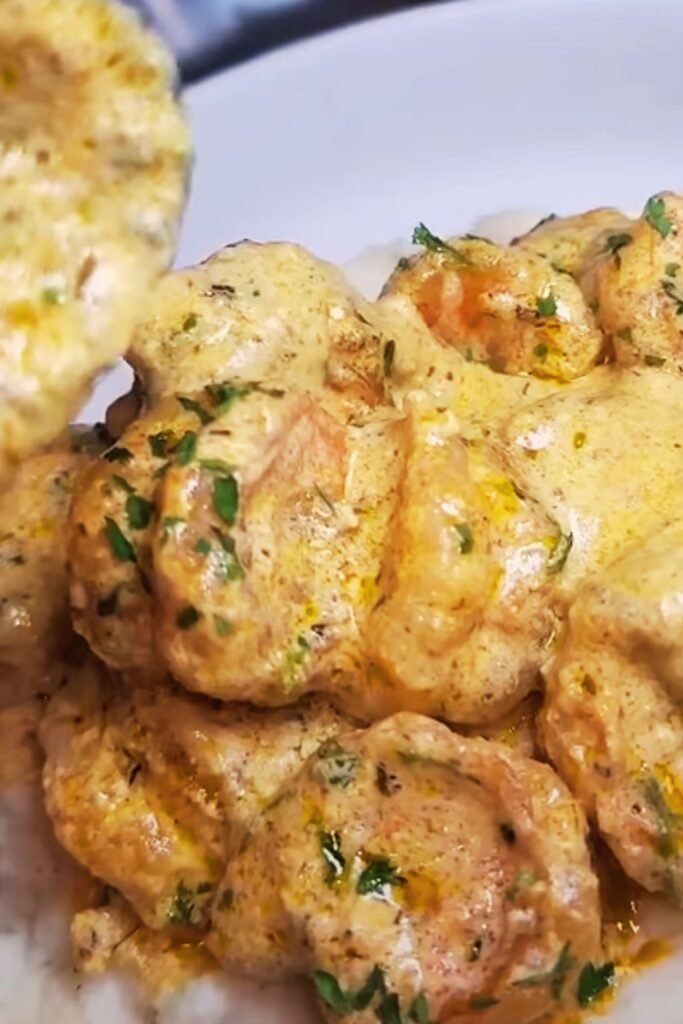
3. Spicy Honey-Glazed Baked Shrimp
The perfect balance of sweet and heat makes this recipe an absolute crowd-pleaser every time I serve it.
Ingredients:
- 1 pound large shrimp (21-25 count), peeled and deveined
- 3 tablespoons honey
- 2 tablespoons soy sauce
- 1 tablespoon olive oil
- 2 teaspoons sriracha (adjust to taste)
- 3 cloves garlic, minced
- 1 tablespoon fresh ginger, grated
- 1 lime, juiced
- 2 green onions, thinly sliced
- 1 tablespoon sesame seeds
Instructions:
- Preheat oven to 400°F (200°C)
- In a bowl, whisk together honey, soy sauce, olive oil, sriracha, garlic, ginger, and lime juice
- Add shrimp and marinate for 15 minutes (no longer)
- Transfer shrimp to a baking dish, reserving the marinade
- Bake for 8-10 minutes until shrimp are pink and firm
- While shrimp are baking, pour the reserved marinade into a small saucepan
- Bring to a boil, then simmer for 3-4 minutes until slightly thickened
- Drizzle the reduced glaze over the cooked shrimp
- Garnish with sliced green onions and sesame seeds before serving
This versatile dish works wonderfully served over rice or as part of an Asian-inspired salad.
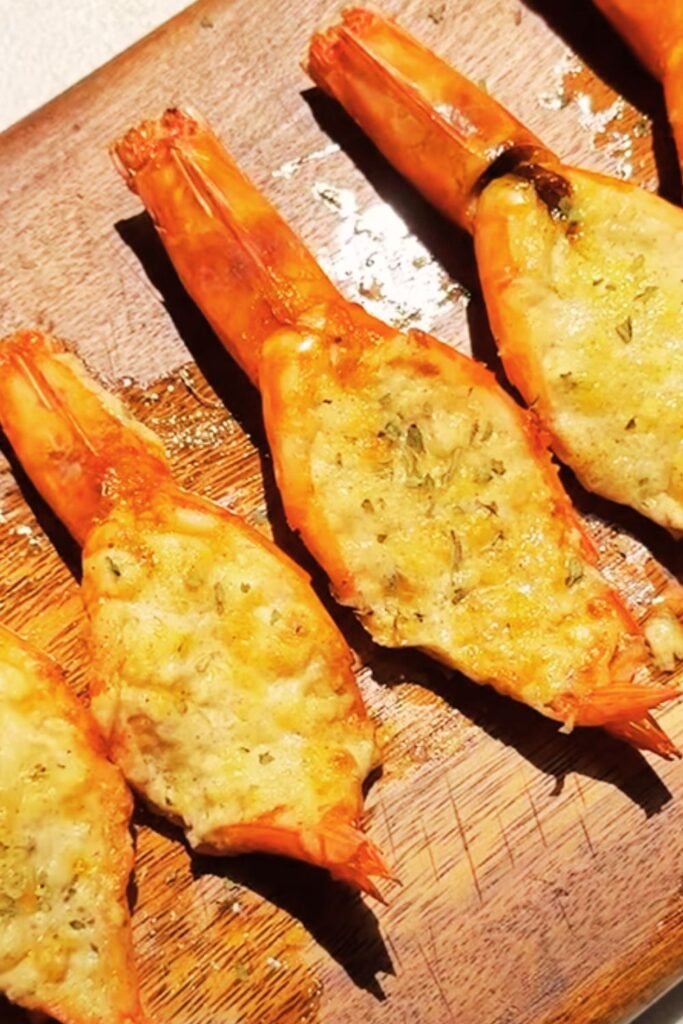
4. Herb and Butter Stuffed Shrimp
For special occasions, this impressive yet surprisingly easy preparation elevates shrimp to star status on any table.
Ingredients:
- 1 pound colossal shrimp (under 10 count), peeled and deveined (leave tails on)
- 4 tablespoons butter, softened
- 2 tablespoons fresh herbs (parsley, chives, tarragon), finely chopped
- 1 clove garlic, minced
- 1 teaspoon lemon zest
- 2 tablespoons Panko breadcrumbs
- 1 tablespoon olive oil
- Salt and pepper to taste
Instructions:
- Preheat oven to 375°F (190°C)
- Butterfly the shrimp by cutting along the back almost all the way through
- In a bowl, combine softened butter, herbs, garlic, and lemon zest
- In another small bowl, mix Panko breadcrumbs with olive oil
- Season both mixtures with salt and pepper
- Open each shrimp and fill with a generous portion of the herb butter
- Place stuffed shrimp in a baking dish and top each with breadcrumb mixture
- Bake for 12-15 minutes until shrimp are cooked and topping is golden
- Serve immediately
I often prepare this dish for dinner parties as it can be assembled ahead of time and popped into the oven just before serving.
5. Sheet Pan Roasted Shrimp and Vegetables
This complete meal solution showcases how beautifully shrimp pair with seasonal vegetables in a simple one-pan preparation.
Ingredients:
- 1 pound large shrimp (21-25 count), peeled and deveined
- 2 cups cherry tomatoes
- 1 red bell pepper, sliced
- 1 yellow bell pepper, sliced
- 1 medium zucchini, sliced into half-moons
- 1 red onion, cut into wedges
- 4 tablespoons olive oil, divided
- 4 cloves garlic, minced
- 1 teaspoon dried oregano
- 1 teaspoon dried basil
- ½ teaspoon salt
- ¼ teaspoon black pepper
- Fresh basil leaves for garnish
Instructions:
- Preheat oven to 425°F (220°C)
- In a large bowl, toss all vegetables with 3 tablespoons olive oil, half the garlic, oregano, basil, salt, and pepper
- Spread vegetables on a large rimmed baking sheet
- Roast for 15 minutes until vegetables begin to soften
- Meanwhile, toss shrimp with remaining olive oil and garlic
- Remove vegetables from oven, add shrimp to the pan in a single layer
- Return to oven and bake for an additional 6-8 minutes until shrimp are pink and opaque
- Garnish with fresh basil leaves before serving
This nutritious, colorful dish has become one of my weeknight staples. The vegetables can be varied based on seasonal availability and personal preference.
Serving and Presentation Ideas
Thoughtful presentation transforms your baked shrimp from merely a meal to a memorable dining experience. Here are some of my favorite ways to serve these delicious creations:
Elegant Plating Techniques
For dinner parties or special occasions:
- Arrange shrimp in a circular pattern around a small bowl of dipping sauce
- Serve individual portions in scallop shells or small gratin dishes
- Create height by stacking shrimp over a bed of risotto or polenta
- Use large butter lettuce leaves as natural serving vessels
- Garnish with microgreens or edible flowers for color contrast
Complementary Side Dishes
The best side dishes enhance without overshadowing your perfectly baked shrimp:
Starches that Work Well:
- Crusty artisan bread
- Lemon herb rice pilaf
- Creamy polenta
- Angel hair pasta tossed with olive oil and herbs
- Roasted garlic mashed potatoes
Vegetable Pairings:
- Grilled asparagus
- Sautéed spinach with garlic
- Roasted cherry tomatoes
- Steamed green beans with lemon zest
- Summer squash ribbons
The key is balancing flavors and textures—I like to include something starchy for substance and something green for freshness and visual appeal.
Sauce and Garnish Suggestions
The right finishing touches can elevate your baked shrimp to restaurant-quality status:
Quick Sauce Ideas:
- Lemon-butter sauce with capers
- Cilantro-lime cream
- Roasted red pepper coulis
- Simple cocktail sauce with freshly grated horseradish
- Garlic aioli
Garnishes That Add Impact:
- Fresh herb leaves (parsley, cilantro, basil)
- Citrus zest or thin slices
- Toasted breadcrumbs or panko
- Finely diced bell peppers for color
- Crispy fried shallots
I always consider the color palette of my final dish and try to include contrasting elements that make the shrimp stand out as the star.
Troubleshooting Common Baked Shrimp Issues
Even experienced cooks occasionally encounter challenges when baking shrimp. Here’s how to address the most common problems:
Preventing Overcooking
Overcooked shrimp become rubbery and lose their sweet flavor—a disappointment after careful preparation. To avoid this:
- Set a timer for the minimum cooking time suggested
- Remember that shrimp continue cooking from residual heat after removal from the oven
- For extra insurance in recipes with sauce, consider removing the dish from the oven when shrimp are almost but not quite done, then let them finish cooking in the hot sauce
- Consider the size of your shrimp and adjust cooking times accordingly—smaller shrimp may need as little as 5 minutes
Addressing Texture Issues
If your shrimp aren’t turning out with the perfect texture, consider these solutions:
Problem: Mushy Shrimp
- Likely Cause: Over-marinating, especially in acidic liquids
- Solution: Limit marinade time to 30 minutes maximum
Problem: Tough, Chewy Texture
- Likely Cause: Overcooking or poor-quality frozen shrimp
- Solution: Reduce cooking time and ensure proper thawing
Problem: Watery Dish
- Likely Cause: Not patting shrimp dry before baking or overcrowding the pan
- Solution: Thoroughly dry shrimp with paper towels and ensure they’re arranged in a single layer
Fixing Flavor Balance
If your seasoning isn’t quite right:
Problem: Bland Result
- Solution: Finish with flaky sea salt, fresh citrus juice, or a drizzle of high-quality olive oil
Problem: Too Spicy
- Solution: Serve with a cooling element like Greek yogurt or a mild cream sauce
Problem: Overwhelming Garlic Flavor
- Solution: Balance with fresh herbs and a touch of honey or butter to round out the sharpness
I’ve found that having a few “rescue” ingredients on hand—lemon juice, fresh herbs, honey, and butter—can salvage almost any shrimp dish that needs last-minute flavor adjustment.

Frequently Asked Questions
As someone who teaches cooking classes featuring baked shrimp, I encounter these questions regularly. Here are straight-to-the-point answers to help you navigate your shrimp-baking journey:
Q: Can I use frozen shrimp without thawing first? While technically possible, I strongly advise against it. Frozen shrimp release excess moisture during cooking, resulting in improper texture and diluted flavors. The extra 10-15 minutes required for proper thawing makes a significant difference in quality.
Q: How do I know if my shrimp are fresh? Fresh shrimp should smell like the ocean—clean and briny, never fishy or ammonia-like. They should feel firm to the touch and have clear, not cloudy, flesh. The shells should be intact and cling tightly to the meat.
Q: Can I prepare baked shrimp dishes ahead of time? You can prepare everything up to the point of baking several hours in advance. However, I don’t recommend baking the shrimp until shortly before serving. Reheated shrimp often become tough and lose their delicate texture.
Q: What’s the best way to reheat leftover baked shrimp? For the best texture, gently warm them in a covered dish in a 300°F oven with a tablespoon of water or broth for moisture. Check after 3-4 minutes to avoid overcooking. Alternatively, enjoy them cold in salads or wraps—sometimes this is preferable to risking texture changes from reheating.
Q: How can I tell if my shrimp are sustainably sourced? Look for certifications like Marine Stewardship Council (MSC), Aquaculture Stewardship Council (ASC), or Best Aquaculture Practices (BAP). Wild-caught North American shrimp and responsibly farmed options from Ecuador and Vietnam often have better sustainability profiles.
Q: My shrimp curl up tightly when baked. How can I prevent this? Tight curling indicates overcooking. Try reducing your baking time by 1-2 minutes. For presentation dishes, you can also score the belly side of the shrimp with shallow cuts before cooking to help them remain straighter.
Q: Can I substitute different seafood in these baked recipes? Yes, with timing adjustments. Sea scallops work particularly well with similar flavors but require slightly different cooking times (typically 8-12 minutes depending on size). Firm white fish can also be substituted but will likely need a few minutes longer than shrimp.
Q: Do I need to devein small shrimp? For small shrimp used in casual dishes, deveining is less crucial and often difficult due to their size. For medium to large shrimp, especially in elegant preparations, I always recommend deveining for the best eating experience and appearance.
Conclusion: Your Path to Baked Shrimp Perfection
After guiding you through the essential techniques, flavorful recipes, and troubleshooting tips for baked shrimp, I hope you’re feeling confident and inspired to bring these delicious dishes into your own kitchen routine. The beauty of mastering baked shrimp lies in its wonderful balance of simplicity and sophistication—quick enough for weeknight dinners yet elegant enough for your most special occasions.
Remember that perfect baked shrimp comes down to just a few key principles:
- Choosing quality shrimp and preparing them properly
- Understanding the delicate balance of flavors that complement rather than overpower
- Respecting the brief cooking time that shrimp require
- Considering the entire plate when planning your meal
With each shrimp dish you create, you’ll develop a better sense of timing and flavor combinations that suit your personal taste. Don’t be afraid to experiment and adapt the recipes I’ve shared to make them your own—cooking is as much about creativity as it is about technique.
I encourage you to start with one of the simpler recipes if you’re new to baking shrimp, then gradually work your way to the more complex preparations as your confidence grows. Before long, you’ll be creating your own signature baked shrimp dishes that friends and family will request time and again.
Happy cooking, and enjoy the delicious results of your shrimp-baking adventures!