Have you ever found yourself craving that perfect slice of creamy, velvety cheesecake? The kind that melts in your mouth and leaves you wondering if you’ve just tasted a little piece of heaven? I sure have. And let me tell you, after years of experimenting with countless cheesecake recipes, I’ve discovered that sometimes the classics truly are unbeatable.
The Philadelphia cheesecake recipe – the one printed right on the cream cheese package – has been my go-to for years. It promises simplicity without sacrificing flavor. But is this too-good-to-be-true recipe actually worth the hype? Today, I’m diving deep into this classic dessert to uncover all its secrets, pitfalls, and untapped potential.
The Magic Behind Philadelphia Cheesecake
There’s something magical about a recipe that has stood the test of time. The classic Philadelphia cheesecake recipe has been printed on cream cheese packages for decades, becoming a cornerstone of American dessert culture. What makes it so special? It’s the perfect balance of simplicity and decadence.
When I first attempted this recipe as a novice baker, I was amazed that something requiring so few ingredients could taste so divine. The genius lies in letting quality ingredients shine without unnecessary complications. Philadelphia cream cheese itself brings a distinctive tanginess and creaminess that forms the foundation of this beloved dessert.
Breaking Down the Classic Recipe
Let’s start with the basics. The standard Philadelphia cheesecake recipe calls for:
| Ingredient | Amount | Purpose |
|---|---|---|
| Philadelphia Cream Cheese | 4 packages (8 oz each) | The star of the show, providing creamy texture and tangy flavor |
| Sugar | 1 cup | Sweetens without overpowering the cream cheese |
| Vanilla Extract | 1 teaspoon | Adds subtle aromatic flavor |
| Eggs | 4 | Provides structure and richness |
| Graham Cracker Crumbs | 1½ cups | Creates a textural contrast with the creamy filling |
| Butter | ⅓ cup, melted | Binds the crust together |
| Sugar (for crust) | 3 tablespoons | Sweetens and helps caramelize the crust |
What strikes me about this ingredient list is its purity. No cornstarch, no flour, no sour cream – just the essential components that let the cream cheese shine.
The Process: Simpler Than You Think
Creating this magnificent dessert involves just a few straightforward steps:
- Prepare the crust: Combine graham cracker crumbs, melted butter, and sugar. Press into a springform pan and bake briefly.
- Make the filling: Beat cream cheese and sugar until smooth, add vanilla, then eggs one at a time.
- Bake: Pour filling over prepared crust and bake at a moderate temperature.
- Cool: Allow to cool gradually to prevent cracking.
- Chill: Refrigerate for several hours before serving.
That’s it. Five basic steps to cheesecake perfection. But as with many seemingly simple recipes, the devil is in the details.
Critical Success Factors: What the Package Doesn’t Tell You

After making this recipe dozens of times, I’ve identified several crucial factors that can make or break your Philadelphia cheesecake experience:
Temperature Matters
The package instructions casually mention that ingredients should be at room temperature, but they don’t emphasize just how critical this is. Cold cream cheese will remain lumpy no matter how long you beat it, resulting in a less-than-perfect texture. I’ve learned to leave my cream cheese out for at least 2 hours before starting.
Temperature is equally important for eggs. Cold eggs can cause the batter to curdle or separate. I place mine in warm (not hot) water for about 5 minutes if I’ve forgotten to take them out earlier.
The Mixing Method
Overmixing is the silent killer of cheesecakes. The package directions say “mix until blended,” but what does that actually mean? Through trial and error, I’ve found that once ingredients are incorporated, stop mixing. Additional beating introduces air into the batter, which can lead to puffing, cracking, and a less dense texture.
I mix on medium-low speed, scraping down the sides of the bowl frequently. When adding eggs, I beat just until the yellow disappears – no more.
Water Bath: The Unmentioned Hero
Here’s something the package doesn’t tell you: a water bath can be your best friend. While the traditional recipe doesn’t call for it, placing your springform pan in a larger pan filled with about an inch of hot water creates a gentle, humid environment that helps prevent cracking and promotes even baking.
The first time I tried this technique, my cheesecake emerged flawlessly smooth on top – a breakthrough moment in my baking journey.
The Cooling Process
The package instructions suggest cooling before refrigerating, but they don’t detail this critical phase. Rapid temperature changes are the enemy of crack-free cheesecakes. My method: turn off the oven, crack the door open, and let the cheesecake cool gradually for about an hour before removing it.
Then I run a thin knife around the edge (another tip not mentioned on the package) to prevent the cake from sticking to the sides as it contracts during cooling.
Troubleshooting Common Issues
Despite its simplicity, the classic Philadelphia cheesecake can still present challenges. Here are solutions to problems I’ve encountered:
| Problem | Likely Cause | Solution |
|---|---|---|
| Lumpy Batter | Cold cream cheese | Ensure cream cheese is fully softened; beat longer before adding other ingredients |
| Cracked Top | Overmixing; rapid cooling | Mix minimally; use water bath; cool gradually |
| Soggy Crust | Moisture seepage | Pre-bake crust for 10 minutes; wrap pan bottom in foil |
| Sunken Center | Underbaking | Add 5-10 minutes to baking time; check with gentle shake test |
| Browned Top | Oven too hot | Reduce temperature by 25°F; position rack lower in oven |
| Sticking to Pan | Normal contraction | Run knife around edge after baking; use parchment paper |
Elevating the Basic Recipe: My Favorite Variations
The beauty of this recipe is its adaptability. Once you’ve mastered the basic version, you can customize it in countless ways:
Flavorful Additions to the Filling
I’ve experimented with various add-ins to the classic filling:
- Citrus zest: 1-2 tablespoons of lemon, lime, or orange zest adds brightness
- Extracts: Replace vanilla with almond, coconut, or lemon extract
- Spices: A touch of cinnamon, nutmeg, or cardamom creates warmth
- Chocolate: Fold in 4 ounces of melted, cooled chocolate for a marbled effect
Crust Alternatives
The graham cracker crust is delicious but not the only option:
- Cookie crusts: Substitute crushed Oreos, gingersnaps, or shortbread cookies
- Nut crusts: Add finely chopped pecans or almonds to the graham mixture
- Chocolate crust: Replace graham crackers with chocolate wafer cookies
- No-bake crust: Skip baking the crust for a softer base
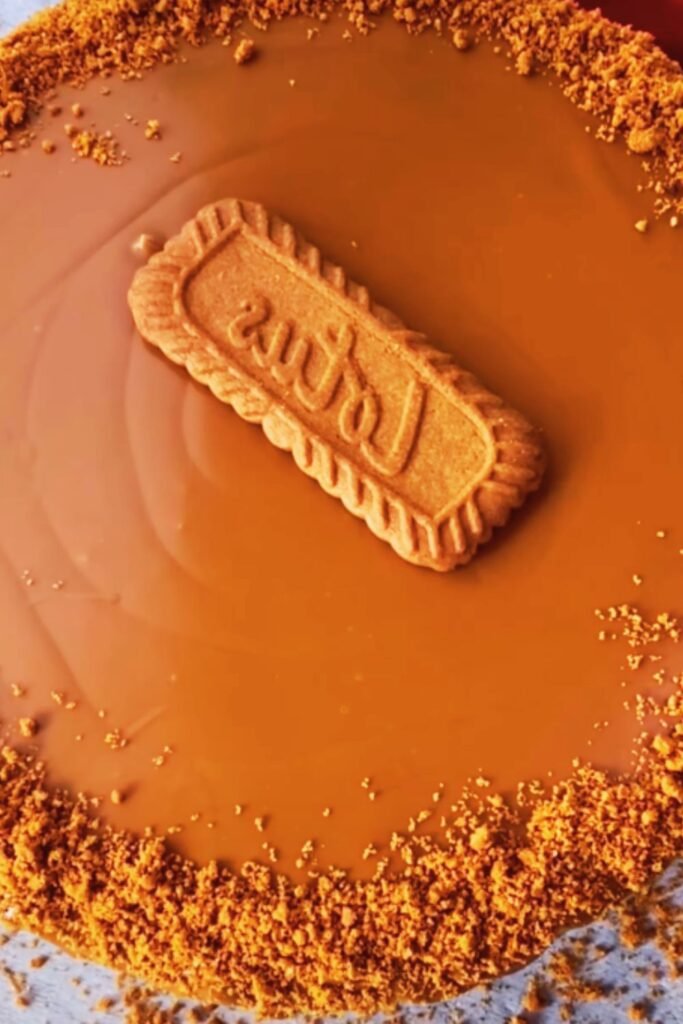
Topping Ideas
While perfect on its own, a finishing touch can elevate this cheesecake:
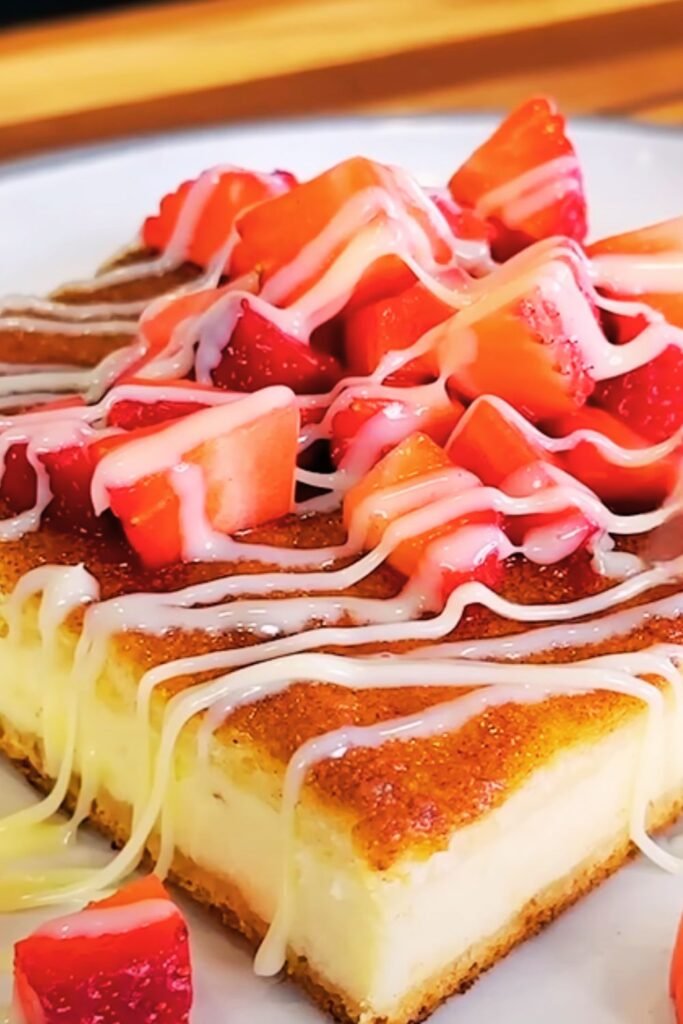
- Fresh fruit: Berries, sliced peaches, or poached pears
- Compotes: Cook down fruits with a bit of sugar for a vibrant sauce
- Chocolate ganache: Pour warm ganache over chilled cheesecake
- Caramel drizzle: Homemade or store-bought caramel adds decadence
- Whipped cream: A classic addition that complements the dense texture
Nutritional Considerations
Let’s be honest – cheesecake isn’t health food. But understanding its nutritional profile helps with mindful enjoyment:
| Component | Amount per Slice (1/12 of cake) | % Daily Value* |
|---|---|---|
| Calories | 450 | – |
| Total Fat | 32g | 41% |
| Saturated Fat | 18g | 90% |
| Cholesterol | 155mg | 52% |
| Sodium | 320mg | 14% |
| Total Carbohydrate | 34g | 12% |
| Dietary Fiber | <1g | 3% |
| Sugars | 28g | – |
| Protein | 7g | 14% |
*Based on a 2,000 calorie diet
I’ve found that a smaller slice paired with fresh fruit creates a more balanced dessert experience. For those watching sugar intake, reducing the sugar to 3/4 cup doesn’t significantly impact taste but cuts about 4g of sugar per slice.
Make-Ahead and Storage Tips
One of the greatest advantages of cheesecake is its make-ahead potential. In fact, I believe this Philadelphia classic actually improves after 24 hours in the refrigerator, as the flavors have time to meld and mature.
Storage guidelines I’ve developed through experience:
- Refrigerator: Tightly covered, it keeps well for up to 5 days.
- Freezer: Wrap individual slices or the whole cake (without toppings) in plastic wrap, then foil. Freeze for up to 2 months.
- Thawing: Transfer frozen cheesecake to refrigerator 24 hours before serving.
- Room temperature: For optimal flavor and texture, let chilled cheesecake stand at room temperature for 30 minutes before serving.
Serving Suggestions
The way you present and serve cheesecake can enhance the overall experience:
Perfect Slicing Technique
For clean cuts, I dip a sharp knife in hot water, wipe it dry before each slice, and use a single downward motion rather than a sawing action.
Accompaniments
While delicious on its own, I find these pairings particularly complementary:
- Fresh berry medley with a touch of mint
- Coffee or espresso
- Hot tea, particularly Earl Grey or chai
- Sparkling water with a twist of citrus
Occasion-Specific Presentations
For different events, I adjust my presentation:
- Dinner parties: Individual slices with a drizzle of raspberry coulis and a mint leaf
- Family gatherings: Whole cheesecake with berries piled in the center
- Holiday celebrations: Seasonal decorations like chocolate curls for Christmas or candied citrus for summer
Environmental and Ethical Considerations
As my baking journey has evolved, I’ve become more conscious of ingredient sourcing. For an even better Philadelphia cheesecake:
- Cream cheese: Consider organic options or local dairy products when available
- Eggs: Free-range or pasture-raised eggs often have richer yolks and support humane farming
- Vanilla: Fair-trade vanilla extract supports ethical farming practices
- Seasonal toppings: Using in-season local fruits reduces environmental impact
The Cultural Significance of Cheesecake
Philadelphia cheesecake isn’t just a dessert – it’s a cultural icon. American-style cheesecake distinct from its European cousins like German käsekuchen or Italian crostata di ricotta. The Philadelphia brand, established in 1872, helped standardize and popularize this distinctly American interpretation.
In my travels, I’ve noticed how cheesecake creates an immediate connection with people. Everyone seems to have a cheesecake story or memory – whether it’s their grandmother’s recipe or a special occasion cake. This simple dessert transcends generations and geographic boundaries, bringing people together through shared enjoyment.
Is the Classic Recipe Too Good to Be True?
After all my experimentation and research, I’ve concluded that the classic Philadelphia cheesecake recipe is indeed as good as advertised – with some caveats. Its simplicity is genuine, but mastering the unwritten techniques takes practice.
What makes this recipe remarkable is its flexibility. It provides a solid foundation that both beginners and experienced bakers can build upon. The straightforward approach allows the quality of ingredients to shine through without unnecessary complications.
Is it too good to be true? Not exactly. It’s more like a well-designed starting point that rewards attention to detail and personal creativity. With the additional insights I’ve shared, you can transform this simple recipe into a truly extraordinary dessert experience.
My Perfect Philadelphia Cheesecake Recipe
Here’s my enhanced version of the classic, incorporating all the tips and tricks I’ve learned:
Ingredients
For the crust:
- 1½ cups graham cracker crumbs (about 12 full sheet graham crackers)
- 3 tablespoons granulated sugar
- ⅓ cup unsalted butter, melted
For the filling:
- 4 packages (8 oz each) Philadelphia cream cheese, softened (very important!)
- 1 cup granulated sugar
- 1 teaspoon pure vanilla extract
- 4 large eggs, room temperature
- Pinch of salt (my addition for flavor balance)
- Optional: 1 tablespoon lemon zest (my addition for brightness)
Instructions
- Prepare: Set out ingredients 2 hours before starting. Preheat oven to 325°F. Wrap outside of a 9-inch springform pan with aluminum foil (to prevent water leakage if using water bath).
- Make crust: Combine graham cracker crumbs, sugar, and melted butter. Press mixture firmly into bottom and slightly up sides of springform pan. Bake for 10 minutes, then cool on wire rack.
- Make filling: Using stand mixer with paddle attachment at MEDIUM-LOW speed, beat cream cheese until completely smooth, about 2 minutes. Scrape bowl thoroughly. Gradually add sugar and beat until just incorporated. Add vanilla, salt, and optional lemon zest. Add eggs ONE AT A TIME, beating on low speed just until each is incorporated. Scrape bowl after each addition.
- Prepare water bath: Place foil-wrapped springform pan in larger roasting pan. Pour filling over crust. Place in oven, then carefully add hot water to roasting pan to reach about 1 inch up sides of springform pan.
- Bake: 55-65 minutes until edges are set but center still has slight jiggle when gently shaken.
- Cool properly: Turn off oven, crack door open, and let cheesecake cool in oven for 1 hour. Remove from water bath, run thin knife around edge, and cool completely on rack (about 2 hours).
- Chill: Cover and refrigerate at least 8 hours, preferably 24 hours for best flavor development.
FAQ: Your Burning Cheesecake Questions Answered
Q: Why did my cheesecake crack even though I followed the recipe exactly?
While the classic recipe is reliable, environmental factors like oven hot spots can cause cracking. Try using a water bath, avoiding overmixing, and cooling gradually. Remember that even “imperfect” cheesecakes taste delicious and can be covered with toppings.
Q: Can I reduce the amount of sugar in this recipe?
Absolutely! I’ve successfully reduced the sugar to 3/4 cup with minimal impact on texture or overall flavor. The cream cheese still shines through beautifully.
Q: Is there a dairy-free version of this classic recipe?
While it won’t be exactly the same, plant-based cream cheese substitutes have improved dramatically. Look for a full-fat variety and expect a slightly different texture. You may need to add 2 tablespoons of cornstarch to help with setting.
Q: How can I tell when my cheesecake is done baking?
The perfect cheesecake should have set edges but still maintain a slight jiggle in the center (about 2-3 inches in diameter). If you’re uncertain, an instant-read thermometer inserted in the center should read 150°F.
Q: Why does the original recipe not use a water bath if it’s so helpful?
The original recipe prioritizes simplicity and accessibility. While a water bath improves results, it adds complexity and equipment needs. The basic recipe will work without one – just expect potential cracking.
Q: My cheesecake sunk in the middle after cooling. What went wrong?
This typically indicates underbaking. The residual heat during cooling should finish setting the center. Next time, add 5-10 minutes to the baking time or leave it in the turned-off oven longer.
Q: Can I make mini cheesecakes with this recipe?
Definitely! Use a muffin tin lined with paper liners and reduce baking time to about 20-25 minutes. This recipe yields approximately 24 mini cheesecakes.
Q: How far in advance can I make this cheesecake?
For optimal freshness, make it 1-2 days ahead. However, it will keep well refrigerated for up to 5 days. You can also freeze it for up to 2 months – it thaws beautifully.
Q: Why does my cheesecake always stick to the sides of the pan?
This is normal as the cheesecake contracts during cooling. Running a thin knife around the edge immediately after baking prevents tearing. For extra insurance, line the sides of your pan with parchment paper.
Q: Is it really necessary to have the cream cheese at room temperature?
Yes, absolutely! This is perhaps the most critical factor for a smooth, lump-free cheesecake. Cold cream cheese will never fully incorporate, no matter how long you beat it.
Final Thoughts
The classic Philadelphia cheesecake recipe deserves its legendary status. It represents the perfect balance between accessibility and excellence – simple enough for beginners yet capable of producing bakery-quality results. With attention to the details I’ve highlighted and perhaps some personal customizations, this recipe can become your signature dessert.
Remember that cheesecake-making is both science and art. Each time you bake one, you’ll gain insights and develop your own techniques. Whether you’re making it for a special occasion or simply to satisfy a craving, this timeless recipe provides a reliable path to dessert bliss.
So is the classic Philadelphia cheesecake recipe too good to be true? I don’t think so. It’s exactly as good as it needs to be – a thoughtfully crafted foundation that rewards care and attention with one of life’s most sublime culinary pleasures.