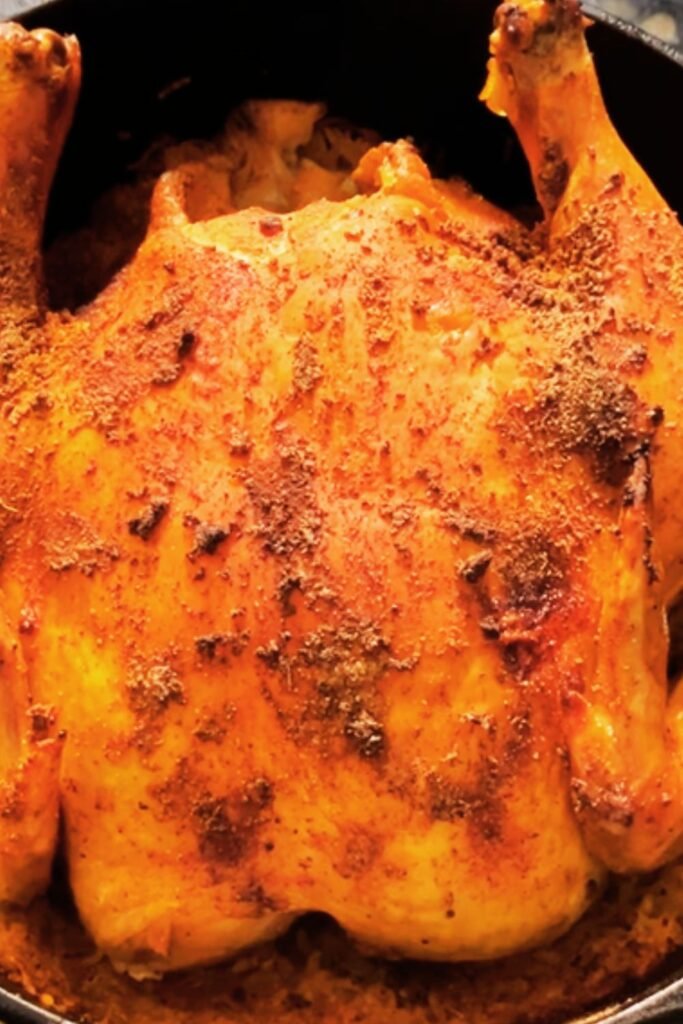
There’s something deeply satisfying about roasting a whole chicken. The aroma that fills your home, the beautiful golden skin, and the versatility of the leftovers make it a cornerstone recipe that every home cook should master. After years of experimenting with different methods, I’ve found that using a Dutch oven produces the most consistently delicious results. The heavy pot with its tight-fitting lid creates the perfect environment for a chicken that’s juicy on the inside with perfectly crispy skin.
Today, I’m sharing my tried-and-true method for roasting a whole chicken in a Dutch oven, along with tips and tricks I’ve learned along the way. This recipe has become my Sunday dinner staple, and once you try it, I think you’ll understand why!
Why a Dutch Oven Works Magic with Whole Chicken
Before diving into the recipe, let me explain why I’m such an advocate for using a Dutch oven for roasting chicken:
- Even heat distribution: The thick walls and heavy lid of a Dutch oven maintain consistent temperature throughout the cooking process.
- Moisture retention: The sealed environment helps keep the chicken juicy while still allowing the skin to crisp up beautifully.
- Versatility: You can sear, roast, and make gravy all in the same pot, minimizing cleanup.
- Heat retention: Dutch ovens hold heat exceptionally well, ensuring your chicken cooks evenly.
- Flavor development: The enclosed environment concentrates flavors and aromas.
Ingredients
For a 4-5 pound whole chicken:
For the Chicken:
- 1 whole chicken (4-5 pounds)
- 2 tablespoons unsalted butter, softened
- 2 tablespoons olive oil
- 4 cloves garlic, minced
- 1 tablespoon fresh rosemary, finely chopped
- 1 tablespoon fresh thyme leaves
- 1 tablespoon fresh sage, finely chopped
- 2 teaspoons kosher salt
- 1 teaspoon freshly ground black pepper
- 1 teaspoon paprika (sweet or smoked)
- ½ teaspoon garlic powder
- ½ teaspoon onion powder
- 1 lemon, halved
- 1 medium onion, quartered
- 3-4 cloves garlic, peeled but left whole
For the Vegetable Bed (Optional):
- 1 pound baby potatoes, halved
- 3 carrots, cut into 2-inch pieces
- 2 celery stalks, cut into 2-inch pieces
- 1 large onion, cut into wedges
- 4 cloves garlic, peeled
- 2 tablespoons olive oil
- 1 teaspoon kosher salt
- ½ teaspoon freshly ground black pepper
- 1 teaspoon dried herbs (thyme, rosemary, or herbes de Provence)
Equipment Needed
- 5-7 quart Dutch oven (enameled cast iron works best)
- Kitchen twine for trussing
- Meat thermometer
- Sharp kitchen scissors or knife
- Cutting board
- Small mixing bowl
- Measuring spoons
- Basting brush (optional)
Preparation Steps
Step 1: Prepare the Chicken
- Remove the chicken from the refrigerator 30-45 minutes before cooking to bring it closer to room temperature. This ensures more even cooking.
- Preheat your oven to 425°F (220°C).
- Remove giblets and neck from the chicken cavity if they’re included. Rinse the chicken inside and out with cold water, then pat thoroughly dry with paper towels. This step is crucial for achieving crispy skin.
- Place the chicken on a cutting board and trim any excess fat from around the cavity.
Step 2: Season the Chicken
- In a small bowl, combine the softened butter, olive oil, minced garlic, chopped herbs (rosemary, thyme, and sage), salt, pepper, paprika, garlic powder, and onion powder to create a herb butter mixture.
- Gently loosen the skin over the breast and thighs by sliding your fingers underneath, being careful not to tear it.
- Spread about half of the herb butter mixture under the skin, directly onto the meat.
- Rub the remaining herb butter all over the outside of the chicken, covering it completely.
- Season the cavity with additional salt and pepper.
- Stuff the cavity with the lemon halves, quartered onion, and whole garlic cloves.
Step 3: Truss the Chicken
- Trussing helps the chicken cook evenly and keeps the wings and legs from burning. Using kitchen twine, tie the legs together at the ankles.
- Tuck the wing tips behind the chicken’s back to prevent them from burning.
Step 4: Prepare the Dutch Oven
- If you’re including vegetables, toss them with olive oil, salt, pepper, and dried herbs in a bowl.
- Spread the vegetable mixture across the bottom of your Dutch oven to create a flavorful bed for the chicken. This not only adds flavor but also elevates the chicken to promote air circulation.
- If not using vegetables, you can place a small rack in the bottom of the Dutch oven.
Step 5: Position the Chicken
- Place the seasoned and trussed chicken on top of the vegetables or rack, breast side up.
- If desired, drizzle a little additional olive oil over the top of the chicken for extra crispiness.
Cooking Method
Step 1: Initial High-Heat Roasting
- Place the uncovered Dutch oven with the chicken in the preheated 425°F (220°C) oven.
- Roast uncovered for 30 minutes to help the skin start to crisp and develop color.
Step 2: Reduce Temperature and Continue Cooking
- After 30 minutes, reduce the oven temperature to 375°F (190°C).
- Continue roasting uncovered for about 45-60 minutes more, or until a meat thermometer inserted into the thickest part of the thigh (without touching bone) registers 165°F (74°C).
- If the skin starts to brown too quickly during cooking, loosely tent the chicken with aluminum foil.
Step 3: Basting (Optional)
- About halfway through the cooking time, you can baste the chicken with the juices that have accumulated in the bottom of the pot.
- This adds flavor and helps keep the meat moist, though it’s optional since the Dutch oven already creates a moist cooking environment.
Step 4: Rest Before Carving
- Once the chicken reaches 165°F (74°C), remove the Dutch oven from the oven.
- Transfer the chicken to a cutting board and tent loosely with foil.
- Let it rest for 15-20 minutes before carving. This step is crucial as it allows the juices to redistribute throughout the meat, ensuring a moist and flavorful result.
Making a Simple Pan Gravy
While the chicken is resting, you can make a delicious gravy with the drippings:
- If you’ve included vegetables, carefully remove them with a slotted spoon and set aside.
- Place the Dutch oven on the stovetop over medium heat.
- If needed, add 1-2 tablespoons of butter and whisk in 2 tablespoons of all-purpose flour to create a roux.
- Cook the roux for 1-2 minutes, stirring constantly until it turns golden.
- Slowly whisk in 1½ cups of chicken broth, ensuring no lumps form.
- Bring to a simmer and cook until the gravy thickens to your desired consistency, about 5-7 minutes.
- Season with salt and pepper to taste, and possibly a splash of white wine vinegar to brighten the flavors.
- Strain through a fine-mesh sieve for a smooth gravy if desired.
Carving the Chicken
Carving can be intimidating, but with practice, it becomes second nature:
- Remove the kitchen twine used for trussing.
- Start by removing the legs: cut through the skin between the breast and the thigh, then pull the leg away from the body and cut through the joint.
- Separate the thigh from the drumstick by cutting through the joint connecting them.
- For the wings, pull each away from the body and cut through the joint.
- For the breast meat, locate the breastbone running down the center of the chicken. Make a deep cut on one side of it, then slice downward, following the curve of the rib cage until the breast meat is removed. Repeat on the other side.
- Slice the breast meat against the grain for the most tender result.
Nutritional Information
The following table provides approximate nutritional values for a typical serving of roasted chicken (about 6 oz of meat with skin) without additional vegetables or gravy:
| Nutrient | Amount per Serving |
|---|---|
| Calories | 350 |
| Protein | 35g |
| Fat | 21g |
| Saturated Fat | 6g |
| Cholesterol | 115mg |
| Carbohydrates | 2g |
| Fiber | 0g |
| Sodium | 430mg |
| Potassium | 320mg |
| Iron | 2mg |
| Vitamin A | 135 IU |
| Vitamin C | 3mg |
Timing Guide for Different Chicken Sizes
Cooking times can vary based on the size of your chicken. Use this table as a general guideline, but always rely on your meat thermometer for accuracy:
| Chicken Weight | Initial Roast (425°F) | Continued Roast (375°F) | Approximate Total Time |
|---|---|---|---|
| 3-4 pounds | 25 minutes | 40-50 minutes | 65-75 minutes |
| 4-5 pounds | 30 minutes | 45-60 minutes | 75-90 minutes |
| 5-6 pounds | 35 minutes | 60-70 minutes | 95-105 minutes |
| 6-7 pounds | 40 minutes | 70-85 minutes | 110-125 minutes |
Remember: The chicken is done when a meat thermometer inserted into the thickest part of the thigh registers 165°F (74°C).
Flavor Variations
Once you’ve mastered the basic technique, try these delicious variations:
Lemon-Herb
- Add the zest of 2 lemons to your herb butter
- Increase the amount of fresh herbs by 50%
- Squeeze lemon juice over the chicken after resting
Garlic-Parmesan
- Double the garlic in the herb butter
- Add ¼ cup grated Parmesan cheese to the herb butter
- Stuff head of garlic (top sliced off) in the cavity
Mediterranean
- Use olive oil instead of butter
- Add 1 tablespoon dried oregano to the seasonings
- Stuff cavity with lemon, garlic, and fresh oregano sprigs
- Add kalamata olives and cherry tomatoes to the vegetable bed
Spicy Southwest
- Add 1 teaspoon each of cumin and chili powder to the seasonings
- Include ¼ teaspoon cayenne pepper for heat
- Stuff cavity with lime instead of lemon and add a quartered jalapeño
Serving Suggestions
A beautifully roasted chicken deserves equally delicious accompaniments. Here are some of my favorite pairings:
- Starchy Sides: Creamy mashed potatoes, wild rice pilaf, crusty bread, or roasted sweet potatoes
- Green Vegetables: Sautéed green beans with almonds, roasted Brussels sprouts, steamed broccoli with lemon, or a simple green salad with vinaigrette
- Sauces: The pan gravy is perfect, but you might also enjoy cranberry sauce, herb pesto, or a light mustard sauce
- Extras: Dinner rolls, cornbread, or garlic bread for sopping up those delicious juices
- Dessert Pairings: Apple pie, poached pears, or lemon sorbet complement a roast chicken dinner beautifully
Storage and Leftovers
One of the joys of roasting a whole chicken is the leftovers! Here’s how to store them properly:
- Refrigeration: Carve any remaining meat off the bones and store in an airtight container in the refrigerator for up to 4 days.
- Freezing: Leftover chicken can be frozen for up to 3 months. Wrap tightly in plastic wrap and then place in a freezer bag.
- Bones: Don’t discard the carcass! Place it in a ziplock bag and freeze it until you’re ready to make homemade chicken stock.
Leftover Ideas:
- Chicken salad sandwiches
- Add to pasta dishes or risotto
- Use in quesadillas or tacos
- Make a pot pie or chicken soup
- Add to stir-fries or grain bowls
- Create a hearty chicken and bean chili
Troubleshooting Common Issues
| Problem | Possible Cause | Solution |
|---|---|---|
| Dry breast meat | Overcooked | Use a meat thermometer and remove chicken when thigh reaches 165°F |
| Undercooked dark meat | Uneven cooking | Truss properly and ensure chicken is at room temperature before roasting |
| Soggy skin | Not dry enough before roasting | Pat chicken very dry and don’t cover Dutch oven during initial roasting |
| Vegetables too soft | Cooked too long | Cut into larger pieces or add halfway through cooking time |
| Burnt skin but undercooked meat | Oven too hot | Lower temperature and loosely tent with foil |
| Bland flavor | Insufficient seasoning | Season generously both under the skin and on the exterior |
Q&A Section
Q: Why is it important to bring the chicken to room temperature before roasting? A: Allowing the chicken to sit at room temperature for 30-45 minutes helps it cook more evenly. When you place a cold chicken in a hot oven, the exterior will cook much faster than the interior, potentially resulting in overcooked outer meat by the time the center reaches a safe temperature.
Q: Do I need to wash the chicken before cooking? A: The USDA actually recommends against washing raw chicken as it can spread bacteria around your kitchen through water splashing. However, I find that a quick rinse followed by thorough patting dry helps achieve crispier skin. If you do rinse, make sure to thoroughly clean your sink and surrounding areas afterward.
Q: Why truss the chicken? Is it really necessary? A: Trussing isn’t absolutely required, but it does help the chicken cook more evenly by keeping the limbs close to the body. Without trussing, the legs and wings can spread out, cooking faster and potentially drying out before the rest of the chicken is done. At minimum, I recommend tucking the wing tips behind the chicken’s back to prevent burning.
Q: Can I use dried herbs instead of fresh? A: Yes, though you’ll want to reduce the amount by about one-third since dried herbs are more concentrated than fresh. For this recipe, use 1 teaspoon each of dried rosemary, thyme, and sage instead of 1 tablespoon each of fresh herbs.
Q: My Dutch oven is only 4 quarts. Can I still make this recipe? A: A 4-quart Dutch oven will work for a smaller chicken (around 3-4 pounds). For larger chickens, you’ll either need a bigger pot or you might need to skip the vegetable bed underneath to ensure proper air circulation around the chicken.
Q: How can I tell if the chicken is done without a meat thermometer? A: While a meat thermometer is the most reliable method, you can also check by piercing the thickest part of the thigh with a knife. The juices should run clear, not pink. Additionally, the leg should move easily in its socket when wiggled. However, I strongly recommend investing in a good meat thermometer for food safety.
Q: Can I prepare this chicken in advance for a dinner party? A: Yes! You can prepare the herb butter and clean and season the chicken up to 24 hours in advance. Keep the seasoned chicken covered in the refrigerator and bring it to room temperature before roasting. This actually allows the seasonings to penetrate the meat more deeply, resulting in better flavor.
Q: My vegetables burned on the bottom of the Dutch oven. What went wrong? A: This can happen if there’s not enough moisture in the pot or if your oven runs hot. Try adding ¼ cup of chicken broth or water to the bottom of the pot before cooking, or place a layer of thick onion slices on the very bottom to act as a buffer between the other vegetables and the hot surface.
Why This Recipe Works
Over the years, I’ve learned that the secret to a perfect roast chicken lies in a few key principles:
- Proper preparation: Bringing the chicken to room temperature and thoroughly drying the skin sets the stage for even cooking and crispy skin.
- Generous seasoning: Seasoning under the skin brings flavor directly to the meat, not just the surface.
- Optimal cooking environment: The Dutch oven creates a semi-enclosed space that keeps moisture circulating while still allowing the skin to crisp.
- Two-temperature approach: Starting high creates golden skin, while finishing at a lower temperature ensures the meat cooks through without drying out.
- Proper resting: Allowing the chicken to rest before carving means juicier meat on your plate instead of on your cutting board.
The Dutch oven method simplifies what can sometimes be a challenging dish, making it accessible even to newer cooks. Plus, the one-pot approach means less cleanup — always a win in my kitchen!
I hope this detailed guide helps you create the perfect roast chicken. Once you master this basic technique, you’ll have endless possibilities for variations to suit any season or occasion. Happy cooking!