There’s something magical about sitting around a hibachi grill, watching skilled chefs flip spatulas, create onion volcanoes, and craft the most delicious fried rice you’ve ever tasted. I’ve been obsessed with recreating that perfect Benihana-style fried rice at home for years, and after countless attempts (and a few smoke detector incidents), I’ve finally cracked the code.
Today, I’m sharing every secret technique and ingredient you need to make restaurant-quality hibachi fried rice in your own kitchen—no fancy grill required. This isn’t just any fried rice recipe; this is the authentic hibachi experience that will transport you straight to Benihana without leaving your dining room.
What Makes Hibachi Fried Rice So Special?
Before we dive into the recipe, let’s understand what sets hibachi fried rice apart from other varieties. The term “hibachi” actually refers to the flat-top grill (teppanyaki) used in Japanese steakhouses like Benihana. This cooking surface allows chefs to achieve that distinct flavor through:
- High heat cooking that creates the perfect char
- Quick movements that prevent sticking and burning
- The ability to cook multiple ingredients side by side
- The magical combination of butter and soy sauce that caramelizes perfectly
That signature flavor comes from a precise combination of ingredients and techniques that I’ll break down in thorough detail. Trust me, once you try this method, you’ll never go back to ordinary fried rice again.
Essential Ingredients for Authentic Hibachi Fried Rice
The beauty of hibachi fried rice lies in its simplicity. You don’t need exotic ingredients—just the right ones, prepared correctly:
| Ingredient | Amount | Notes |
|---|---|---|
| Medium-grain rice | 2 cups uncooked | Yields about 6 cups cooked. Day-old rice works best |
| Unsalted butter | 4 tablespoons | Never substitute with oil; butter is key to authentic flavor |
| Soy sauce | 3-4 tablespoons | Use low-sodium for better control of salt levels |
| Fresh garlic | 2-3 cloves, minced | Provides aromatic base |
| Sweet onion | 1 medium, finely diced | Vidalia or white onion works well |
| Carrots | 1/2 cup, diced small | For color and sweetness |
| Frozen peas | 1/2 cup | No need to thaw |
| Eggs | 3 large | The protein binder that brings everything together |
| Vegetable oil | 2 tablespoons | For the initial cooking |
| Sesame oil | 1 teaspoon | Optional but adds authentic flavor |
| Green onions | 4-5 stalks, thinly sliced | For garnish and fresh flavor |
| Salt and white pepper | To taste | White pepper is traditional but black works too |
Special Equipment You’ll Need
While you don’t need a professional hibachi grill, having the right tools will help you achieve better results:
- A large, flat-bottomed carbon steel wok or a wide, heavy skillet
- A sturdy metal spatula (preferably with a straight edge)
- A very hot cooking surface (the hotter your stove can get, the better)
The Rice: The Foundation of Perfect Hibachi Fried Rice
The most crucial component of great hibachi fried rice is, unsurprisingly, the rice itself. There are several key factors to consider:
Rice Type Matters
Hibachi restaurants typically use medium-grain rice, which has the perfect balance of starch and structure. Short-grain rice can become too sticky, while long-grain varieties like basmati or jasmine don’t hold together quite right for this application.
The Day-Old Rice Secret
This isn’t just an old wives’ tale—science backs it up. Day-old refrigerated rice has had time for the starches to retrograde (a process where the starch molecules realign), which creates the perfect texture for frying. Fresh rice contains too much moisture and will become mushy.
If you’re in a hurry, here’s my quick-cooling method:
- Cook rice with about 10% less water than usual
- Spread the hot rice thinly on a baking sheet
- Place in refrigerator (uncovered) for 1-2 hours
- Break up any clumps before using
Proper Rice Cooking Technique
For 2 cups of uncooked medium-grain rice:
- Rinse rice 3-4 times until water runs mostly clear
- Cook with 3 cups water (slightly less than normal)
- Let rest covered for 10 minutes after cooking
- Fluff with fork and cool as directed above
The Benihana Method: Step-by-Step Instructions
Preparation Phase
Proper mise en place (having everything ready before cooking) is essential for hibachi-style cooking:
- Have all ingredients chopped and measured
- Break up any clumps in your cold rice
- Crack eggs into a small bowl
- Arrange ingredients in the order you’ll use them
- Open a window or turn on your vent fan (it will get smoky!)
The Cooking Process
- Heat your cooking surface: Preheat your wok or skillet over high heat until it’s smoking hot (about 2-3 minutes).
- Cook the eggs first:
- Add 1 tablespoon of oil to the hot pan
- Pour in beaten eggs
- Scramble quickly until just set but still slightly moist
- Remove and set aside
- Sauté the aromatics:
- Add remaining oil to the pan
- Add garlic and onions, stir-fry for 30 seconds until fragrant
- Add carrots, cook for another 1-2 minutes
- The butter magic:
- Push vegetables to the side
- Add 3 tablespoons of butter to the empty side
- When butter is melted and bubbling (but not brown), mix with vegetables
- Rice frying technique:
- Add cold rice to the pan
- Using your spatula, press down and chop repeatedly to break up clumps
- Toss and mix with the butter and vegetables
- Allow rice to sit untouched for 30 seconds to develop a slight crust, then toss again
- Repeat this process 2-3 times for the best texture
- Season like the professionals:
- Drizzle soy sauce around the perimeter of the pan (this helps it caramelize)
- Add white pepper
- Toss everything together quickly to distribute the seasonings
- Final additions:
- Add frozen peas (they’ll cook from the residual heat)
- Return the cooked eggs to the pan
- Add the remaining tablespoon of butter
- Add optional sesame oil
- Fold everything together gently
- Finishing touch:
- Sprinkle with sliced green onions
- Give one final toss
- Taste and adjust seasonings if needed
Common Mistakes to Avoid
Through my many attempts at perfecting this recipe, I’ve learned what not to do:
| Mistake | Why It’s a Problem | How to Fix It |
|---|---|---|
| Using freshly cooked, hot rice | Creates mushy, clumpy fried rice | Use day-old rice or the quick-cooling method |
| Cooking on medium heat | Doesn’t create the right texture or flavor | Use the highest heat your stove can generate |
| Overcrowding the pan | Causes steaming instead of frying | Cook in batches if needed |
| Adding all seasonings at once | Prevents proper caramelization | Add soy sauce around the edge of the pan |
| Using the wrong fat | Missing the signature Benihana flavor | Always use real butter, not margarine or just oil |
| Constantly stirring | Prevents the desirable slight crust from forming | Allow rice to sit untouched for brief periods |
Customization Options: Making It Your Own
While I’m sharing the classic hibachi restaurant-style recipe, there are several authentic variations you can try:
Protein Additions
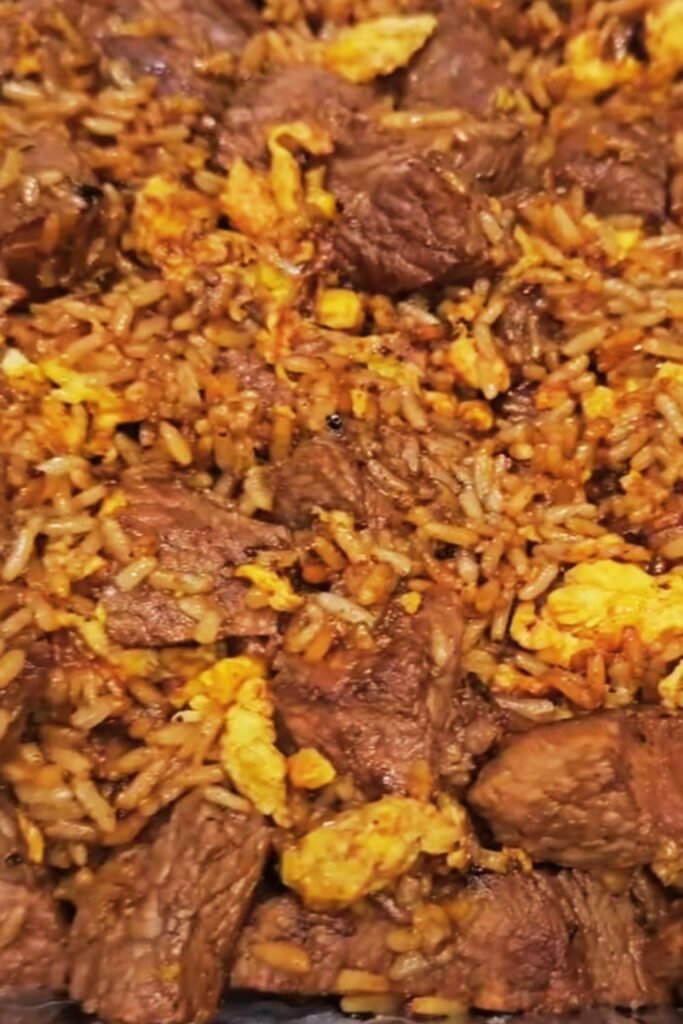
For a complete meal, add one of these proteins (cook separately and add at the end):
- Diced chicken (marinated in soy sauce, garlic, and ginger)
- Steak (New York strip works well, cut into small cubes)
- Shrimp (peeled and deveined)
- Tofu (extra-firm, pressed and cubed)
Vegetable Variations
Feel free to incorporate these authentic hibachi vegetables:
- Bean sprouts (add at the very end)
- Mushrooms (button or shiitake, sliced)
- Zucchini (small diced cubes)
- Bell peppers (small dice)
Sauce Upgrades
For an extra flavor boost, try these additions:
- A dash of rice vinegar for brightness
- Japanese mayo drizzled on top before serving
- Yum Yum Sauce on the side (that pink sauce they serve at hibachi restaurants)
- A touch of garlic butter at the very end
Serving Suggestions
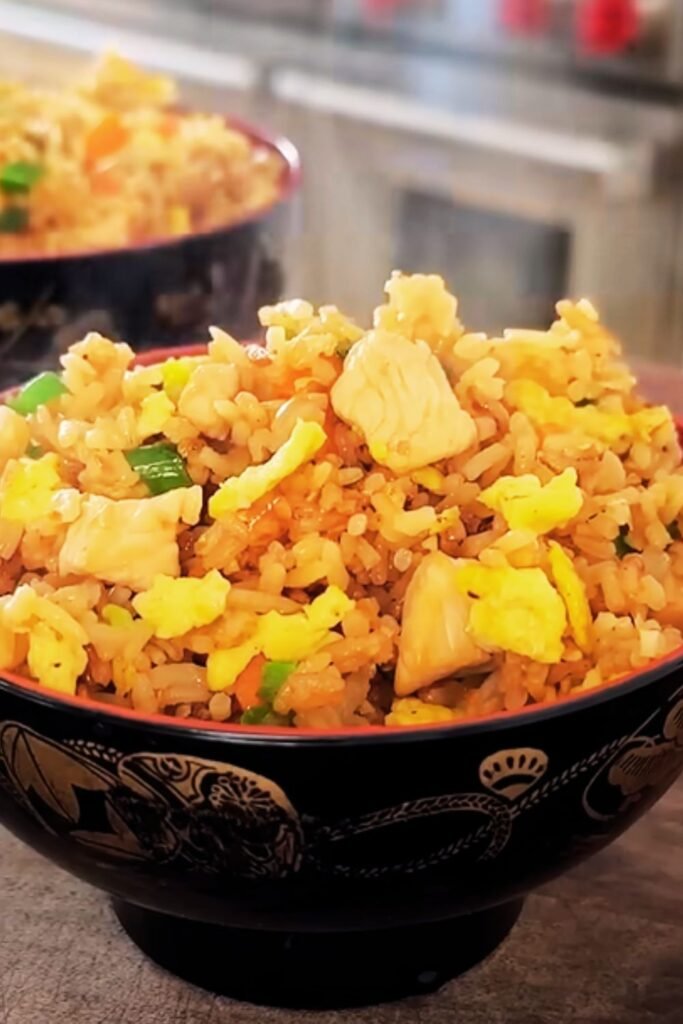
To complete your at-home hibachi experience:
- Serve in small bowls with chopsticks
- Pair with ginger salad dressing on a side salad
- Add a clear soup (like a simple miso)
- Include Japanese pickled vegetables for authenticity
- Serve with hot green tea
Storage and Reheating Tips
Made too much? Here’s how to handle leftovers:
- Store in an airtight container in the refrigerator for up to 3 days
- For reheating, add a small splash of water to prevent drying
- The best reheating method: a hot skillet with a touch of butter
- Microwave reheating works but leads to slightly drier results
- Freezing not recommended (affects texture significantly)
Scaling the Recipe
This recipe serves about 4-6 people as a side dish or 3-4 as a main course. To scale up or down:
| Desired Servings | Uncooked Rice | Eggs | Butter | Soy Sauce |
|---|---|---|---|---|
| 2-3 people | 1 cup | 2 | 2 tbsp | 1.5-2 tbsp |
| 4-6 people (original) | 2 cups | 3 | 4 tbsp | 3-4 tbsp |
| 8-10 people | 4 cups | 6 | 8 tbsp | 6-8 tbsp |
When scaling up, consider cooking in batches rather than overcrowding your pan.
Troubleshooting Guide
Even experienced cooks sometimes encounter issues. Here’s how to fix common problems:
- Rice too dry: Add a little more butter or a splash of broth
- Rice too wet: Continue cooking uncovered to evaporate excess moisture
- Not enough flavor: Increase soy sauce and butter; check if your heat was high enough
- Too salty: Balance with a squeeze of fresh lemon juice
- Rice sticking to pan: Your pan wasn’t hot enough initially or needs more oil
- Rice burning: Your heat may be too high for your pan—adjust slightly down but keep it hot
Frequently Asked Questions
Why is my fried rice mushy instead of having separate grains? The most common reason is using freshly cooked rice that hasn’t had time to dry out and cool. Always use day-old refrigerated rice or quick-cooled rice as described in the recipe.
Can I use brown rice instead? Yes, but the texture will be different. If using brown rice, you’ll want to cook it slightly less than normal and allow it to dry out longer in the refrigerator.
Is there a substitute for butter to make this dairy-free? While butter is traditional and creates that distinctive hibachi flavor, you can substitute with a high-quality plant-based butter alternative. Pure oil won’t give the same richness.
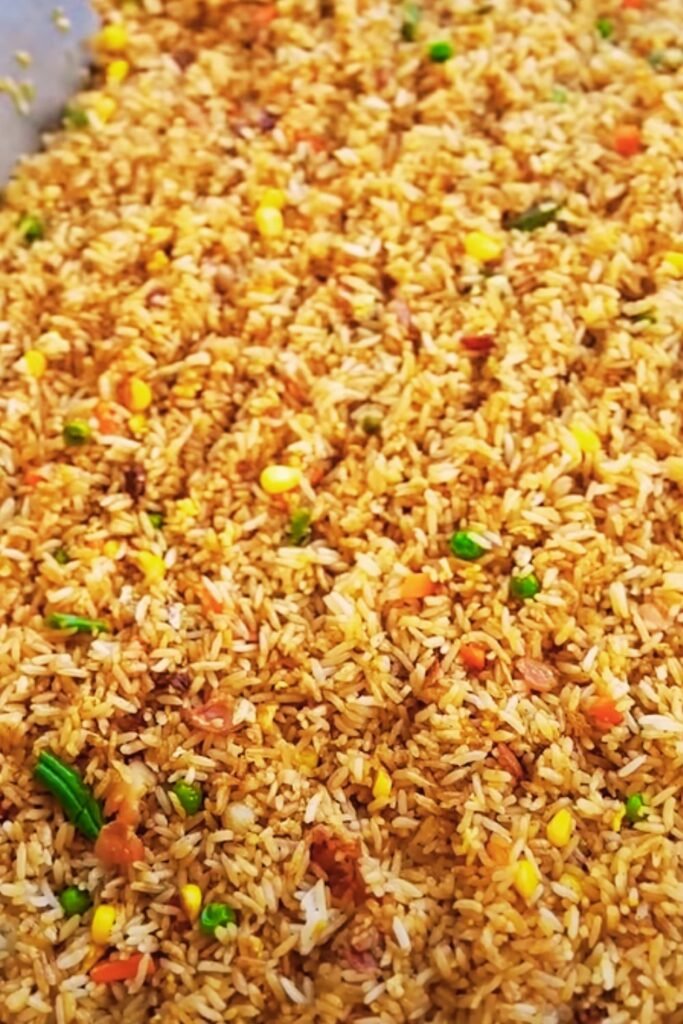
How do hibachi chefs get their rice so yellow? Contrary to popular belief, authentic hibachi rice doesn’t use food coloring. The golden color comes from the proper caramelization of soy sauce and butter on very high heat. Some restaurants might add a small amount of turmeric or yellow food coloring, but this isn’t traditional.
Why do restaurants use such large cooking surfaces? The large flat surface allows for even heat distribution and the ability to move ingredients to cooler areas when needed. At home, you can simulate this by using your largest pan and cooking in batches if necessary.
Can I prepare ingredients ahead of time? Absolutely! Chop all vegetables and measure seasonings the day before. The only things that should be done right before cooking are beating the eggs and starting the actual cooking process.
What’s the white sauce that sometimes comes with hibachi meals? That’s typically called “Yum Yum Sauce” or “White Sauce,” and it’s an American creation that’s become standard at hibachi restaurants. It’s made with mayonnaise, sugar, rice vinegar, paprika, garlic powder, and sometimes a touch of tomato paste.
The Final Secret: Confidence
After making this recipe dozens of times, I’ve discovered that beyond ingredients and technique, there’s one more secret: confidence. Channel your inner hibachi chef! Move quickly, don’t second-guess yourself, and have fun with the process. The more you make this recipe, the more intuitive it will become.
Remember, hibachi cooking is as much performance as it is preparation. Turn up the heat, move with purpose, and embrace the sizzle and smoke that comes with authentic high-heat cooking. Your family and friends will be amazed by your hibachi mastery!
If you’ve enjoyed this recipe, be sure to check out my other restaurant copycat guides. With practice, you’ll never need to pay premium prices for hibachi again—though I still recommend visiting the professionals occasionally for inspiration (and those onion volcanoes).
Happy cooking!