There’s something magical about the combination of warm, gooey cheese, tender chicken, and creamy avocado nestled between two perfectly toasted slices of bread. I’ve spent years perfecting my sandwich game, and I can confidently say that the Chicken Avocado Melt stands as a crowning achievement in my culinary journey. This isn’t just any sandwich—it’s a complete meal that delivers nutrition, satisfaction, and incredible flavor in every bite.
What makes this sandwich so special? It’s the thoughtful balance of textures and flavors—crispy bread giving way to melted cheese, tender chicken, and buttery avocado. The combination creates a harmony that’s both comforting and exciting. Whether you’re looking for a hearty lunch, a quick dinner, or even an impressive but easy meal for guests, this sandwich delivers every time.
In this guide, I’ll walk you through everything you need to know to create the perfect Chicken Avocado Melt, from ingredient selection to assembly techniques. I’ll also share my favorite variations and serving suggestions to help you make this recipe your own. By the end, you’ll have a versatile recipe in your arsenal that’s sure to become a regular in your meal rotation.
The Perfect Ingredients: Quality Matters
The beauty of a Chicken Avocado Melt lies in its simplicity, which means each ingredient needs to shine. Let’s break down what you’ll need and how to select the best components:
For the Base Sandwich
| Ingredient | Quantity | Selection Tips |
|---|---|---|
| Bread | 2 slices per sandwich | Sourdough, multigrain, or hearty white bread work best; should be at least ½-inch thick |
| Chicken breast | 4-6 oz per sandwich | Fresh or leftover, thinly sliced or shredded |
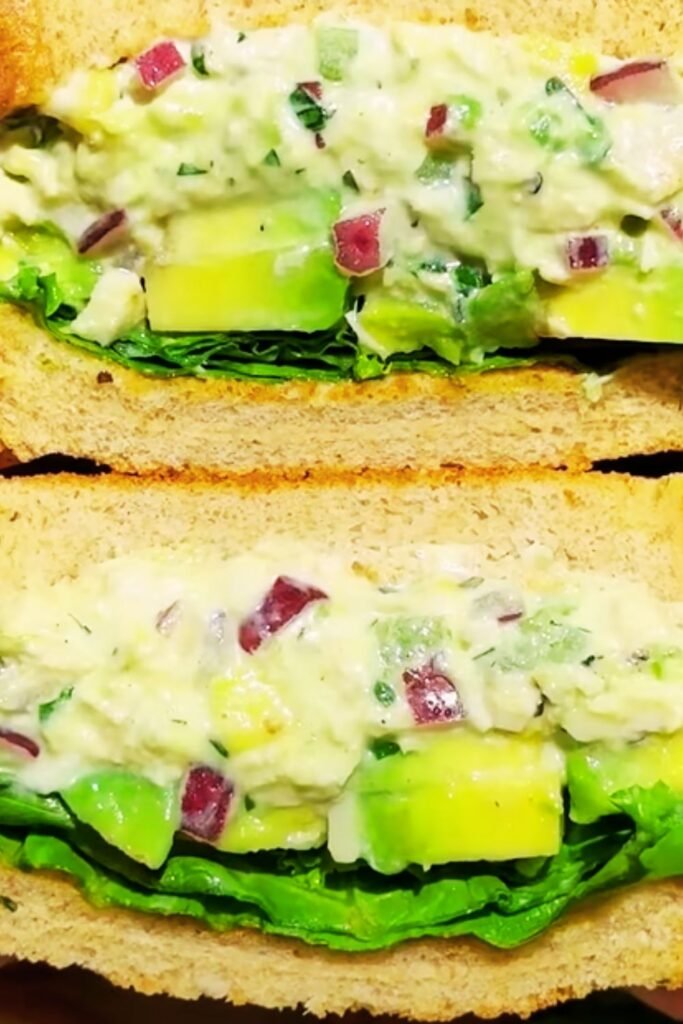
| Ripe avocado | ½ avocado per sandwich | Should yield slightly to gentle pressure; Hass variety recommended |
| Cheese | 2-3 oz per sandwich | Monterey Jack, pepper jack, cheddar, or Swiss all work beautifully |
| Butter | 1-2 tsp per slice | Unsalted, room temperature for easy spreading |
| Mayonnaise | 1-2 tbsp | Optional, but adds extra creaminess |
| Dijon mustard | 1-2 tsp | Adds a tangy kick |
| Salt and pepper | To taste | Freshly ground pepper makes a difference |
Optional Add-ins for Extra Flavor
| Ingredient | Suggested Amount | Flavor Profile |
|---|---|---|
| Bacon | 2-3 slices | Adds smokiness and crunch |
| Tomato slices | 2-3 thin slices | Brings freshness and acidity |
| Red onion | 2-3 thin rings | Adds sharpness and crunch |
| Baby spinach | Small handful | Adds nutrition and subtle earthiness |
| Fresh herbs | 1-2 tsp chopped | Cilantro, basil, or parsley add brightness |
| Jalapeños | 3-4 slices | Adds heat for spice lovers |
| Garlic aioli | 1 tbsp | Replaces regular mayo for extra flavor |
The quality of your ingredients will significantly impact the final result. I’ve learned through many sandwiches that fresh, ripe avocados and good-quality cheese make all the difference. For the chicken, I prefer to use freshly cooked breast meat, but this sandwich is also an excellent vehicle for leftover roasted chicken.
Preparing the Chicken: Methods for Maximum Flavor
Before we assemble our sandwich masterpiece, let’s talk about preparing the star of the show: the chicken. You have several options here, depending on your time constraints and preferences.
Method 1: Quick Pan-Seared Chicken
This is my go-to method when I’m starting from scratch and want fresh chicken specifically for sandwiches.
- Season chicken breasts with salt, pepper, and your favorite herbs (I love a combination of garlic powder, paprika, and dried oregano)
- Heat a tablespoon of olive oil in a skillet over medium-high heat
- Cook chicken breasts for 5-7 minutes per side, until internal temperature reaches 165°F (74°C)
- Let rest for 5 minutes before slicing thinly against the grain
Method 2: Roasted Chicken Breast
This method produces juicy, flavorful chicken that works wonderfully in sandwiches.
- Preheat oven to 425°F (220°C)
- Season chicken breasts as above, plus a drizzle of olive oil
- Place on a baking sheet and roast for 18-22 minutes, until internal temperature reaches 165°F (74°C)
- Let rest for 10 minutes before slicing or shredding
Method 3: Repurposed Rotisserie Chicken
This is my time-saving secret weapon for quick meals!
- Remove skin from store-bought rotisserie chicken
- Shred or slice the breast meat
- If desired, briefly warm the meat in a skillet with a splash of chicken broth to refresh it
The key to great chicken for this sandwich is to ensure it’s moist and well-seasoned. Dry chicken will detract from the overall experience. I also find that slicing the chicken relatively thin helps it integrate better with the other ingredients.
The Art of the Perfect Avocado
Avocados can be tricky—one day too hard, the next day overripe. Here’s my foolproof method for selecting and preparing avocados for your sandwich:
Selecting the Perfect Avocado
- Look for avocados that yield slightly to gentle pressure
- The stem end should come off easily and reveal green underneath (not brown)
- Hass avocados tend to have the creamiest texture and best flavor for sandwiches
Storing and Ripening
- To speed up ripening: Place avocados in a paper bag with a banana or apple
- To slow down ripening: Store ripe avocados in the refrigerator for up to 2 days
- Once cut, brush exposed surfaces with lemon juice to prevent browning
Preparing for the Sandwich
I’ve found two methods work well for incorporating avocado into this sandwich:
Method 1: Sliced
- Cut the avocado in half and remove the pit
- Peel off the skin
- Slice thinly and fan out across the sandwich
Method 2: Mashed (my personal favorite)
- Scoop avocado flesh into a small bowl
- Add a squeeze of lime juice, pinch of salt, and crushed red pepper flakes
- Mash with a fork until spreadable but still somewhat chunky
- Spread onto one side of the bread
The mashed method allows the avocado to meld better with the other ingredients and prevents slices from sliding out when you bite into the sandwich. That being said, either approach will yield delicious results!
Cheese Selection: Finding the Perfect Melt
The cheese you choose will significantly impact the character of your sandwich. Here’s my breakdown of excellent options:
Best Cheeses for Chicken Avocado Melts
| Cheese | Melting Properties | Flavor Profile | Best Pairing Notes |
|---|---|---|---|
| Monterey Jack | Melts smoothly and evenly | Mild, buttery | Perfect all-around choice that doesn’t overpower |
| Pepper Jack | Excellent melt with spicy kick | Moderate spiciness with creamy backdrop | Great with cilantro and lime additions |
| Cheddar | Sharp flavor, slightly grainier melt | Tangy, rich | Works well with bacon additions |
| Swiss | Distinctive holes, stretchy melt | Nutty, slightly sweet | Pairs wonderfully with mushrooms |
| Gouda | Velvety, smooth melt | Subtle smokiness, especially smoked varieties | Excellent with caramelized onions |
| Provolone | Excellent pull when melted | Mild with slight sharpness | Great with Italian herbs like basil |
| Havarti | Ultra-creamy, smooth melt | Buttery, slightly tangy | Works well with any herb additions |
For my perfect Chicken Avocado Melt, I typically use a combination of cheeses—most often Monterey Jack for its superior melting properties and mild flavor, with a smaller amount of sharp cheddar for an extra flavor boost. The key is to ensure you have enough cheese to achieve that satisfying gooey pull when you take a bite.
Pro tip: Grating the cheese rather than using slices promotes more even melting and better integration with the other ingredients.
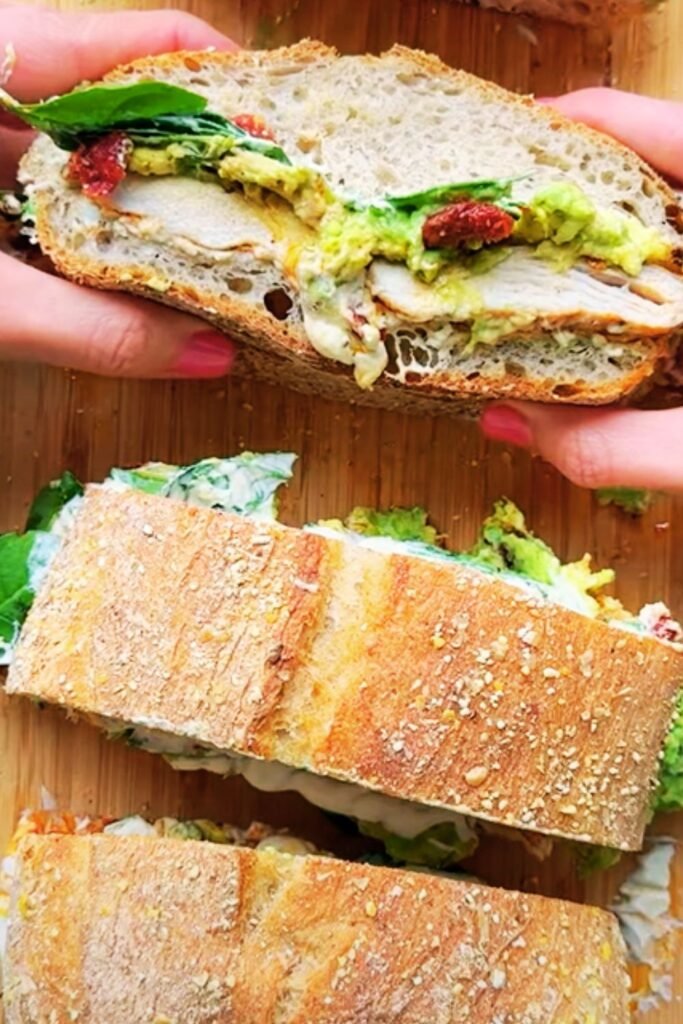
Assembly Method: Building the Perfect Sandwich
Now that we’ve covered the core ingredients, let’s put everything together. The order of assembly actually matters quite a bit for the perfect melt:
Step-by-Step Assembly
- Butter the bread: Spread softened butter on the outside of each bread slice (the sides that will contact the pan)
- Apply condiments: On the inside of one slice, spread mayonnaise, mustard, or other preferred spread
- Add cheese foundation: Place a layer of cheese directly on top of the condiments. This creates a moisture barrier that helps prevent soggy bread
- Add chicken layer: Arrange your sliced or shredded chicken evenly
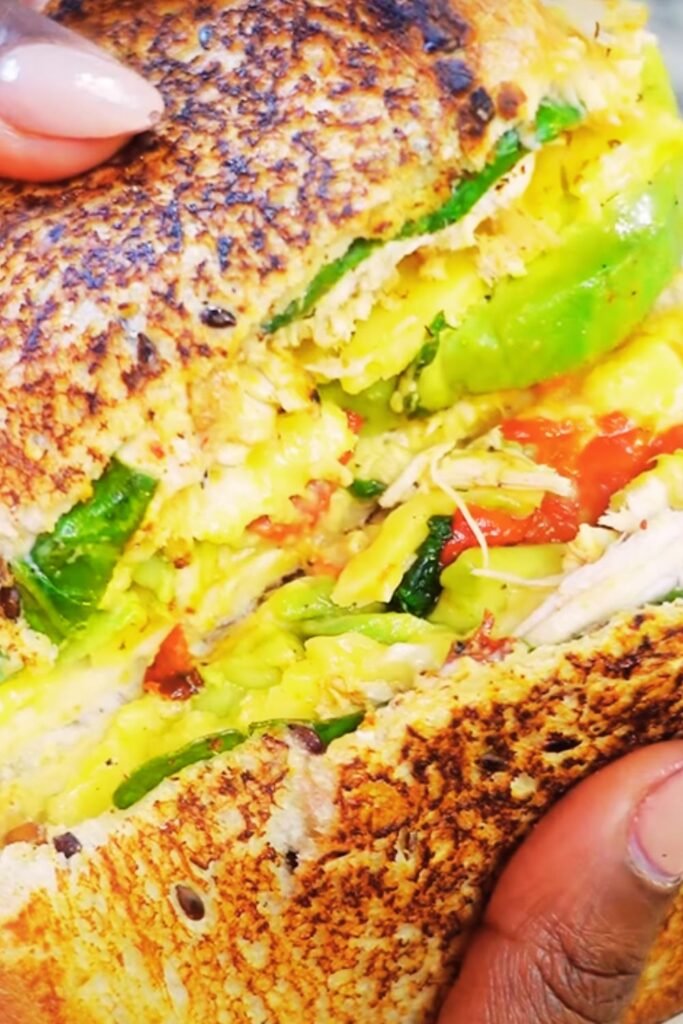
- Add the avocado: Either lay down slices or spread your mashed avocado
- Add optional extras: This is where bacon, tomato, or other add-ins would go
- Top with more cheese: Another layer of cheese helps “glue” everything together
- Close the sandwich: Place the second slice of bread on top, buttered side up
This layering method ensures that the bread gets crispy, the cheese melts perfectly, and the fillings stay securely inside the sandwich.
Cooking Techniques: Achieving the Perfect Melt
There are three excellent methods for cooking your Chicken Avocado Melt. I’ll guide you through each one:
Method 1: Stovetop Skillet (Classic Approach)
This traditional method gives you the most control over the cooking process:
- Heat a skillet or griddle over medium heat
- Place the assembled sandwich in the skillet, butter-side down
- Cook for 3-4 minutes until golden brown
- Flip carefully using a spatula
- Cook the second side for another 3-4 minutes until cheese is melted and bread is golden brown
- If needed, cover with a lid for 1 minute to help cheese melt completely
Method 2: Panini Press (Quick and Even)
If you have a panini press or grill, this creates beautiful grill marks and even heating:
- Preheat your panini press to medium heat
- Place the assembled sandwich inside
- Close the press without applying too much pressure
- Cook for 3-5 minutes until bread is crispy and cheese is melted
Method 3: Oven-Finished (For Multiple Sandwiches)
Great when making sandwiches for several people:
- Preheat oven to 375°F (190°C)
- Sear both sides of the sandwich in a skillet for about 2 minutes per side
- Transfer sandwiches to a baking sheet
- Bake for 5-7 minutes until cheese is completely melted
Regardless of method, the perfect Chicken Avocado Melt should have crispy, golden-brown bread, completely melted cheese, and warm fillings throughout. The key is patience—cooking over moderate heat ensures the inside warms through before the outside burns.
Variations: Making the Recipe Your Own
While the classic Chicken Avocado Melt is hard to improve upon, here are some delicious variations I’ve developed over the years:
Southwest Style
- Add sliced jalapeños
- Use pepper jack cheese
- Incorporate a tablespoon of chopped cilantro
- Spread with chipotle mayo instead of regular mayonnaise
- Add a squeeze of lime juice to the avocado
Mediterranean Inspired
- Add roasted red peppers
- Use feta cheese along with provolone
- Add baby spinach and sliced kalamata olives
- Spread with tzatziki instead of mayonnaise
- Season chicken with oregano and lemon zest
BBQ Chicken Melt
- Toss chicken with your favorite BBQ sauce before adding to sandwich
- Use smoked gouda or cheddar cheese
- Add caramelized onions
- Add crispy bacon pieces
- Use Texas toast or thick-cut sourdough bread
California Club Style
- Add crispy bacon
- Add sliced tomato and lettuce (add after cooking)
- Use a mixture of mayo and mashed avocado as spread
- Add thinly sliced cucumber for extra crunch
- Use multi-grain bread for more texture
These variations follow the same cooking method as the original but offer different flavor profiles to keep things interesting. Don’t be afraid to experiment with your own combinations!
Serving Suggestions: Creating a Complete Meal
A Chicken Avocado Melt is substantial on its own, but here are some excellent pairings to round out your meal:
Light Side Options
- Mixed green salad with simple vinaigrette
- Sliced fresh fruit (particularly good with grapes or apple slices)
- Cucumber salad with dill and vinegar
- Tomato soup (the classic sandwich companion)
- Roasted vegetable soup
Heartier Sides
- Sweet potato fries
- Homemade potato chips
- Coleslaw (particularly good with the BBQ variation)
- Pasta salad with vinaigrette dressing
- Roasted vegetables like Brussels sprouts or cauliflower
For a refreshing beverage pairing, I recommend:
- Homemade lemonade
- Iced tea
- Sparkling water with citrus
- Fresh fruit smoothie
- Limeade with a sprig of mint
The key to a good pairing is balance—something acidic or fresh helps cut through the richness of the sandwich.
Make-Ahead and Storage Tips
While sandwiches are best enjoyed freshly made, there are ways to prep components ahead of time:
Make-Ahead Components
- Cook and slice chicken up to 2 days in advance
- Grate cheese and store in an airtight container up to 5 days
- Mix special spreads or aioli up to 3 days ahead
- Pre-cook bacon if using
For Taking to Work/School
If you want to enjoy this sandwich away from home:
- Toast the bread lightly before assembly
- Place cheese next to the bread on both sides as a moisture barrier
- Keep avocado separate and add just before eating if possible
- Pack in an airtight container
- For best results, reheat in a toaster oven if available
Freezing Option for Chicken
You can prep multiple portions of seasoned, cooked chicken:
- Cook chicken breasts as directed
- Slice or shred
- Portion into sandwich-sized amounts
- Freeze in small containers or ziplock bags
- Thaw overnight in refrigerator before using
Remember that avocado doesn’t freeze well, so that should always be fresh. The same goes for the final assembled sandwich—while technically possible to freeze, the texture suffers significantly.
Nutrition Information: What’s in Your Sandwich
For those watching their nutrition, here’s an approximate breakdown of a standard Chicken Avocado Melt:
| Nutrient | Amount | % Daily Value* |
|---|---|---|
| Calories | 550-650 | Varies |
| Protein | 35-40g | 70-80% |
| Fat | 30-35g | 38-45% |
| Saturated Fat | 10-12g | 50-60% |
| Carbohydrates | 35-40g | 13-15% |
| Fiber | 6-8g | 21-29% |
| Sodium | 800-1000mg | 35-43% |
| Calcium | 300-350mg | 23-27% |
| Iron | 3-4mg | 17-22% |
| Potassium | 700-800mg | 15-17% |
*Based on a 2,000 calorie diet
This sandwich provides a good balance of macronutrients, with substantial protein from the chicken and cheese, healthy fats from the avocado, and carbohydrates from the bread. The avocado also contributes valuable fiber, vitamins, and minerals.
Lightening It Up
If you’re looking to reduce calories:
- Use open-face style (one slice of bread)
- Reduce cheese by half
- Use cooking spray instead of butter on bread
- Choose a leaner cheese like part-skim mozzarella
- Add more veggies and less meat
Troubleshooting Common Issues
Even experienced sandwich makers encounter challenges! Here are solutions to common problems:
Soggy Bread
Problem: Moisture from fillings makes bread soggy before serving Solution:
- Toast bread lightly before assembly
- Use cheese as a “moisture barrier” next to the bread
- For avocado, pat slices dry with a paper towel before adding
- Don’t overload with wet ingredients
Cheese Not Melting Properly
Problem: Sandwich exterior browns before cheese melts Solution:
- Use grated cheese instead of sliced for better melting
- Lower heat and cook for longer time
- Cover pan with lid to trap heat and help cheese melt
- Make sure cheese is at room temperature before using
Filling Falling Out
Problem: Sandwich contents slide out when eating Solution:
- Let sandwich rest for 2-3 minutes before cutting
- Cut sandwich diagonally for better stability
- Don’t overstuff
- Use mashed avocado instead of slices to help “glue” ingredients together
Unevenly Toasted Bread
Problem: Some parts of bread burn while others remain pale Solution:
- Make sure butter is spread evenly and to the edges
- Use a heavy pan that distributes heat well
- Press down gently but firmly with spatula while cooking
- Ensure bread slices are even thickness
Q&A Section: Your Chicken Avocado Melt Questions Answered
Q: Can I make this sandwich with leftover grilled chicken? Absolutely! Leftover grilled, roasted, or even rotisserie chicken works wonderfully. The smoky flavor from grilled chicken adds an extra dimension to the sandwich. Just make sure to slice it thinly or shred it before use.
Q: What’s the best way to keep avocado from browning if I’m packing this for lunch? The best approach is to squeeze fresh lemon or lime juice over the avocado and keep it in an airtight container separate from the sandwich. Add it just before eating. If that’s not possible, the acidic component of mayo or mustard can help slow browning, so make sure avocado is placed directly against a spread.
Q: Is there a good vegetarian substitute for the chicken? Several options work well! Try grilled portobello mushrooms sliced thinly, sliced hard-boiled eggs, marinated tofu, tempeh, or even a grain-based patty. Season these alternatives similarly to how you’d season the chicken.
Q: My bread gets too dark before the cheese melts. What am I doing wrong? You’re likely using heat that’s too high. Try lowering your heat to medium-low and giving the sandwich more time to allow the cheese to melt before the bread burns. Covering the pan with a lid for a minute can also help melt the cheese through the trapped steam.
Q: Can I make this sandwich dairy-free? Yes! There are several good vegan cheese alternatives that melt reasonably well. Look for brands specifically labeled as “melting” varieties. Alternatively, you can skip the cheese altogether and add extra avocado and a flavorful spread like hummus or dairy-free pesto.
Q: What’s the best bread to use for this sandwich? I prefer sourdough for its tangy flavor and sturdy texture, but multigrain, ciabatta, or a hearty white bread all work well. The key is having slices thick enough (about ½-inch) to support the fillings while still getting crispy when toasted.
Q: How do I prevent my sandwich from getting soggy when I add tomatoes? If using tomatoes, slice them and lay them on paper towels for 5 minutes to remove excess moisture before assembling your sandwich. Also, place them in the middle of the sandwich with cheese or other ingredients serving as a barrier between the tomatoes and the bread.
Q: Can this sandwich be made ahead and reheated? While it’s best fresh, you can assemble it (without avocado) and refrigerate for a few hours. When ready to eat, add the avocado and heat in a skillet over medium-low heat, or wrap in foil and warm in a 325°F (165°C) oven for about 10 minutes.
Final Thoughts: Why This Sandwich Deserves a Place in Your Recipe Collection
The Chicken Avocado Melt isn’t just a sandwich—it’s a complete meal experience that brings together protein, healthy fats, and complex carbohydrates in one handheld package. What makes it truly special is its versatility; you can adjust nearly every component to suit your taste preferences or what you have available in your refrigerator.
I’ve served this sandwich at casual lunch gatherings, made it as a quick weeknight dinner, and even prepared fancy mini versions as appetizers for parties. Each time, it’s been met with enthusiasm and requests for the recipe. There’s something universally appealing about the combination of warm, melted cheese and creamy avocado that makes this sandwich a crowd-pleaser.
Beyond its delicious taste, what I appreciate most about this recipe is its forgiving nature. Even if you’re not a confident cook, it’s hard to go wrong with this sandwich. The techniques are straightforward, the ingredients are readily available, and the results are consistently satisfying.
I encourage you to make this recipe your own by experimenting with different cheeses, breads, and add-ins. The foundation—chicken, avocado, and melted cheese—provides a reliable base for countless creative variations. Whether you stick to the classic version or branch out with different flavor profiles, the Chicken Avocado Melt is sure to become a regular in your meal rotation.
So heat up that skillet, gather your ingredients, and prepare to enjoy one of life’s simple pleasures: a perfectly executed sandwich that nourishes body and soul alike.