There’s something magical about the sizzle of a well-seasoned cast iron skillet on a weekend morning. I’ve been perfecting my breakfast skillet game for years, and I can confidently say that this roasted potato and egg combination has become my absolute favorite way to start the day. Whether I’m feeding my family on a lazy Sunday or impressing weekend guests, this one-pan wonder delivers every single time.
The beauty of a breakfast skillet lies in its versatility and simplicity. You get crispy, golden potatoes, perfectly cooked eggs, and endless opportunities to customize with your favorite ingredients. I’ve made this recipe hundreds of times, tweaking and refining until I achieved what I consider the perfect balance of flavors and textures.
Understanding the Breakfast Skillet Foundation
Cast Iron Skillet : The heavy-duty, heat-retaining cookware that creates the perfect crispy bottom on potatoes while maintaining even heat distribution throughout the cooking process.
Roasted Potatoes : Cubed potatoes that are pre-roasted or pan-fried until golden and crispy on the outside while remaining fluffy and tender on the inside.
Egg Cookery : The technique of creating wells in the potato mixture and cracking fresh eggs directly into these spaces, allowing them to cook gently in the residual heat.
Seasoning Profile : A carefully balanced combination of herbs, spices, and aromatics that enhance the natural flavors without overwhelming the dish.
My journey with breakfast skillets began during college when I had limited kitchen equipment but unlimited appetite. I discovered that a single cast iron skillet could produce restaurant-quality results with minimal cleanup. Over the years, I’ve experimented with countless variations, but this roasted potato and egg combination remains my gold standard.
Essential Equipment and Ingredient Selection
The success of any breakfast skillet starts with choosing the right equipment and ingredients. I’ve learned through trial and error that certain tools and ingredient qualities make all the difference between a mediocre breakfast and an extraordinary one.
Equipment Essentials
- 10-12 inch cast iron skillet: This is non-negotiable for me. The heat retention and even cooking surface create those coveted crispy edges.
- Sharp chef’s knife: Consistent potato cubing is crucial for even cooking.
- Large mixing bowl: For tossing potatoes with seasonings.
- Measuring spoons and cups: Precision matters, especially with seasonings.
- Spatula or wooden spoon: For gentle stirring without scratching the skillet.
Potato Varieties and Preparation
I’ve tested numerous potato varieties, and my preferences have evolved based on texture and flavor outcomes:
| Potato Type | Texture Result | Cooking Time | Best Use |
|---|---|---|---|
| Russet | Fluffy interior, crispy exterior | 20-25 minutes | Classic choice, holds seasonings well |
| Yukon Gold | Creamy, buttery texture | 18-22 minutes | Premium option, naturally rich flavor |
| Red Potatoes | Waxy, firm texture | 22-26 minutes | Holds shape well, slightly sweet |
| Fingerlings | Dense, nutty flavor | 16-20 minutes | Gourmet presentation, unique taste |
| Sweet Potatoes | Sweet, soft interior | 15-18 minutes | Nutritious alternative, pairs well with herbs |
My personal favorite remains Yukon Gold potatoes. Their naturally buttery flavor and perfect balance between waxy and starchy makes them ideal for achieving that coveted crispy-outside, fluffy-inside texture I crave in every bite.
The Perfect Roasted Potato Base
Creating the ideal potato foundation requires attention to detail that I’ve refined through countless Sunday mornings. The key lies in proper preparation, seasoning, and cooking technique.
Potato Preparation Steps
- Washing and Scrubbing: I always scrub potatoes thoroughly under cold running water, removing any dirt or eyes. I leave the skins on for added nutrition and texture.
- Uniform Cubing: I cut potatoes into ¾-inch cubes. This size ensures even cooking while providing enough surface area for maximum crispiness.
- Soaking Process: I soak cubed potatoes in cold water for 15-20 minutes to remove excess starch, which prevents them from sticking together during cooking.
- Thorough Drying: After soaking, I pat the potatoes completely dry with paper towels. Moisture is the enemy of crispiness.
Seasoning Blend Mastery
My signature seasoning blend has evolved over years of experimentation:
| Ingredient | Amount (serves 4-6) | Purpose | Flavor Profile |
|---|---|---|---|
| Sea Salt | 1½ teaspoons | Enhances natural flavors | Clean, mineral notes |
| Black Pepper | ¾ teaspoon | Adds heat and depth | Warm, pungent |
| Paprika | 1 teaspoon | Color and mild heat | Smoky, sweet |
| Garlic Powder | 1 teaspoon | Aromatic base | Rich, savory |
| Dried Thyme | ½ teaspoon | Herbal complexity | Earthy, floral |
| Onion Powder | ½ teaspoon | Depth of flavor | Sweet, pungent |
| Cayenne Pepper | ¼ teaspoon (optional) | Heat level | Fiery, clean heat |
Cooking Technique and Timing
The cooking process requires patience and attention to detail. I’ve learned that rushing this step results in unevenly cooked potatoes and disappointment.
Heat Management
I preheat my cast iron skillet over medium-high heat for 3-4 minutes before adding oil. The skillet should be hot enough that a drop of water sizzles and evaporates immediately. I use a generous amount of oil – about 3 tablespoons – which seems like a lot but is necessary for achieving that perfect crispy crust.
The Cooking Process
- Initial Searing: I add seasoned potatoes to the hot oil and resist the urge to move them immediately. The first 4-5 minutes are crucial for developing that golden crust.
- Strategic Stirring: I stir the potatoes every 4-5 minutes, allowing each surface to develop color before moving them.
- Temperature Adjustment: Midway through cooking, I reduce heat to medium to prevent burning while ensuring the interiors cook through completely.
- Testing for Doneness: I pierce the largest potato piece with a fork. It should slide in easily while the exterior remains crispy.

Mastering the Egg Component
The eggs are where this dish transforms from good to extraordinary. I’ve experimented with various techniques, and I’ve found that creating wells in the potato mixture and cracking eggs directly into them produces the most consistent results.
Egg Selection and Quality
I always use the freshest eggs possible, preferably from free-range chickens. Fresh eggs have firmer whites and more vibrant yolks, which not only taste better but also create a more visually appealing final dish.
Well Creation Technique
After the potatoes reach perfect crispiness, I use the back of a large spoon to create evenly spaced wells in the potato mixture. These wells should be deep enough to contain the eggs without them running together, but not so deep that they touch the bottom of the skillet.
Egg Cooking Options
| Cooking Style | Time Required | Technique | Result |
|---|---|---|---|
| Sunny Side Up | 6-8 minutes | Cover skillet, low heat | Runny yolk, set white |
| Over Easy | 4-5 minutes + flip | Quick flip, 1-2 min more | Slightly runny yolk |
| Over Medium | 5-6 minutes + flip | Flip, cook 2-3 min more | Partially runny yolk |
| Over Hard | 6-7 minutes + flip | Flip, cook 3-4 min more | Fully set yolk |
| Baked Style | 8-10 minutes | Oven finish at 375°F | Evenly cooked throughout |
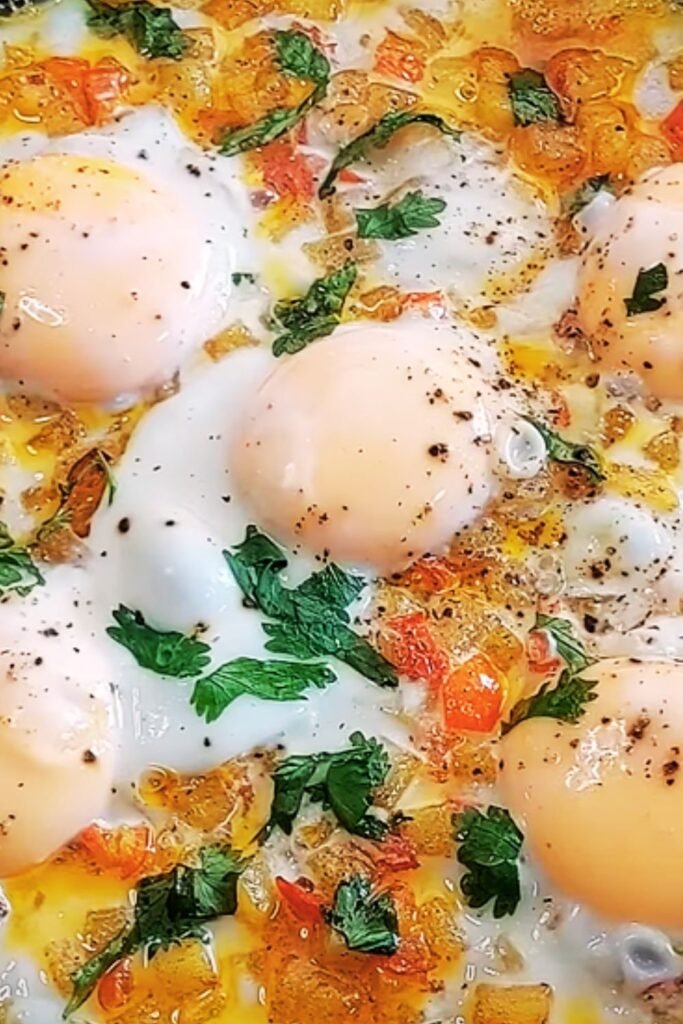
My preferred method involves covering the skillet and reducing heat to low, allowing the eggs to cook gently in the residual heat. This technique prevents the bottoms from overcooking while ensuring the whites set properly.
Flavor Enhancement and Customization
Over the years, I’ve discovered numerous ways to elevate this basic recipe. The beauty of a breakfast skillet lies in its adaptability to personal preferences and dietary needs.
Vegetable Additions
Adding vegetables not only increases nutritional value but also introduces new flavors and textures:
- Bell Peppers: I add diced peppers during the last 8-10 minutes of potato cooking for a sweet crunch.
- Onions: Yellow or red onions, added with the potatoes, caramelize beautifully and add depth.
- Mushrooms: I sauté mushrooms separately first to remove excess moisture, then fold them in.
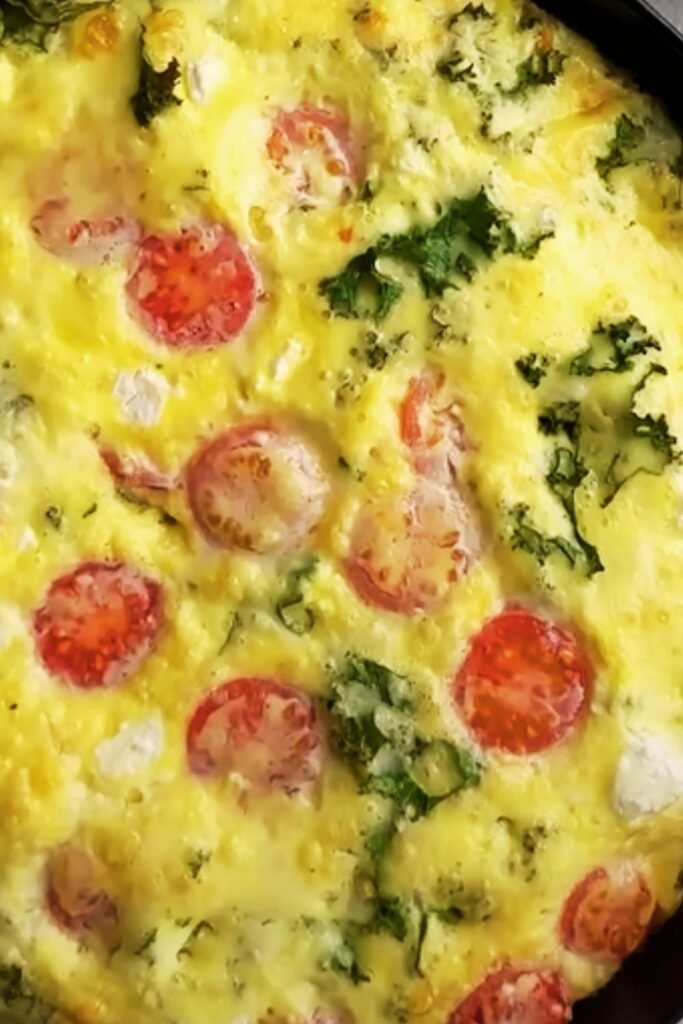
- Spinach: Fresh spinach wilts quickly when added just before cracking the eggs.
- Tomatoes: Cherry tomatoes, halved and added in the final minutes, provide bursts of acidity.
Protein Enhancements
While eggs provide substantial protein, I sometimes incorporate additional options:
- Bacon: I cook bacon first, remove it, then use the rendered fat for cooking potatoes.
- Sausage: Crumbled breakfast sausage, browned and drained, adds hearty flavor.
- Ham: Diced ham, added in the final minutes, provides smoky saltiness.
- Chorizo: Spanish chorizo, sliced thin, contributes spicy, paprika-rich notes.
Nutritional Considerations and Health Benefits
I believe breakfast should fuel your body for the day ahead, and this skillet delivers impressive nutritional value when prepared thoughtfully.
Nutritional Breakdown
| Nutrient Category | Per Serving (approx.) | Health Benefits |
|---|---|---|
| Calories | 320-380 | Sustained energy release |
| Protein | 12-15g | Muscle maintenance and satiety |
| Complex Carbohydrates | 35-40g | Steady blood sugar levels |
| Healthy Fats | 18-22g | Brain function and hormone production |
| Fiber | 4-6g | Digestive health and fullness |
| Vitamin C | 25% DV | Immune system support |
| Potassium | 20% DV | Heart health and blood pressure |
| Iron | 15% DV | Energy production and circulation |
Dietary Adaptations
I’ve successfully adapted this recipe for various dietary needs:
Paleo-Friendly: I substitute sweet potatoes for regular potatoes and use coconut oil instead of vegetable oil.
Keto Adaptation: I replace potatoes with cauliflower florets, increasing the fat content with extra cheese and avocado.
Vegetarian Enhancement: I focus on mushroom and pepper additions while incorporating plant-based proteins like nutritional yeast.
Dairy-Free Version: I skip cheese additions and use olive oil exclusively for cooking.
Serving Suggestions and Presentation
Presentation matters, even for a rustic breakfast skillet. I’ve developed several serving strategies that elevate this humble dish into something special.
Garnish Options
- Fresh Herbs: Chopped chives, parsley, or cilantro added just before serving brighten the entire dish.
- Cheese: A sprinkle of sharp cheddar, crumbled feta, or grated Parmesan adds richness.
- Hot Sauce: I offer various hot sauces on the side to accommodate different heat preferences.
- Avocado: Sliced avocado provides creamy contrast and healthy fats.
- Sour Cream: A dollop of sour cream or Greek yogurt adds tangy coolness.
Accompaniment Recommendations
- Toast: Thick-cut sourdough or whole grain bread for dipping into runny yolks
- Fresh Fruit: Seasonal berries or sliced melon to balance the richness
- Coffee: A robust dark roast or smooth medium roast coffee complements the hearty flavors
- Juice: Fresh orange juice or a green smoothie for nutritional balance
- Yogurt: Greek yogurt with honey and granola for those wanting lighter options
Troubleshooting Common Issues
Through years of making this recipe, I’ve encountered and solved numerous common problems that can arise during preparation.
Problem-Solution Guide
| Common Issue | Likely Cause | My Solution |
|---|---|---|
| Soggy Potatoes | Excess moisture, low heat | Pat dry thoroughly, increase heat |
| Burnt Bottoms | Temperature too high | Reduce heat, add more oil |
| Uneven Cooking | Inconsistent cubing | Focus on uniform ¾-inch pieces |
| Overcooked Eggs | High heat, uncovered | Lower heat, cover skillet |
| Bland Flavor | Insufficient seasoning | Season in layers, taste-test |
| Sticking Issues | Inadequate oil, cold pan | More oil, proper preheating |
Advanced Techniques
As my skills developed, I incorporated several advanced techniques:
Temperature Layering: I start with high heat for searing, reduce to medium for cooking through, then lower to gentle for eggs.
Moisture Control: I’ve learned to manage moisture by cooking vegetables separately if they’re particularly watery.
Flavor Building: I build flavors in layers, seasoning the potatoes, then adding aromatics, and finally finishing with fresh herbs.
Storage and Reheating Guidelines
While breakfast skillets are best enjoyed fresh, I’ve developed effective methods for storing and reheating leftovers.
Storage Methods
- Refrigeration: I store leftovers in the refrigerator for up to 3 days in airtight containers.
- Freezing: The potato portion freezes well for up to 1 month, though I don’t recommend freezing the eggs.
- Portion Control: I divide leftovers into individual portions for easy reheating.
Reheating Techniques
- Oven Method: I reheat at 350°F for 8-10 minutes, covered with foil to prevent drying.
- Skillet Reheating: A quick sauté in a lightly oiled pan restores some crispiness.
- Microwave Option: While not ideal, microwaving in 30-second intervals works for quick reheating.
Seasonal Variations and Holiday Adaptations
I love adapting this basic recipe to reflect seasonal ingredients and holiday themes. These variations keep the dish interesting throughout the year.
Spring Version
In spring, I incorporate asparagus spears, fresh peas, and herbs like dill and chervil. The lighter, brighter flavors perfectly capture the season’s renewal energy.
Summer Adaptation
Summer calls for cherry tomatoes, fresh basil, and zucchini. I sometimes add corn kernels for sweetness and color contrast.
Fall Comfort
Autumn ingredients like butternut squash, sage, and caramelized onions create a warming, comforting version perfect for crisp mornings.
Winter Heartiness
Winter versions feature heartier vegetables like Brussels sprouts, kale, and root vegetables, often with warming spices like cumin and smoked paprika.
Budget-Friendly Tips and Meal Planning
As someone who values both quality and economy, I’ve developed strategies for making this recipe budget-friendly without sacrificing flavor or nutrition.
Cost-Saving Strategies
- Buy potatoes in bulk: I purchase 5-10 pound bags when they’re on sale and store them properly.
- Seasonal shopping: I adapt the recipe based on what vegetables are in season and affordable.
- Egg selection: I buy eggs in larger quantities and use them across multiple meals.
- Herb preservation: I grow my own herbs or buy larger quantities and preserve them.
Meal Prep Applications
This recipe works wonderfully for meal prep:
- I prepare large batches on weekends for busy weekday mornings.
- Individual portions can be assembled and refrigerated, then quickly reheated.
- The basic potato mixture can be prepared in advance and eggs added fresh each morning.
Advanced Cooking Techniques
After mastering the basics, I began experimenting with more sophisticated techniques that elevate this humble dish.
Professional Methods
Parboiling Technique: I sometimes parboil potatoes for 5-6 minutes before seasoning and searing. This ensures even cooking while maintaining crispy exteriors.
Oil Temperature Control: I use a thermometer to maintain oil temperature between 350-375°F for optimal crisping without burning.
Resting Period: I allow cooked potatoes to rest for 2-3 minutes before adding eggs, which prevents overcooking from residual heat.
Flavor Development
Aromatics Integration: I’ve learned to bloom spices in oil before adding potatoes, which intensifies their flavors significantly.
Acid Balance: A splash of apple cider vinegar or lemon juice at the end brightens all the flavors without overpowering the dish.
Umami Enhancement: I sometimes add a small amount of Worcestershire sauce or soy sauce for depth and complexity.
Frequently Asked Questions
Q: Can I use frozen potatoes instead of fresh ones? A: While I always prefer fresh potatoes, frozen hash browns can work in a pinch. However, you’ll need to thaw and drain them thoroughly first, and the texture won’t be quite as good as fresh potatoes that you’ve cubed yourself.
Q: What’s the best oil to use for cooking the potatoes? A: I typically use neutral oils with high smoke points like canola or vegetable oil. Olive oil works too, but use light olive oil rather than extra virgin to avoid burning. Coconut oil is excellent for those following paleo diets.
Q: How do I prevent my eggs from overcooking? A: The key is temperature control. Once you add the eggs, reduce the heat to low and cover the skillet. The residual heat from the potatoes and gentle steam will cook the eggs perfectly without making them rubbery.
Q: Can I make this recipe dairy-free? A: Absolutely! Simply omit any cheese and use oil instead of butter. The dish is naturally dairy-free otherwise, and you won’t miss the dairy with all the other flavors present.
Q: What size skillet should I use for different serving sizes? A: For 2-3 people, use a 10-inch skillet. For 4-6 people, I recommend a 12-inch skillet. If you’re feeding a crowd, consider making two skillets rather than overcrowding one large pan.
Q: How can I make this recipe spicier? A: I love adding heat! Try incorporating diced jalapeños with the vegetables, using hot paprika instead of regular, adding cayenne pepper to the seasoning blend, or serving with hot sauce on the side.
Q: Is it possible to make this recipe ahead of time? A: You can prep the potatoes and vegetables the night before, but I recommend cooking everything fresh. The potatoes lose their crispiness when stored, and eggs are always best when cooked fresh.
Q: What vegetables work best in breakfast skillets? A: My favorites include bell peppers, onions, mushrooms, and spinach. Harder vegetables like carrots or Brussels sprouts need to be added earlier in the cooking process, while delicate greens should be added at the very end.
Q: How do I know when my potatoes are perfectly cooked? A: Perfect potatoes should be golden brown and crispy on the outside, and a fork should pierce them easily. They should sound crispy when you stir them, and the edges should be well-caramelized.
Q: Can I use sweet potatoes instead of regular potatoes? A: Yes! Sweet potatoes work wonderfully and cook slightly faster than regular potatoes. They add natural sweetness and pair especially well with herbs like rosemary and thyme. Just watch the timing as they can go from perfect to overcooked quickly.
This breakfast skillet recipe has become more than just a meal in my kitchen—it’s a weekend tradition, a way to bring people together, and a canvas for creativity. Every time I make it, I’m reminded of why simple, well-executed dishes often become the most treasured. Whether you’re cooking for yourself on a quiet morning or feeding a houseful of guests, this ultimate breakfast skillet delivers satisfaction, nutrition, and pure comfort in every single bite.